Official Luthiers Forum!Owned and operated by Lance Kragenbrink |
| It is currently Mon May 11, 2026 3:26 pm |
|
All times are UTC - 5 hours |
 
|
Page 1 of 2 |
[ 27 posts ] | Go to page 1, 2 Next |
|
| Author | Message | ||||||
|---|---|---|---|---|---|---|---|
| Chris Paulick |
|
||||||
Joined: Sat Jun 21, 2008 10:58 am Posts: 2774 Location: Tampa, Florida USA |
|
||||||
| Top | |||||||
| Mike Kroening |
|
|||||
Joined: Tue Mar 04, 2008 10:55 pm Posts: 404 Location: Dallas, Texas |
|
|||||
| Top | ||||||
| woody b |
|
||||||
Joined: Sat Mar 07, 2009 7:56 am Posts: 1825 Location: Grover NC First name: Woodrow Last Name: Brackett City: Grover State: NC Zip/Postal Code: 28073 Country: USA Focus: Build |
|
||||||
| Top | |||||||
| Chris Paulick |
|
||||||
Joined: Sat Jun 21, 2008 10:58 am Posts: 2774 Location: Tampa, Florida USA |
|
||||||
| Top | |||||||
| SniderMike |
|
||||||
Joined: Tue Mar 14, 2006 4:08 pm Posts: 1018 Location: Denver, Colorado |
|
||||||
| Top | |||||||
| SteveSmith |
|
||||||
Joined: Wed Oct 08, 2008 11:36 am Posts: 7551 Location: Southeast US City: Lenoir City State: TN Zip/Postal Code: 37772 Country: US Focus: Repair |
|
||||||
| Top | |||||||
| SniderMike |
|
||||||
Joined: Tue Mar 14, 2006 4:08 pm Posts: 1018 Location: Denver, Colorado |
|
||||||
| Top | |||||||
| Burton LeGeyt |
|
||||||
Joined: Sat Aug 19, 2006 1:29 am Posts: 1384 Location: United States |
|
||||||
| Top | |||||||
| SteveSmith |
|
||||||
Joined: Wed Oct 08, 2008 11:36 am Posts: 7551 Location: Southeast US City: Lenoir City State: TN Zip/Postal Code: 37772 Country: US Focus: Repair |
|
||||||
| Top | |||||||
| Chris Paulick |
|
||||||
Joined: Sat Jun 21, 2008 10:58 am Posts: 2774 Location: Tampa, Florida USA |
|
||||||
| Top | |||||||
| Dave Fifield |
|
||||||
Joined: Wed Jan 23, 2008 8:05 pm Posts: 1567 Location: San Jose, CA First name: Dave Last Name: Fifield City: San Jose State: CA Zip/Postal Code: 95124 Country: USA Focus: Build Status: Amateur |
|
||||||
| Top | |||||||
| Wes McMillian |
|
||||||
Joined: Sun May 29, 2005 7:17 am Posts: 622 Location: Santo, TX |
|
||||||
| Top | |||||||
| Chris Paulick |
|
||||||
Joined: Sat Jun 21, 2008 10:58 am Posts: 2774 Location: Tampa, Florida USA |
|
||||||
| Top | |||||||
| Todd Rose |
|
||||||
Joined: Fri Nov 11, 2005 3:32 am Posts: 2687 Location: Ithaca, New York, United States |
|
||||||
| Top | |||||||
| Darryl Young |
|
||||||
Joined: Wed Oct 22, 2008 9:31 pm Posts: 1885 First name: Darryl Last Name: Young State: AR Country: USA Focus: Build Status: Amateur |
|
||||||
| Top | |||||||
| Chris Paulick |
|
||||||
Joined: Sat Jun 21, 2008 10:58 am Posts: 2774 Location: Tampa, Florida USA |
|
||||||
| Top | |||||||
| Chris Paulick |
|
||||||
Joined: Sat Jun 21, 2008 10:58 am Posts: 2774 Location: Tampa, Florida USA |
|
||||||
| Top | |||||||
| Carey |
|
|||||
Joined: Thu Sep 22, 2005 11:57 am Posts: 352 Location: Los Osos CA Focus: Repair |
|
|||||
| Top | ||||||
| Dave Fifield |
|
||||||
Joined: Wed Jan 23, 2008 8:05 pm Posts: 1567 Location: San Jose, CA First name: Dave Last Name: Fifield City: San Jose State: CA Zip/Postal Code: 95124 Country: USA Focus: Build Status: Amateur |
|
||||||
| Top | |||||||
| Carey |
|
|||||
Joined: Thu Sep 22, 2005 11:57 am Posts: 352 Location: Los Osos CA Focus: Repair |
|
|||||
| Top | ||||||
| Todd Rose |
|
||||||
Joined: Fri Nov 11, 2005 3:32 am Posts: 2687 Location: Ithaca, New York, United States |
|
||||||
| Top | |||||||
| Darryl Young |
|
||||||
Joined: Wed Oct 22, 2008 9:31 pm Posts: 1885 First name: Darryl Last Name: Young State: AR Country: USA Focus: Build Status: Amateur |
|
||||||
| Top | |||||||
| woody b |
|
||||||
Joined: Sat Mar 07, 2009 7:56 am Posts: 1825 Location: Grover NC First name: Woodrow Last Name: Brackett City: Grover State: NC Zip/Postal Code: 28073 Country: USA Focus: Build |
|
||||||
| Top | |||||||
| Chris Paulick |
|
||||||
Joined: Sat Jun 21, 2008 10:58 am Posts: 2774 Location: Tampa, Florida USA |
|
||||||
| Top | |||||||
| Todd Rose |
|
||||||
Joined: Fri Nov 11, 2005 3:32 am Posts: 2687 Location: Ithaca, New York, United States |
|
||||||
| Top | |||||||
|
|
Page 1 of 2 |
[ 27 posts ] | Go to page 1, 2 Next |
|
All times are UTC - 5 hours |
Who is online |
Users browsing this forum: No registered users and 226 guests |
| You cannot post new topics in this forum You cannot reply to topics in this forum You cannot edit your posts in this forum You cannot delete your posts in this forum You cannot post attachments in this forum |


![[:Y:]](./images/smilies/smiley20.gif "Thumbs Up")

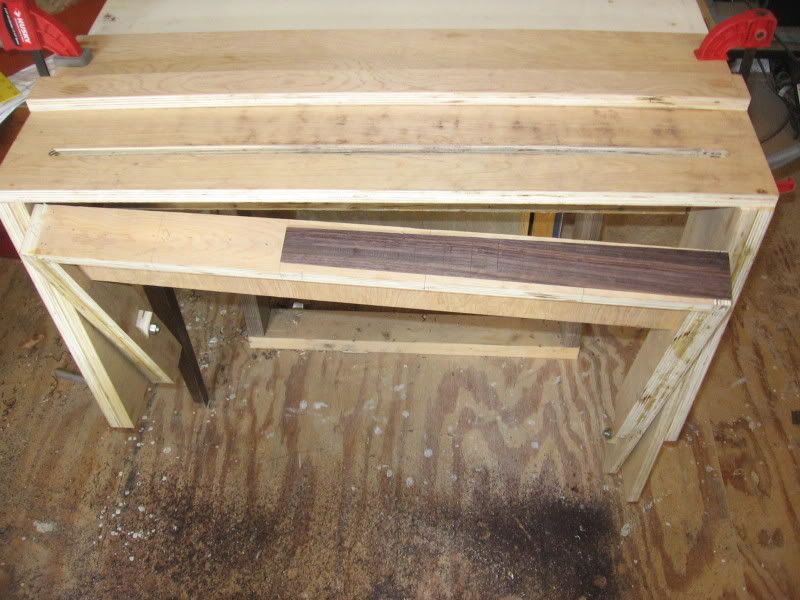

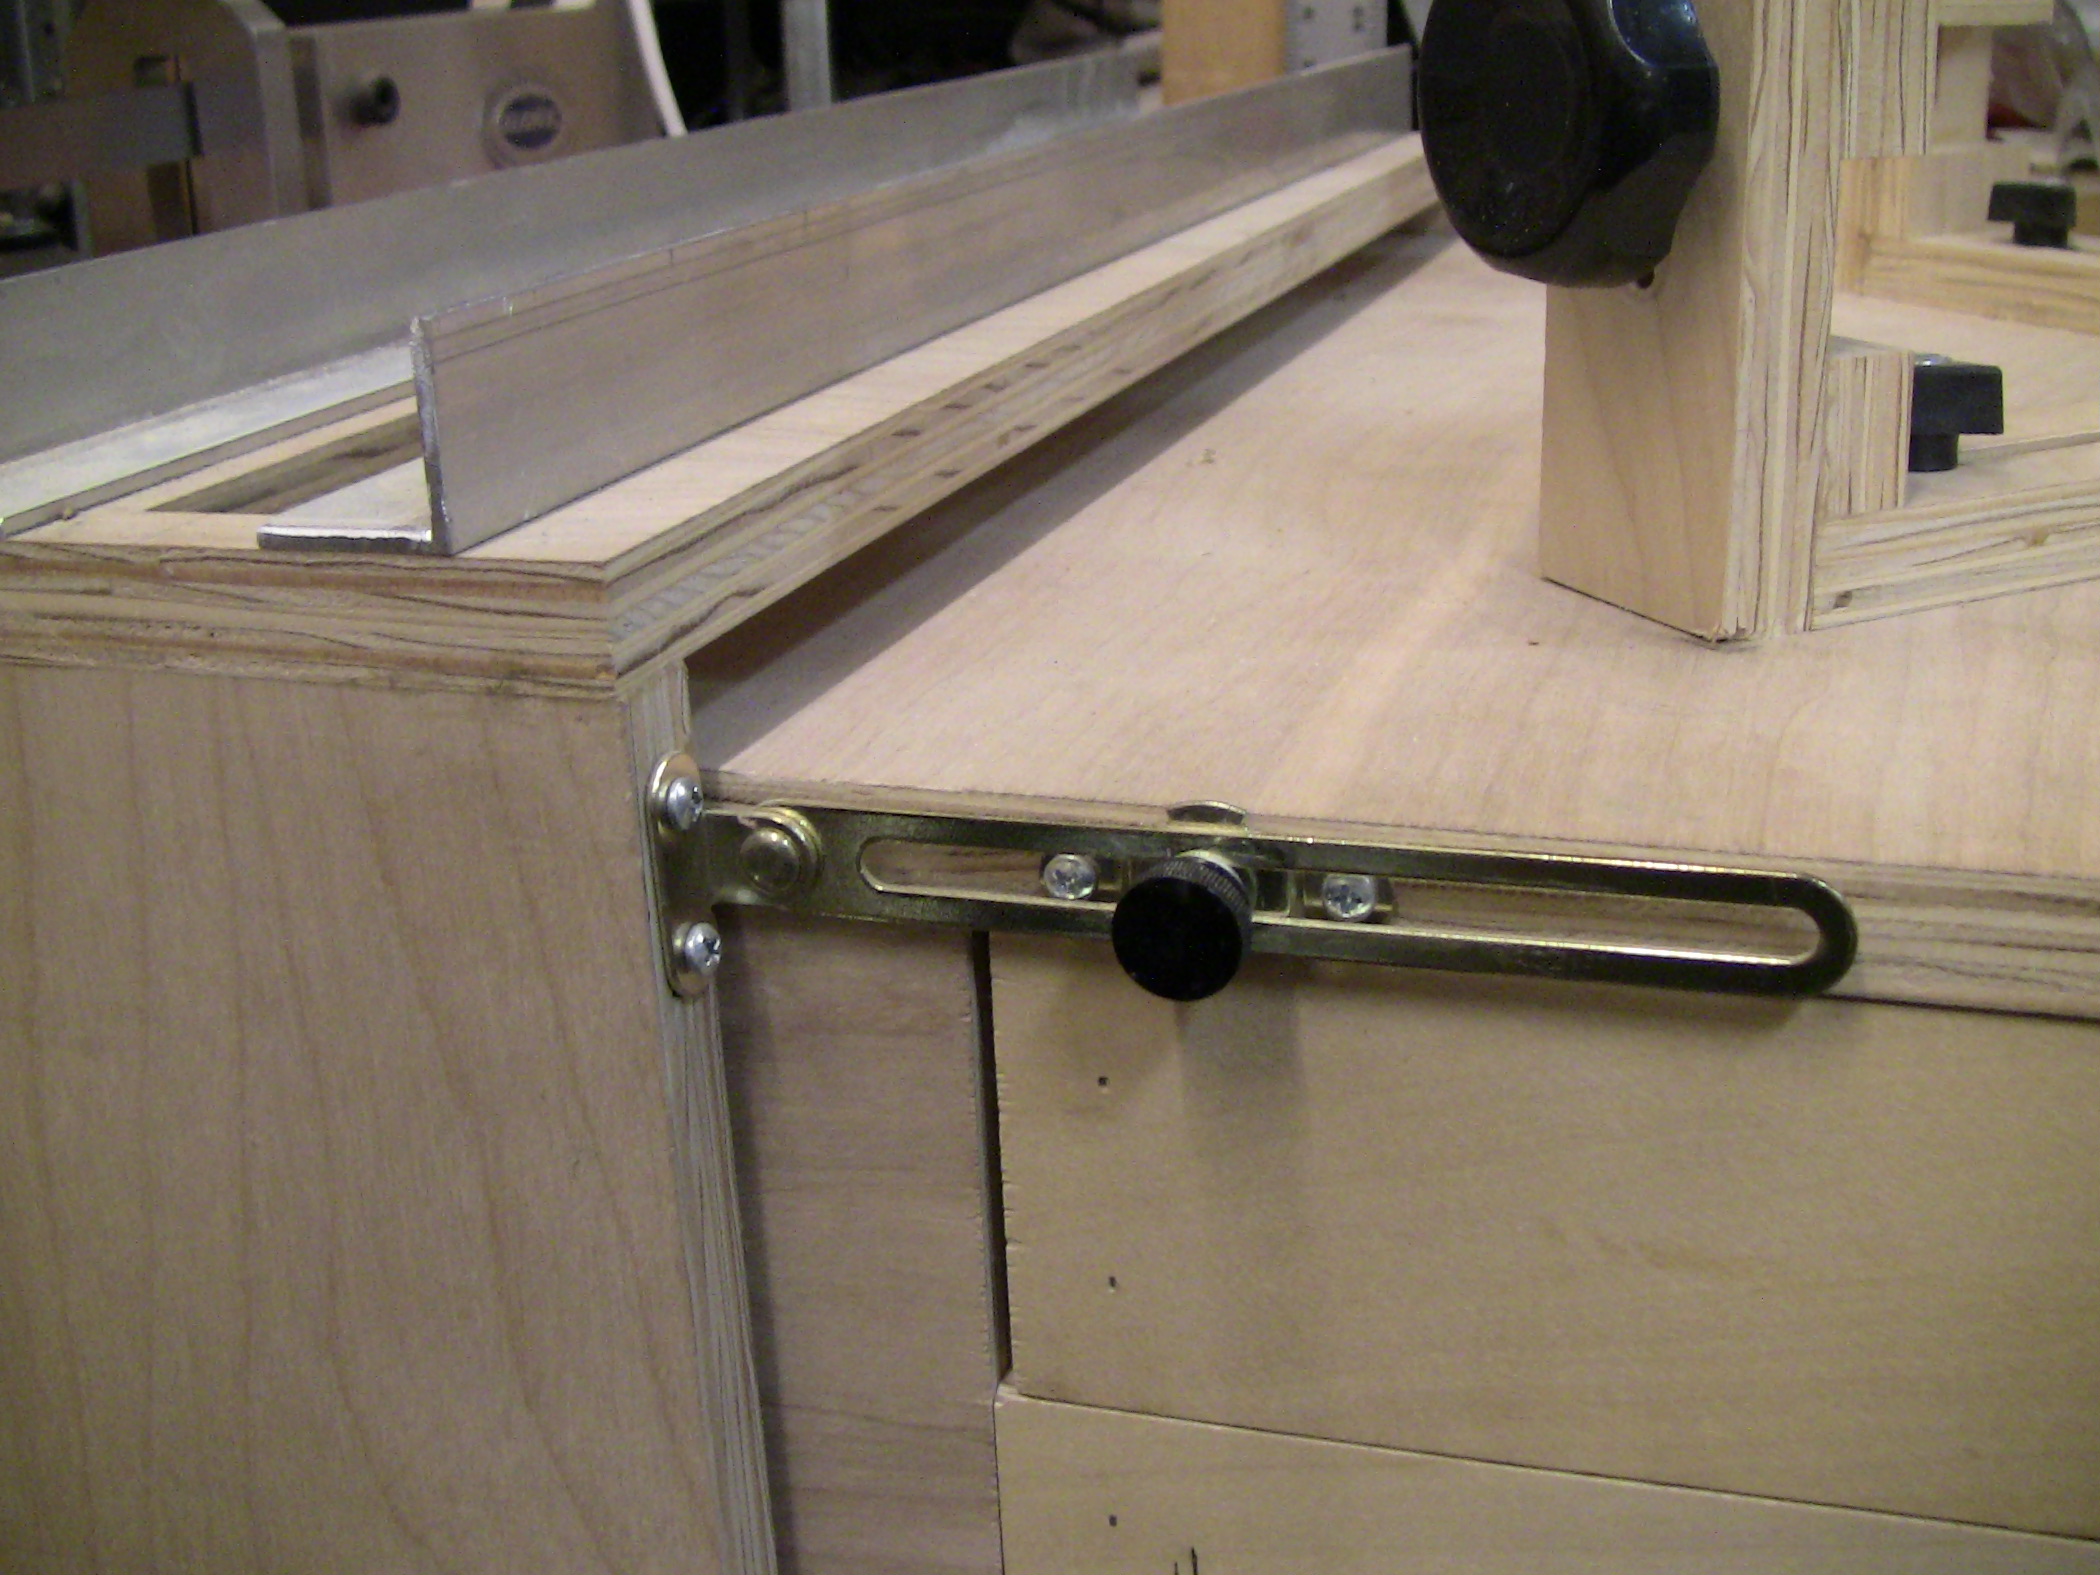
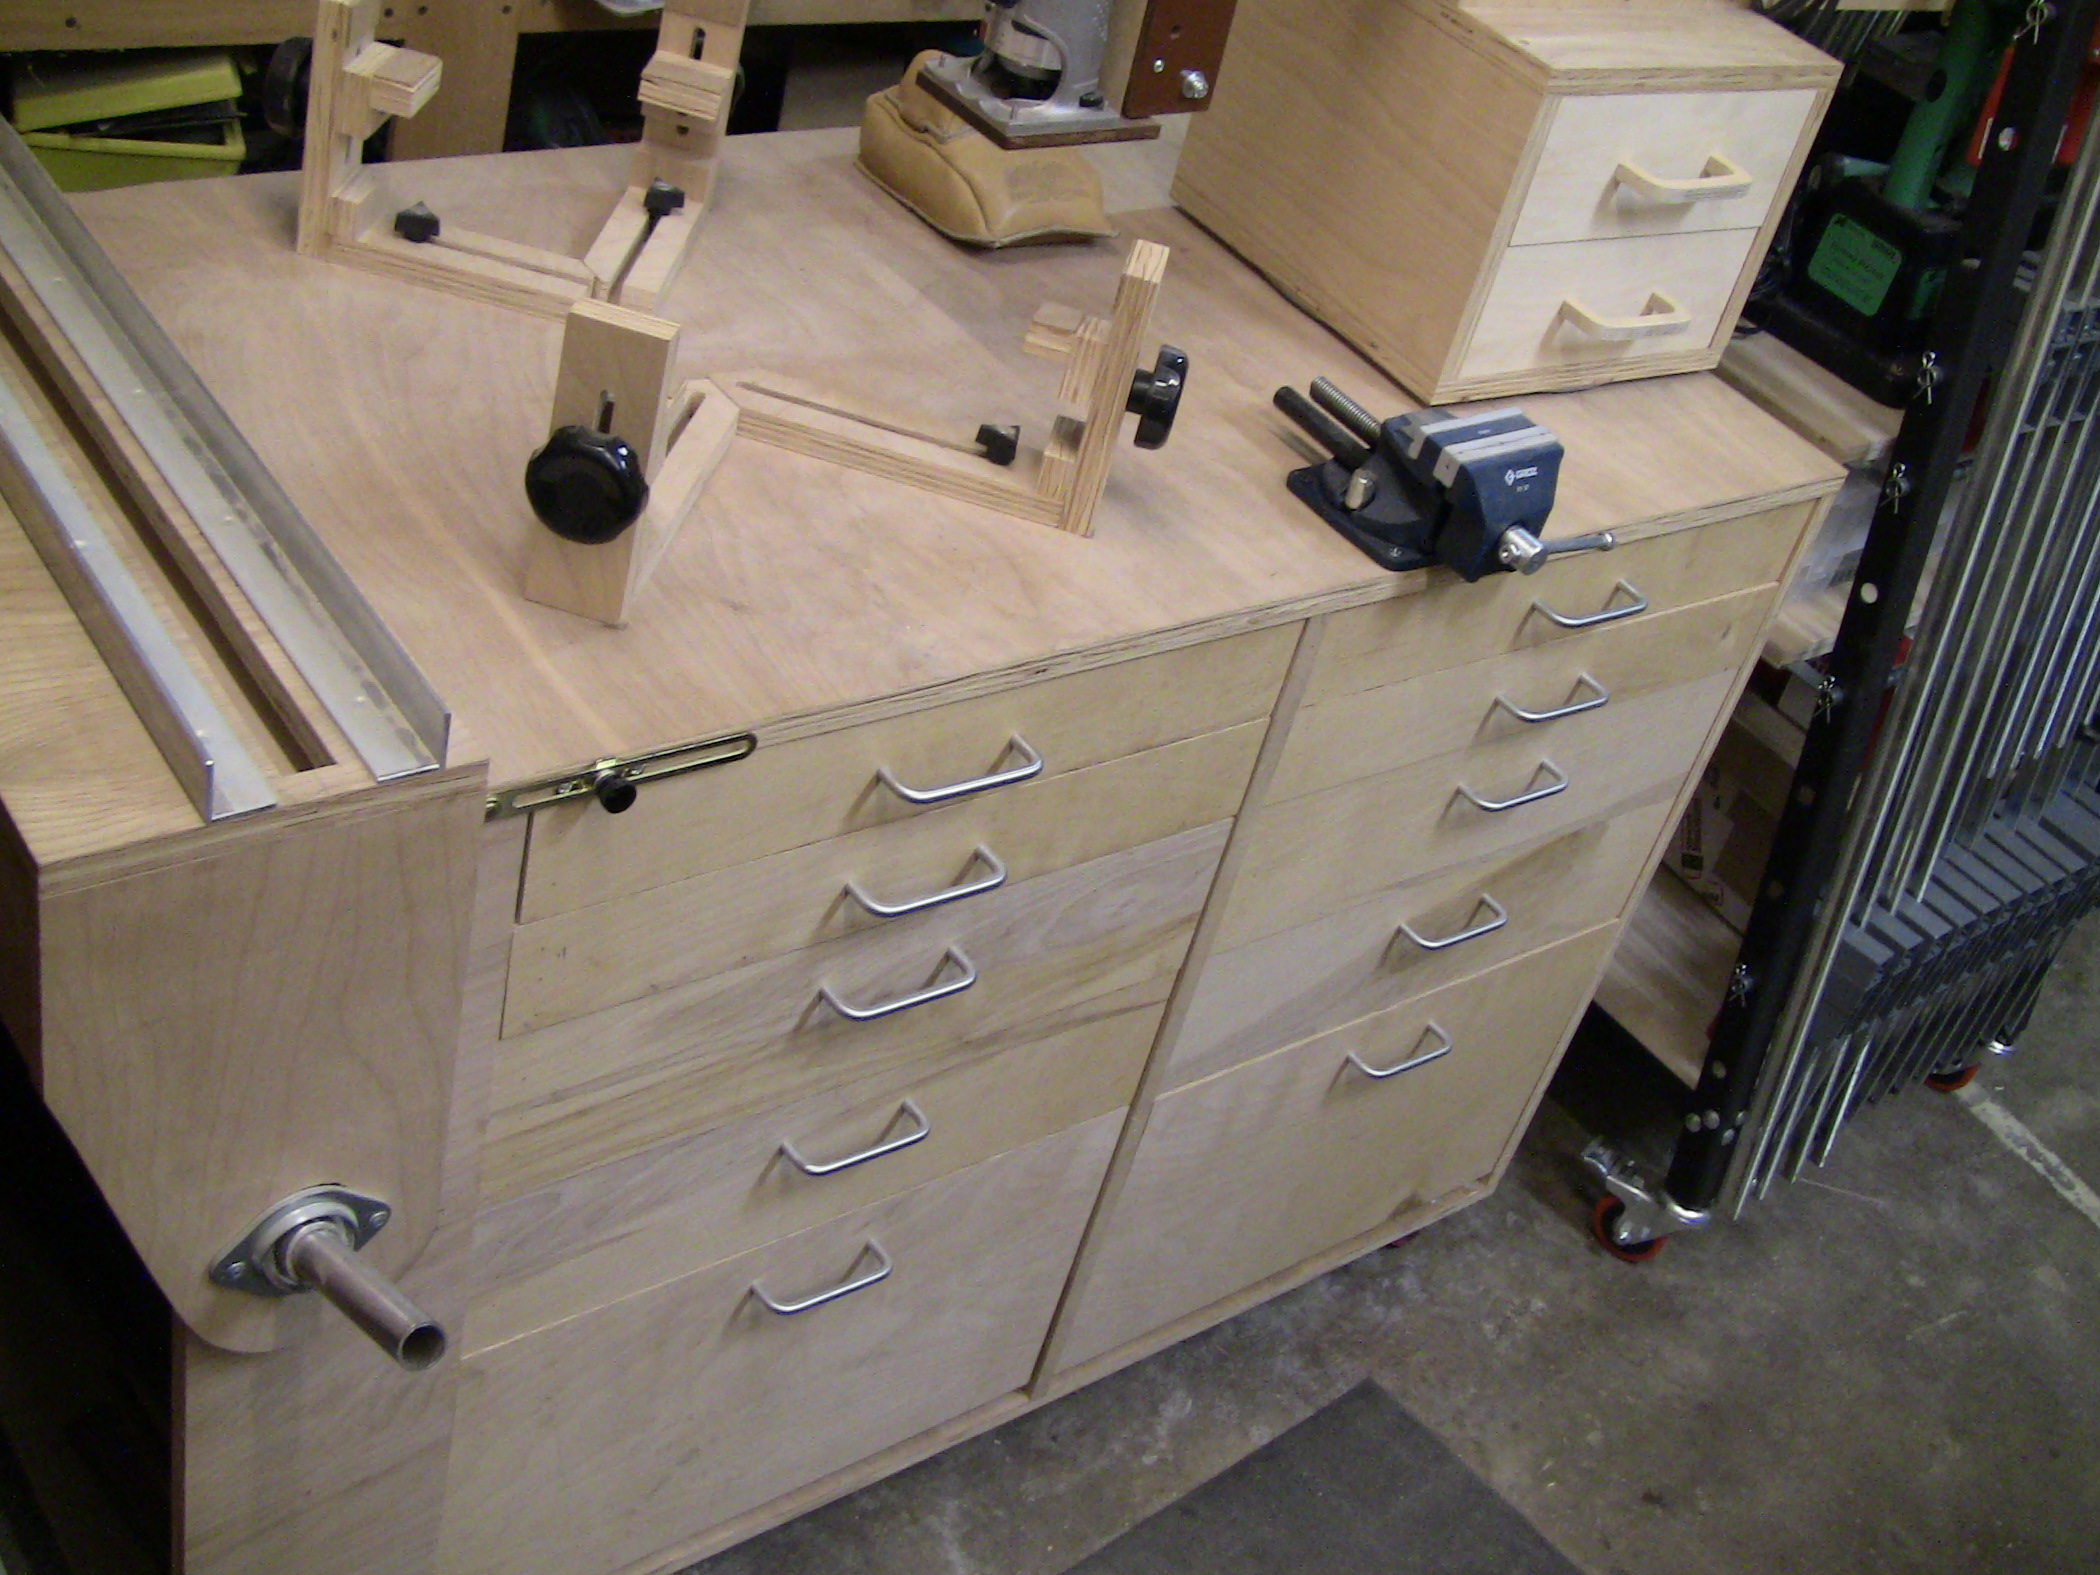
 ). My version of the Williams style binding jig sits on the right hand end of the unit, and the compound radius fretboard routing jig on the left hand end. I found space at the front to mount a small vise that I use for nut making etc. also. Click on the pictures to see/download the hi-res versions.