Official Luthiers Forum!

Owned and operated by Lance Kragenbrink
It is currently Sat Jul 19, 2025 1:32 am


All times are UTC - 5 hours


Forum rules


Be nice, no cussin and enjoy!


Post new topic Reply to topic  [ 6 posts ] 
Author Message
 Post subject: glueing top and back
PostPosted: Wed May 20, 2009 9:21 am 
Offline
Walnut
Walnut

Joined: Thu Jan 08, 2009 9:25 pm
Posts: 11
Hello all, here is the first of I'm sure many questions. I have to glue my top and back. What I have done is run a router along a straight edge (not a ruler but a machined straight edge) to get a clean straight joint. Here is the question. I've made three passes now and each time I check my joint to a light I can still see a little light through it. This light through would appear to be the entire length of the plates and I really can't figure out where the plates are cleanly touching. We are talking what I believe is less than a hairs thickness and I can cheat by moving my head side to side slightly and the light goes away. Am I good to glue as I know I can draw this in or do I need to make sure I get NO light through the joint?


Top
 Profile  
 
 Post subject: Re: glueing top and back
PostPosted: Wed May 20, 2009 9:29 am 
Offline
Koa
Koa
User avatar

Joined: Fri Mar 23, 2007 9:56 am
Posts: 1271
No light is what you're after. It's pretty hard to do with a router and a straight edge. Everything has to be perfect and your straight edge has to be stiff enough not to flex. I would go with a plane and a shooting board or a jointer if you have one. All methods take some practice and patience. Should be lots in the archives about the details.

edit: by the way, holding the plates flat against a window or light table will help you keep the pieces flat and co-planer while checking the joint.

_________________
http://www.chassonguitars.com


Top
 Profile  
 
 Post subject: Re: glueing top and back
PostPosted: Wed May 20, 2009 12:02 pm 
Offline
Cocobolo
Cocobolo
User avatar

Joined: Mon Jan 03, 2005 7:06 am
Posts: 460
Location: United States
"No light" is not absolutely necessary. If you have an equal variance from the center line, that is a uniformly tapered space between the two plates of that doesn't exceed .001" (use a feeler gauge), you're fine. When properly clamped, the gap will close and you'll have a "spring joint". Actually structurally stronger than a flush joint.

I do agree with Kent on the use of shooting board instead of the router/straightedge. If you have a gap using this method, it's not likely to be uniformly tapered. I use a jointer and simply apply a liitle more vertical pressure in the center of the pass, but lots of people use the plane/shooting board method with great success.

_________________
Jimmy Caldwell
http://www.caldwellguitars.com


Top
 Profile  
 
 Post subject: Re: glueing top and back
PostPosted: Wed May 20, 2009 2:55 pm 
Offline
Walnut
Walnut

Joined: Thu Jan 08, 2009 9:25 pm
Posts: 11
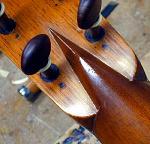
Hey Jimmy, did you just tell me I need to buy another tool??? Alright, another trip to busy bee for a feeler gauge set. All kidding aside thanks for the input guys. I didn't have a set of feeler gauges this morning so I improvised. I was curious to see what I could get through the crack. I first tried some computer paper and not go, next I tried some aluminum foil and couldn't get it through. Lastly I tried some gum rapper with the paper taken off. I did get it in, but not all the way through as it just kept binding. I think I'll give it a try and see what happens. I laid them up on my clamping board and had no problem getting rid of the gap, just a little tap on my wedges and everything was nice and tight.


Top
 Profile  
 
 Post subject: Re: glueing top and back
PostPosted: Wed May 20, 2009 3:22 pm 
Offline
Koa
Koa
User avatar

Joined: Thu Jan 01, 2009 9:43 am
Posts: 601
Location: Bozeman, Montana
Focus: Build
Patti,

I personally would worry about tiny cup marks made by the router. Use the method you are using to get close and just double stick tape some 220 grit sandpaper to a 10-12 inch long or so piece of wood that is as straight and square as you can make it. This is your home made hand plane.

Imagine your bookmatched top open like a book and call the left side A and the right side B.

Elevate side A right side up with a bit with a piece of plywood and have the center seam to the right. This will make side A 3/4 inch above the bench and parallel to it with the center seam easily accesible.

Use your sandpaper staight edge and LIGHTLY sand the center seam. Sand the entire seam, one stroke at a time, not back and forth.

Elevate side B on the plywood UPSIDE DOWN with the center seam to the right.

Use your sandpaper straight edge and LIGHTLY sand the center seam.

Flip side B over like the page of a book and match it to side A.

Check for zero light and repeat if necessary. It is very possible and desireable to have zero light.

I use a hand plane for this but if you are close with the router then this will be fine and with practice you can make a perfect joint in no time.

I understand that this may not be entirely clear, do not hesitate to ask any questions.

sb

_________________
http://www.booneguitars.com
https://www.facebook.com/pages/Stephen-Boone-guitar-builder/488208541257210


Top
 Profile  
 
 Post subject: Re: glueing top and back
PostPosted: Wed May 20, 2009 4:46 pm 
Offline
Brazilian Rosewood
Brazilian Rosewood
User avatar

Joined: Sat Jun 21, 2008 10:58 am
Posts: 2774
Location: Tampa, Florida USA
You might also want to do a search as there is a lot of past responces to this question.


Top
 Profile  
 
Display posts from previous:  Sort by  
Post new topic Reply to topic  [ 6 posts ] 

All times are UTC - 5 hours


Who is online

Users browsing this forum: No registered users and 10 guests


You cannot post new topics in this forum
You cannot reply to topics in this forum
You cannot edit your posts in this forum
You cannot delete your posts in this forum
You cannot post attachments in this forum

Jump to:  
Powered by phpBB® Forum Software © phpBB Group
phpBB customization services by 2by2host.com