Official Luthiers Forum!

Owned and operated by Lance Kragenbrink
It is currently Tue Jul 22, 2025 6:54 am


All times are UTC - 5 hours


Forum rules


Be nice, no cussin and enjoy!


Post new topic Reply to topic  [ 11 posts ] 
Author Message
PostPosted: Fri Dec 26, 2008 9:06 am 
Offline
Contributing Member
Contributing Member
User avatar

Joined: Thu Jun 12, 2008 6:59 am
Posts: 1964
Location: Rochester Michigan
So I just got my new HVLP conversion gun the other day and have so far put 4 coats on my guitar. Over all, I'm loving it - especially the lack of fog in the shop after each session. The gun's pretty nice, the Asturo all stainless waterborne model. Although I'm thrilled with the results so far, I'm still a total noob at spray finishing and I'd like some comments on the level of my finish off the gun and see if there's room for improvement through technique and adjustment. Here's what I've done so far:

Surface is EIR pore filled with Z-poxy, leveled and a couple coats of shellac on that.

Four coats of:
Target USL, first two un-thinned, second two thinned maybe 10% tops with water
1.2mm tip (smallest I have right now)
27psi at the handle
Air screw backed out 1.25 turns (tip says 10psi max, no idea how to measure that)
Fan screw 2 turns
Needle screw 1.75 turns

I think it looks pretty good - nothing that a bit of leveling won't fix - but I seem to recall the HP gun leaving a better finish and there are a couple of spots on the sides of the upper bout that are really smooth so I'm thinking I can improve it. The finish also seems to look even more harsh in the pictures than in person.

Comments and suggestions please.


You do not have the required permissions to view the files attached to this post.

_________________
http://www.birkonium.com CNC Products for Luthiers
http://banduramaker.blogspot.com


Top
 Profile  
 
PostPosted: Fri Dec 26, 2008 9:44 am 
Offline
Contributing Member
Contributing Member
User avatar

Joined: Fri Sep 09, 2005 7:51 am
Posts: 3786
Location: Canada
Yep .. that looks like waterbase to me .... i could nt get it any better than that (although it was few years back now with PSL) no matter what I set the gun to. You might want to try more air to get it to atomize further, it might level out better.

It looks not bad, and like you say, it will flat sand pretty easy from there. The only thing to be very careful about is not rubbing thru (although maybe its better with the newer product) .... once I did that, I had to strip the whole guitar body back as the respray turned a different colour on the thru spot ... ARRGGHHHHH. That was the last time I ever used the stuff.

_________________
Tony Karol
www.karol-guitars.com
"let my passion .. fulfill yours"


Top
 Profile  
 
PostPosted: Fri Dec 26, 2008 9:57 am 
Offline
Old Growth Brazilian

Joined: Tue Dec 28, 2004 1:56 am
Posts: 10707
Location: United States
the orange peel you are getting is pretty typical of what most first time HVLP attempts. The key to remember is high volume at low pressure. I seem to recall that you are working with a new conversion gun. I don't have much experience with them but I use a turbine unit. It took me a week of practice and adjustment but i found that it takes far less air flow than I expected to get the right spray pattern. I use a 1.4mm tip I first stated by closing the fluid flow to the point I just got a wet pattern at 6psi at the gun. I then played at adjusting only the air flow till I reduced the amount of orange peel to the best result. keeping in mind that I am working with a turbine unit and not a conversion gun. I found that my best results were with about 30 percent open fluid flow at about 30% open air flow. Also the distance from the tip to the surface is also critical for me to keep the orange peel to a min. For me it is about 7-8 inches away from the surface. If you allow this to increase the greater the peel affect get too close and of course the risk of running.

While you are right leveling will resolve the issue. With practice and experiment you will find the proper settings. I found experimenting on cardboard very helpful. I also found that adjusting the viscosity through my viscosity cup to get a 20-22 second flow produced the bets results for me. if the viscosity was higher than 24 seconds to drain the viscosity cup it was difficult to avoid orange peel with waterborne acrylic lacquer. Nitro seemed to be near the same but could be controlled a tad higher than 24 seconds.


Top
 Profile  
 
PostPosted: Fri Dec 26, 2008 11:09 am 
Offline
Cocobolo
Cocobolo
User avatar

Joined: Mon Jan 03, 2005 7:06 am
Posts: 460
Location: United States
Andy,

It's not necessary (or desirable, IMO), to thin USL. Your first unthinned coats have far less orange peel than your thinned coats and I think you've done very well for your first effort. Try using unthinned USL for the rest of your coats and I think you'll find that as you build your finish, the orange peel effect will diminish. Keeping the orange peel to a minimum will greatly reduce your leveling and sanding time and lessen the chance for the dreaded sand-through. I've used USL on about 20 guitars and I think it's the best of the waterbournes. 100% burn in on repairs, reasonably hard, and buffs to a nice gloss. Good luck.

_________________
Jimmy Caldwell
http://www.caldwellguitars.com


Top
 Profile  
 
PostPosted: Fri Dec 26, 2008 6:36 pm 
Offline
Contributing Member
Contributing Member

Joined: Wed Jul 02, 2008 11:44 am
Posts: 1005
Location: SE Michigan
First name: Kenneth
Last Name: Casper
City: Northville
State: MI
Country: U.S.A
Focus: Build
Hi Andy,

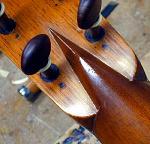
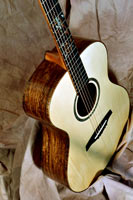
I purchased an Asturo last year and used it and Target's USL for the first time on my Quilted Mahogany OM. I had sprayed lacquer and paint before, but his was my first trip down HVLP Waterborne lane, and I had similar issues getting my setup dialed in. My first four or five coats were sanded back to wood as I just couldn't get the setup dialed in. Finally I found the settings that worked for me and the finish started to flow on like glass. Get your setup and technique dialed in and your finish will look like glass without leveling. I only had to level to clean up dust nibs and overspray. Below was the setup I used:

50' hose with moisture trap at 25'
Asturo Eco/S w/1.3mm tip
34psi at the gun on standby
21psi at the gun w/trigger pulled
Both fluid and air flow open 1 1/8 turns

I sprayed the guitar with it hung vertically and found runs and sags not to be an issue at all with this setup. I sprayed with a nice slow and even pass, covering an area once, then moving down and spraying the next pass with about a 30-50% overlap. This provided enough finish to avoid orange peels and was thin enough to not sag or run. Very easy to lay down. The finish would appear a bit mottled or rough when first sprayed but would soon lay down flat.

I sanded the wood with 600g prior to spraying. I shot three coats a night, waiting an hour between each coat. The next night before spraying, I would level with 600g. I tried using 800g, but I found it just loaded up too quickly. After a good two weeks of curing, the 800g will cut the finish without loading up. Make sure you wait at least this long before rubbing out!

If you want more info on polishing, see the thread link below, which Jeff Weiss set up as a sticky on his Target Coatings website:

http://www.targetcoatings.com/forum/vie ... php?t=1032

Ken

_________________
http://www.casperguitar.com


Top
 Profile  
 
PostPosted: Sat Dec 27, 2008 2:47 pm 
Offline
Koa
Koa

Joined: Tue Jan 22, 2008 8:57 pm
Posts: 779
Location: Austin, Texas
@Ken C: you don't specify the air hose diameter, which makes a big difference in the way air flows to the gun and will affect the correlation between the standby air pressure and the pass through air pressure (pass through is what really matters)

@Andy: when setting up a gun you set your fluid and then adjust the fan so that it deals with the amount of fluid properly. I do this in a scrap piece of wood. Just solidly bump the trigger for a fraction of a second and observe the way the fluid is sprayed. If going for a fan pattern make sure that the liquid is evenly distributed throughout the pattern. If it is heavy on the outside edges then there is too much air/not enough fluid.


Top
 Profile  
 
PostPosted: Sat Jan 03, 2009 3:49 pm 
Offline
Contributing Member
Contributing Member
User avatar

Joined: Thu Jun 12, 2008 6:59 am
Posts: 1964
Location: Rochester Michigan
Quick update for anyone who happens to be following along - I sprayed nine coats over two days about a week ago. Because the orange peel looked bad to me, I decided to let it cure for about a week and then level sand so there would be less to do later.

Upon level sanding with 400g gold, I realized that the orange peel was not nearly as "deep" as I thought. It only took a few strokes of the sanding block to level it perfectly flat. after doing the back, I now figure that it really wasn't necessary and the finish off the gun was pretty darn good after all. I'll spray about another eight to 10 coats and will call it done.

_________________
http://www.birkonium.com CNC Products for Luthiers
http://banduramaker.blogspot.com


Top
 Profile  
 
PostPosted: Sat Jan 03, 2009 6:13 pm 
Offline
Contributing Member
Contributing Member
User avatar

Joined: Thu May 12, 2005 5:46 am
Posts: 2996
Location: United States
Andy, why so many more coats? If you're level and haven't sanded through I'd probably spray one or two more and call it done.
I usually spray 6 coats on the top and 9 everywhere else. I'm spraying nitro with a fuji HVLP.

_________________
Jim Watts
http://jameswattsguitars.com


Top
 Profile  
 
PostPosted: Sat Jan 03, 2009 6:34 pm 
Offline
Contributing Member
Contributing Member
User avatar

Joined: Thu Jun 12, 2008 6:59 am
Posts: 1964
Location: Rochester Michigan
Jim Watts wrote:
Andy, why so many more coats? If you're level and haven't sanded through I'd probably spray one or two more and call it done.
I usually spray 6 coats on the top and 9 everywhere else. I'm spraying nitro with a fuji HVLP.


I'm spraying Target USL waterborne. From what I've read, this stuff goes on a lot thinner than nitro - about half as thick...but perhaps I should re-think.

The stew mac schedule calls for 12 to 16 coats of sealer, level sanding the sealer then 9 to 12 coats of the USL. After following that schedule, I decided that next time I wouldn't bother with the sealer, just put on more topcoats (I suspect that the 12 to 16 coats of sealer are because the sealer needs less time to cure and is easier to level sand). So, I figured that I'd do a total of 20-ish coats total of the USL.

Perhaps I'll try and peel of a bit of finish from my fretboard extension tomorrow morning and measure it to see where I'm at. IIRC about .006 after sanding & buffing is the target yes? Should I shoot for about .008?

_________________
http://www.birkonium.com CNC Products for Luthiers
http://banduramaker.blogspot.com


Top
 Profile  
 
PostPosted: Sat Jan 03, 2009 7:28 pm 
Offline
Contributing Member
Contributing Member
User avatar

Joined: Thu May 12, 2005 5:46 am
Posts: 2996
Location: United States
With nitro when I get .006-.007 on the top I'm done. Then I level flat and sand through the grits, that typically leaves between .004 - .005 on the top. I apply a few more coats to back and sides.
It's a good idea to measure the top thickness at the sound hole prior to spraying, this way you can keep track of how much you've put on.
I think trying find out how much you have on right now is a very good idea.

_________________
Jim Watts
http://jameswattsguitars.com


Top
 Profile  
 
PostPosted: Sun Jan 04, 2009 10:27 am 
Offline
Contributing Member
Contributing Member
User avatar

Joined: Thu Jun 12, 2008 6:59 am
Posts: 1964
Location: Rochester Michigan
Checked it out today. I peeled off a piece of masking tape I used to mask off the FB extension area on the top. Comparing it to a piece of non-lac'd tape showed a finish thickness of .005. This was with 13 coats, no leveling for an average coat of .00038". Because I'm still rather new at this, I'm going to shoot probably 5 or 6 coats today which should give me a thickness of around .007.

I think for a while I'm going to add a couple of easy to get at pieces of tape to be able to do this measurement throughout the spray.

_________________
http://www.birkonium.com CNC Products for Luthiers
http://banduramaker.blogspot.com


Top
 Profile  
 
Display posts from previous:  Sort by  
Post new topic Reply to topic  [ 11 posts ] 

All times are UTC - 5 hours


Who is online

Users browsing this forum: Bing [Bot], doncaparker and 30 guests


You cannot post new topics in this forum
You cannot reply to topics in this forum
You cannot edit your posts in this forum
You cannot delete your posts in this forum
You cannot post attachments in this forum

Jump to:  
Powered by phpBB® Forum Software © phpBB Group
phpBB customization services by 2by2host.com