Official Luthiers Forum!

Owned and operated by Lance Kragenbrink
It is currently Sat Aug 09, 2025 11:07 pm


All times are UTC - 5 hours


Forum rules


Be nice, no cussin and enjoy!


Post new topic Reply to topic  [ 31 posts ]  Go to page 1, 2  Next
Author Message
PostPosted: Sun Mar 23, 2008 11:12 pm 
Offline
Koa
Koa
User avatar

Joined: Tue Apr 03, 2007 7:16 am
Posts: 567
Location: United States
Hello,
I have been applying shellac finish (using the zinser no wax stuff) and am getting too much (I think) on the guitar. Sometimes ridges and even bubbles. gaah 
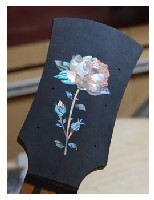
Before I try again, could this be that the shellac was not thinned enough? Is this a result of pressing too hard? I have read alot of documentation on the process, but never seen it done in person. Even Frank Ford's little video and instruction is helpful, but I'm missing something here. Any help would be great.
Also, after the french polishing process, will I have to rub this out with rotten stone or some other high grit, or, will it be done?
thanks,
chris

_________________
Chris Oliver
Infinity Luthiers
...in the shop.

live every minute...


Top
 Profile  
 
PostPosted: Sun Mar 23, 2008 11:26 pm 
Offline
Brazilian Rosewood
Brazilian Rosewood
User avatar

Joined: Thu Mar 01, 2007 3:15 pm
Posts: 2302
Location: Florida
I'm not familiar with using zinsser shellac, but I can venture a guess at what is the problem.

In order to do a proper french polishing job, you have to use measured amounts of shellac to alcohol ratios. I am assuming that you are familiar with the 1 and 2 pound cuts for the french polish? I dont know how one might get those kind of precise cut ratios using pre-mixed products like zinsser....maybe it can be done but I'm not familiar with it.

I found that I got the best results when I followed the Milburn tutorial. The only thing I did different was to wait several days between sessions to allow the alcohol to completely dissipate before proceeding with another session. I, too, experienced some of the same things you are describing when I didnt wait long enough between sessions. If you are already experiencing bubbling, I would venture to say that you will soon experience "sliding" layers if you dont stop, wait several days for the alcohol to escape. Once the finish slides, you have one heck of a mess to clean up...the voice of experience speaking here!

here is a link to the Milburn tutorial

My advice right now is to stop everything, wait at least 3 days before doing anything else, then sand everything level before proceeding being careful not to sand too deep but just to level everything out. Again, the important thing is to stop and wait.

_________________
Reguards,

Ken H


Top
 Profile  
 
PostPosted: Sun Mar 23, 2008 11:51 pm 
Offline
Koa
Koa
User avatar

Joined: Tue Apr 03, 2007 7:16 am
Posts: 567
Location: United States
Thanks Ken,
The zinser can does have the cut ration on it somewhere. I'll look into that. I have already sanded it back and polished it up, but it can definitely be better. I'll wait a few more days and give it another shot.
chris

_________________
Chris Oliver
Infinity Luthiers
...in the shop.

live every minute...


Top
 Profile  
 
PostPosted: Sun Mar 23, 2008 11:56 pm 
Offline
Contributing Member
Contributing Member
User avatar

Joined: Mon Mar 19, 2007 7:05 am
Posts: 9191
Location: United States
First name: Waddy
Last Name: Thomson
City: Charlotte
State: NC
Focus: Build
Status: Semi-pro
Your problem is that you are using too much shellac in the process. The Zinsser formula is a 2 pound cut of dewaxed shellac and should work fine for FP. Load your muneca and then work alcohol in and pad it on a piece of paper until it just barely leaves a mark from dampness. Then, using the swirling motions or fig 8's or what ever you use, polish out your goop. Ocassionally add a couple of drops of alcohol only, and maybe a drop of whatever oil you are using. If you are pore filling, you will be using pumice to fill, so shake a little pumice on your paper, and tap your muneca in that, pat it on the back of your hand or the paper, to blend the pumice into the pad, then use your strokes. The biggest thing to remember is to try to stay as dry as possible. When your alcohol moisture level is right, you can see a little vapor trail behind the muneca as you polish. I you get too much build up on your muneca pad, move the material to a new position or change to a new cover. Prime it with a little alcohol, and pat it out on paper again to get the wetness right. The dryer the better. Remember that. If you have a lot of goop, you may need a little extra alcohol to break it down and stiff some of it off with the muneca. Keep working at it, and it will work down. If you feel you are getting ridges, you can always use a little pumice with a drop of oil and work it down a little. Then go back to polishing. Use oil when your muneca feels sticky, and you can't get a smooth motion. It only takes a small drop. Tap on the back of your hand to disperse it and keep on going. You will be amazed how it will clean up when you are dry enough. I'm no expert, but I have been practicing, and this works well

_________________
Waddy

Photobucket Build Album Library

Sound Clips of most of my guitars


Top
 Profile  
 
PostPosted: Mon Mar 24, 2008 6:49 am 
Offline
Old Growth Brazilian Rosewood
User avatar

Joined: Fri Nov 02, 2007 9:49 am
Posts: 13651
Location: Ann Arbor, Michigan
First name: Hesh
Last Name: Breakstone
City: Ann Arbor
State: Michigan
Country: United States
Status: Professional
Yep Waddy is correct that the Zinnser stuff is 2 lbs out-of-the-can. Thin it to a 1 lb cut, that is what I did and I used Everclear not DA and it worked fine for me. The ridges or even bubbles are symptomatic of putting it on to wet/thick.

When you wipe the stuff on you want to visually see the slightest vapor trail behind you that evaporates in a second or two before your eyes. If the area that you apply the shellac to stays visually wet any longer than this it is being applied to thick.

For me it was really easy to apply it to thick and it took me a while to get the hang of working with a very nearly dry pad which is what it takes to apply a very thin, even coat.

The nice thing about FP is that you can level out what you have done and just keep going, getting better at it and then seeing better results.


Top
 Profile  
 
PostPosted: Mon Mar 24, 2008 9:42 am 
Offline
Koa
Koa
User avatar

Joined: Thu Dec 01, 2005 3:05 pm
Posts: 503
Location: Portland, Oregon
I agree with Hesh and Waddy. Too wet and or too thick. I don't think you can apply too much pressure from what I have found(unless your damaging the box). A good grain fill has been really important for me. When I first tried filling with pumice/shellac method I used too much shellac and got sink back, try to be very conservative with the shellac if you go that route. Z-poxy proved to be much easier for fill. I use a 2lb. cut for body coats. Getting the right balance of alcohol, shellac, oil and speed/pattern/pressure is the key. Again I found it better to be conservative on the amount of shellac(initially I tried to build too fast). The final product is very thin, just keep thinking that. Watching the tail and feeling how smooth the munica is traveling will guide you, and let you know if your munica is loaded too heavy or out of balance.

Rich


Top
 Profile  
 
PostPosted: Mon Mar 24, 2008 10:35 am 
Offline
Old Growth Brazilian

Joined: Tue Dec 28, 2004 1:56 am
Posts: 10707
Location: United States
As Waddy said, sounds to me that you are painting on the shellac with a pad rather than French polishing. This tells me you have a misunderstanding of the process in general.

In French polishing the film build up is more kin to applying a wax paste then buffing it out than it is to laying down a wet coat. There are three main processes Boding, Spiriting off, and Glazing. Four if you consider Stiffing off to be a different process than Spiriting off.

Knowing how and when to perform each process as well as what each process does is critical.


Top
 Profile  
 
PostPosted: Mon Mar 24, 2008 1:29 pm 
Offline
Old Growth Brazilian

Joined: Tue Dec 28, 2004 1:56 am
Posts: 10707
Location: United States
As far as the rub out if done with proper care you should be able to achieve a ultra high gloss via the Glazing process of French polish. The more glazing you do the higher the sheen you can achieve.

A few thoughts crossed my mind after my first post .

First your muneca (pad) construction, preparation and materials used to build it play a very important roll. The inner pad is residual shellac reservoir. It holds the shellac that is to be applied to the surface in a not quite gelled state. The material the inner pad is made from needs to allow this semi gelled shellac to flow out as the new load partially melts the shellac in the inner pad. I like my inner muneca to be made from 100% undyed wool. 100% cotton cheesecloth also works well.

I suspect this may be one of the problems you are having. It might help to understand that each time you load the muneca you are only priming the pad, or in other words propose each new load up of shellac and alcohol on to the pad is to slightly melt the residual shellac in the inner pad to allow the flow of said residual shellac to begin to flow through the outer pad. This is why you must tap the pad to force the new load in to the inner pad to start the inner pad to flow. You do not want to load the outer pad so heavy with shellac that you get a wet outer pad nor do you want to add so much alcohol that you over melt the inner pads shellac. From what I read in your post sounds to me like you are overloading the pad so that the wet outer pad is where the shellac being laid down is coming from.

Second understand that when done right each body session will leave figure eight marks with micro hi and lo ridging. This is where Spiriting-off enters the process. Spiriting off is a lower shellac load and higher alcohol load done with the grain in a firm quick stroke, gliding on and gliding off a lot like rag buffing shoes will level these ridges out. And it should be done at least every other session after the third session and I really suggest after every session. If done with diligent intent then there should be no reason to abrasive level the surface, ever.

I still suspect you really are not confident in exactly how this finish system or its individual processes work. If you have the Milburn tutorial reread and try to dissect each process and learn to understand how the processes work with each other. Let me, Colin or many others of us know if you get stuck or if you don’t understand and remember you can’t goof this finish up so bad it can’t be fixed.


Last edited by Michael Dale Payne on Mon Mar 24, 2008 1:33 pm, edited 1 time in total.

Top
 Profile  
 
PostPosted: Mon Mar 24, 2008 1:29 pm 
Offline
Koa
Koa
User avatar

Joined: Tue Apr 03, 2007 7:16 am
Posts: 567
Location: United States
Excellent observations guys... It did seem like painting, only with a t-shirt that had a nice trail of bubbles and thick shellac following it!
thanks,
chris

_________________
Chris Oliver
Infinity Luthiers
...in the shop.

live every minute...


Top
 Profile  
 
PostPosted: Mon Mar 24, 2008 3:53 pm 
Offline
Old Growth Brazilian

Joined: Tue Dec 28, 2004 1:56 am
Posts: 10707
Location: United States
I will give a couple more tips worth their weight in shellac.

Get rid of the t-shirt material and find some old white linen or muslin for your outer muneca. !!!!!!!!!! I know many tutorials say old well worn t-shirts material but in truth while it will work it is not so good and increases the amount of ridging left during boding plus gathers and holds more dust than linen or muslin.

Never use new material of any material type as the loose fibers have yet to be shed. If you have to use new material wash and dry at least 5 or 6 times before using to loosen up the weave and allow it to shed the loose fiber. Also I suggest cutting into squares with pinking shears as apposed to straight scissors as pinking shears interlocked triangular cut pattern will really helps prevent runs in the weave from starting that can lead to loose fibers.

Make up your inner muneca and load it with shellac. Wring it out till I will not drip but is still saturated with shellac and place it inside an outer muneca covering and store in an air tight container 24 hours prior to its use. This will allow the shellac in the inner muneca to slightly gel to the point best for the process. If the inner pad is too wet you end up pulling off more shellac than you lay down.

Keep in mind the shellac should go on more like a paste wax and not like a fluid. this is a bit of an exaggeration but not much of one


Top
 Profile  
 
PostPosted: Mon Mar 24, 2008 7:47 pm 
Offline
Cocobolo
Cocobolo

Joined: Wed Jan 23, 2008 7:41 am
Posts: 223
Location: Naugatuck, CT
I'm new to FP but I just finished my first and can share some insight. As Michael said, materials made a big difference for me. Once I started using a muneca made with wool inside, I got much better results.

When you have the muneca loaded properly, as Michael says, you will see a faint vapor trail behind as you body. Seemed like when I was going good the trail stayed about 2 inches behind my muneca and evaporated rapidly. When I first started, it would stay for 6 or 8 inches. I soon discovered my muneca was too wet. Watching this vapor trail as I bodied made a huge difference for me. When it's right, you'll notice.

Hope this helps.

_________________
Rob


Top
 Profile  
 
PostPosted: Mon Mar 24, 2008 9:28 pm 
Offline
Koa
Koa
User avatar

Joined: Wed Apr 18, 2007 6:46 am
Posts: 1012
Location: Issaquah, Washington USA
I'll add my two cents worth. Don't try to lay down to much at one time. I found if I left my work for a few hours or next day, spirited off and did another session, it works a lot better.

_________________
A higher purpose for wood.
Rich Smith
Issaquah, WA


Top
 Profile  
 
PostPosted: Mon Mar 24, 2008 10:30 pm 
Offline
Brazilian Rosewood
Brazilian Rosewood

Joined: Fri Aug 19, 2005 4:02 am
Posts: 3272
Location: The Woodlands, Texas
First name: Barry
Last Name: Daniels
Michael,

Is your undyed wool a loose bundle of wool or some type of woven fabric? Any preferred sources for it?


Top
 Profile  
 
PostPosted: Tue Mar 25, 2008 4:24 am 
Offline
Koa
Koa

Joined: Sun Feb 26, 2006 10:21 pm
Posts: 1055
Location: Australia
My choice of materials for my munecas are medical gauze wrapped in well worn cotton T shirt material.

I had similar problems using Ubeaut Hard Shellac. I was using too heavy a cut, too much on the muneca and I wasnt leaving enough time between body sessions. Ive since gone back to normal blonde shellac flakes. Not sure if its the Hard Shellac or just my method, I suspect its the latter.

French Polishing can be the most daunting of finishes to get right but when you do get it right the result is well worth the effort.


Top
 Profile  
 
PostPosted: Tue Mar 25, 2008 7:37 am 
Offline
Koa
Koa

Joined: Thu Dec 01, 2005 5:10 pm
Posts: 778
Location: Madison, WI
kiwigeo wrote:
My choice of materials for my munecas are medical gauze wrapped in well worn cotton T shirt material.

I had similar problems using Ubeaut Hard Shellac. I was using too heavy a cut, too much on the muneca and I wasnt leaving enough time between body sessions. Ive since gone back to normal blonde shellac flakes. Not sure if its the Hard Shellac or just my method, I suspect its the latter.

French Polishing can be the most daunting of finishes to get right but when you do get it right the result is well worth the effort.


The Hard Shellac works VERY well as a french polish media. I am in the process of using on two guitars right now. It is much too thick for FP out of the bottle (about a 4# cut), so it needs to be cut back to a 1#. I tried cutting back to a 2# and it works ok as a wash coat and/or the first couple sessions, but once you have some body on it, the 2# seems too much. I use muslin (shedding is almost non-existent) & cheesecloth as a muneca and go with the method on Robert O'Brien's DVD.
The hard shellac builds up nicely, works just like any other flake product I've used, and takes a gloss very well when its let alone to rest and crosslink.

-j.

_________________
“If God dwells inside us like some people say, I sure hope He likes enchiladas, because that's what He's getting”
-jack handy


Top
 Profile  
 
PostPosted: Tue Mar 25, 2008 8:04 am 
Offline
Old Growth Brazilian

Joined: Tue Dec 28, 2004 1:56 am
Posts: 10707
Location: United States
BarryDaniels wrote:
Michael,

Is your undyed wool a loose bundle of wool or some type of woven fabric? Any preferred sources for it?


I have used both woven works best. Though hard to find these days hunters socks is perfect but most any more are a synthetic blend. Most fabric stores don't carry much either. I have a couple links I will hunt down today and post for both woven and cleanded and combed wool.


Top
 Profile  
 
PostPosted: Tue Mar 25, 2008 9:00 am 
Offline
Koa
Koa

Joined: Tue Mar 07, 2006 12:10 am
Posts: 606
Location: United States
I use the CVS version of this for the inner muneca:


Top
 Profile  
 
PostPosted: Tue Mar 25, 2008 9:38 am 
Offline
Contributing Member
Contributing Member
User avatar

Joined: Mon Mar 19, 2007 7:05 am
Posts: 9191
Location: United States
First name: Waddy
Last Name: Thomson
City: Charlotte
State: NC
Focus: Build
Status: Semi-pro
I took this little 3 hour FP class at Woodcraft, and the guy teaching the class had a good idea. He said check Goodwill and Salvation Army, or any thrift stores for wool sweaters. You can often find heavy knitted natural wool sweaters for $5.00 or so. Sounded like a good idea to me

_________________
Waddy

Photobucket Build Album Library

Sound Clips of most of my guitars


Top
 Profile  
 
PostPosted: Tue Mar 25, 2008 10:07 am 
Offline
Old Growth Brazilian

Joined: Tue Dec 28, 2004 1:56 am
Posts: 10707
Location: United States
WaddyT wrote:
I took this little 3 hour FP class at Woodcraft, and the guy teaching the class had a good idea. He said check Goodwill and Salvation Army, or any thrift stores for wool sweaters. You can often find heavy knitted natural wool sweaters for $5.00 or so. Sounded like a good idea to me


Just watch out for dyes????????


Top
 Profile  
 
PostPosted: Tue Mar 25, 2008 10:18 am 
Offline
Cocobolo
Cocobolo
User avatar

Joined: Sun Mar 02, 2008 6:48 pm
Posts: 130
Location: Bellingham, WA
First name: George
Last Name: Thomas
Country: USA
Focus: Build
Status: Semi-pro
Wow, lots of great advice on FP techniques. The Millburn tutorial is very helpful but to get a very good idea of how the process looks and sounds I recommend the Ron Fernandez DVD. There a only a few differences between Fernandez and Millburn techniques - mostly in the pumice filling part and gassing out periods. Between the two and the excellent posts here you should have a good handle on the process. The Ferndandez DVD is available from Stew-Mac.

_________________
GEO
perpetual beginner


Top
 Profile  
 
PostPosted: Tue Mar 25, 2008 10:15 pm 
Offline
Koa
Koa
User avatar

Joined: Tue Apr 03, 2007 7:16 am
Posts: 567
Location: United States
Excellent instruction and tips everyone. Here are some results of your comments... I even got the vapor trail, although mine I would guess to be at about 5 inches. Maybe load a little less tomorrow night and try again.
thanks again,
chris


You do not have the required permissions to view the files attached to this post.

_________________
Chris Oliver
Infinity Luthiers
...in the shop.

live every minute...


Top
 Profile  
 
PostPosted: Tue Mar 25, 2008 10:22 pm 
Offline
Old Growth Brazilian

Joined: Tue Dec 28, 2004 1:56 am
Posts: 10707
Location: United States
looks good but needs a good Spiriting-off ;)


Top
 Profile  
 
PostPosted: Tue Mar 25, 2008 10:25 pm 
Offline
Koa
Koa
User avatar

Joined: Tue Apr 03, 2007 7:16 am
Posts: 567
Location: United States
MichaelP wrote:
looks good but needs a good Spiriting-off ;)


Does the spiriting off need to be done within the couple hours after gassing, or can it wait until tomorrow?
thanks,
chris

_________________
Chris Oliver
Infinity Luthiers
...in the shop.

live every minute...


Top
 Profile  
 
PostPosted: Wed Mar 26, 2008 8:15 am 
Offline
Old Growth Brazilian

Joined: Tue Dec 28, 2004 1:56 am
Posts: 10707
Location: United States
Chris Oliver wrote:
MichaelP wrote:
looks good but needs a good Spiriting-off ;)


Does the spiriting off need to be done within the couple hours after gassing, or can it wait until tomorrow?
thanks,
chris


It can be done at any time after the film has touch harden but keep in mind the longer the wait the more passes will be needed to do the same amount of leveling. You do want each new body session to touch harden before you spirit-off

Actually I was just taking the opportunity to preach my sermon on the fact that if you spirit-off after every session there should be no need to ever touch the finish with sand paper. I really saw now issue with the film your building.


Looking good


Top
 Profile  
 
PostPosted: Wed Mar 26, 2008 8:31 am 
Offline
Brazilian Rosewood
Brazilian Rosewood

Joined: Fri Aug 19, 2005 4:02 am
Posts: 3272
Location: The Woodlands, Texas
First name: Barry
Last Name: Daniels
Michael, hate to be a pest, but did you find those links for the wool?


Top
 Profile  
 
Display posts from previous:  Sort by  
Post new topic Reply to topic  [ 31 posts ]  Go to page 1, 2  Next

All times are UTC - 5 hours


Who is online

Users browsing this forum: No registered users and 14 guests


You cannot post new topics in this forum
You cannot reply to topics in this forum
You cannot edit your posts in this forum
You cannot delete your posts in this forum
You cannot post attachments in this forum

Jump to:  
Powered by phpBB® Forum Software © phpBB Group
phpBB customization services by 2by2host.com