Official Luthiers Forum!Owned and operated by Lance Kragenbrink |
| It is currently Tue Jul 29, 2025 7:53 pm |
|
All times are UTC - 5 hours |
 
|
Page 1 of 1 |
[ 15 posts ] |
|
| Author | Message | |||||
|---|---|---|---|---|---|---|
| roby |
|
|||||
Joined: Thu Mar 05, 2009 11:12 am Posts: 150 First name: robin Last Name: courtenay City: andover State: hants Country: uk Focus: Build Status: Amateur |
|
|||||
| Top | ||||||
| roby |
|
|||||
Joined: Thu Mar 05, 2009 11:12 am Posts: 150 First name: robin Last Name: courtenay City: andover State: hants Country: uk Focus: Build Status: Amateur |
|
|||||
| Top | ||||||
| roby |
|
|||||
Joined: Thu Mar 05, 2009 11:12 am Posts: 150 First name: robin Last Name: courtenay City: andover State: hants Country: uk Focus: Build Status: Amateur |
|
|||||
| Top | ||||||
| jac68984 |
|
||||||
Joined: Fri May 14, 2010 11:43 am Posts: 668 First name: Aaron Last Name: Craig City: Kansas City State: Missouri Focus: Build Status: Semi-pro |
|
||||||
| Top | |||||||
| dberkowitz |
|
||||||
Joined: Tue Jan 25, 2005 6:35 am Posts: 671 Location: United States Focus: Build Status: Professional |
|
||||||
| Top | |||||||
| roby |
|
|||||
Joined: Thu Mar 05, 2009 11:12 am Posts: 150 First name: robin Last Name: courtenay City: andover State: hants Country: uk Focus: Build Status: Amateur |
|
|||||
| Top | ||||||
| dberkowitz |
|
||||||
Joined: Tue Jan 25, 2005 6:35 am Posts: 671 Location: United States Focus: Build Status: Professional |
|
||||||
| Top | |||||||
| SKBarbour |
|
|||||
Joined: Fri Mar 04, 2011 3:02 pm Posts: 195 Location: Glen Burnie Md. First name: steve Last Name: barbour Country: U.S. Focus: Build Status: Amateur |
|
|||||
| Top | ||||||
| weslewis |
|
|||||
Joined: Sun Jan 10, 2010 11:40 am Posts: 764 First name: wes Last Name: Lewis City: Garland State: Tx. Zip/Postal Code: 75044 Focus: Build |
|
|||||
| Top | ||||||
| theguitarwhisperer |
|
|||||
Joined: Fri Apr 02, 2010 10:35 pm Posts: 2561 Country: USA Focus: Repair Status: Professional |
|
|||||
| Top | ||||||
| Pmaj7 |
|
||||||
Joined: Sat Jan 31, 2009 8:50 pm Posts: 2260 Location: Seattle WA Focus: Build Status: Semi-pro |
|
||||||
| Top | |||||||
| giltzow |
|
|||||
Joined: Fri Jun 04, 2010 10:02 pm Posts: 313 First name: Michael Last Name: Giltzow City: Boise State: Idaho Zip/Postal Code: 83709 Country: usa Focus: Build Status: Semi-pro |
|
|||||
| Top | ||||||
|
|
Page 1 of 1 |
[ 15 posts ] |
|
All times are UTC - 5 hours |
Who is online |
Users browsing this forum: No registered users and 12 guests |
| You cannot post new topics in this forum You cannot reply to topics in this forum You cannot edit your posts in this forum You cannot delete your posts in this forum You cannot post attachments in this forum |


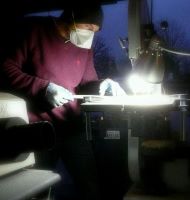
 and yes the way he sets the angle does not work, which will result in a incorrect heel angle plus its hard to get the center line dead on when using a router to rout the mortise. I have gone back to making the neck block with the mortise built in making sure it is glued in straight with the centerlines lined up, then transfer the neck angle to the heel and sand on a disc sander getting the angle and centerline set properly, then cut the tenon using Cumpiano's method on a table saw....process is easy , accurate and no jig to keep up with...