Official Luthiers Forum!

Owned and operated by Lance Kragenbrink
It is currently Sun Aug 03, 2025 6:22 am


All times are UTC - 5 hours


Forum rules


Be nice, no cussin and enjoy!


Post new topic Reply to topic  [ 26 posts ]  Go to page 1, 2  Next
Author Message
PostPosted: Mon Apr 19, 2010 8:12 pm 
Offline
Contributing Member
Contributing Member

Joined: Wed Jul 02, 2008 11:44 am
Posts: 1005
Location: SE Michigan
First name: Kenneth
Last Name: Casper
City: Northville
State: MI
Country: U.S.A
Focus: Build
My general practice has been to mask the bridge location a tad undersize, spray the finish, remove the mask, and glue on the bridge using LMII White Glue. I built an OMC over two years ago and the bridge has shown no signs of lifting. The bridge (Martin style ebony) on number two lifted up, so I removed it and glued it back down using the same approach, and it has since lifted back up. The bridge on numbers 3 and 4 to my knowledge have stayed put (I don't have these guitars, but I talk with the owners on occasion and specifically ask about the bridge given the lifted bridge on #2). I have kept a close eye on #5, the claro walnut 185, and it had held firm until yesterday when it decided to let go. That bridge doesn't have a huge footprint, something in size to a pyramid bridge in Madagascar RW that did not appear particularly oily.

So I am doing something wrong. Glue was supposedly fresh, so I doubt that is the issue. I have read through a number of posts, and presume the most likely culprit is the fact that I have the edges of the bridge resting on the finish. I see that some of you score the finish around the bridge and remove it, others route a small ledge in the bridge, either of these have the bridge sitting down right on the wood as opposed to resting on the finish. Given the small footprint of the bridge I used on #5, I want to have as much of the bridge glued down as possible, so I plan on scoring the finish around the bridge and removing the thin line of finish rather than routing a ledge on the bridge.

The bridges come off clean with no tear out on the top. My question, though, is how best to clean and prep the bridge location after pulling the bridge? Can I use LMII's glue again or do I need to use something else? I know a failed glue joint is not going to glue up as strong as a new joint. I have already glued the bridge down twice on #2. This will be the third time. I don't want to have to do it again.

Would appreciate any advice you can share,

Ken

_________________
http://www.casperguitar.com


Top
 Profile  
 
PostPosted: Mon Apr 19, 2010 8:19 pm 
Offline
Koa
Koa
User avatar

Joined: Sun Jan 07, 2007 1:14 pm
Posts: 761
First name: Blain
City: Leander
State: Texas
Country: United States
Focus: Build
If using a radius on your top, are you also radiusing the bottom side of the bridge to get a good fit?

Other than that, I definitely think that having the bridge sitting on top of some finish around the edges could be the cause of your failing joints.

Have you considered using HHG? Assuming you have a good fit between the bridge and the top, HHG is really impressive stuff.

_________________
Thanks,
Blain

http://www.ullrichguitar.com

"89.67% of all statistics are made up on the spot."


Top
 Profile  
 
PostPosted: Mon Apr 19, 2010 9:12 pm 
Offline
Cocobolo
Cocobolo

Joined: Sun Feb 13, 2005 2:47 am
Posts: 306
Location: Seattle
First name: Rick
Last Name: Davis
City: Seattle
State: WA
Country: United States
Focus: Build
Status: Professional
My experience with the LMI glue is that it really likes a tight joint (as does hide glue, for that matter). I've tried leaving a 1/16" lip of finish under the bridge edges and, in a couple of cases, had the bridge lift when the humidity dropped. I've also tried routing a narrow, shallow rabbet around the edge but had trouble controlling the depth of cut after fitting the underside of the bridge to the top radius. So I'm back to scoring around the bridge (new scalpel blade each time) and fitting to bare wood with no gaps. Overall, it's worked in about 150 cases and not in one or two. That's not quite good enough but we keep learning.

I find it important to fit the bridge really well. I have a sanding jig with the same radius as the top and check the fit with fine tracing paper. It has to fit all the way out to the wings.

Remove the old glue from the soundboard and the bridge with De-Glue-Goo. (I've written that so many times it's becoming a habit.) A light scraping will give fresh, clean, smooth surfaces. Double-check the bridge fit. If the LMI glue is getting thick, cut it with a drop of water (no more than 10% according to LMI). Clamp, wait overnight. Clean squeeze-out with, yes, De-Glue-Goo. Refit pin holes.

Hope that helps.

Rick


Top
 Profile  
 
PostPosted: Mon Apr 19, 2010 10:42 pm 
Offline
Cocobolo
Cocobolo
User avatar

Joined: Mon Dec 08, 2008 11:55 pm
Posts: 145
Location: Perth, Western Australia
Rick Davis wrote:
I've also tried routing a narrow, shallow rabbet around the edge but had trouble controlling the depth of cut after fitting the underside of the bridge to the top radius.

I've made a small, makeshift router table with a surface having the same radius as my tops, i.e., 25'. I sand the underside of the bridge to fit the radius of my top, then use the router table and a laminate trimmer to rout a ledge in the perimeter of the bridge. Oh, and I saw it here, on the OLF! [:Y:]

_________________
Cheers
Pete


Top
 Profile  
 
PostPosted: Tue Apr 20, 2010 7:01 am 
Offline
Cocobolo
Cocobolo

Joined: Wed Jan 23, 2008 7:41 am
Posts: 223
Location: Naugatuck, CT
Hey Ken, I had a similar problem, until I realized I never took off the shellac I sealed the top with early on in the build process. Not sure if that could be it, but when mine came off with NO tear out at all, I started to look closer and noticed the shellac. OOps idunno 
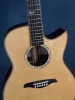
Hasn't budged since I sanded it down and reglued.

_________________
Rob


Top
 Profile  
 
PostPosted: Tue Apr 20, 2010 7:22 am 
Offline
Contributing Member
Contributing Member
User avatar

Joined: Sat Feb 28, 2009 10:34 pm
Posts: 1073
First name: Rob
Last Name: McDougall
City: Cochrane
State: Alberta
Rob Warren wrote:
I realized I never took off the shellac I sealed the top with early on in the build process.


That sounds familiar...... :D


Top
 Profile  
 
PostPosted: Tue Apr 20, 2010 9:17 am 
Offline
Contributing Member
Contributing Member

Joined: Wed Jul 02, 2008 11:44 am
Posts: 1005
Location: SE Michigan
First name: Kenneth
Last Name: Casper
City: Northville
State: MI
Country: U.S.A
Focus: Build
Thanks Guys,

Prior to finishing, I tape sandpaper to the top and work the bridge back and forth over the sandpaper until the entire bottom of the bridge has been sanded, so I am confident I have a nice fit from that perspective. I do hit the tops with shellac to protect them while I work on bindings, etc, but I sand back down to bare wood prior to masking and spraying.

On the J-185, I had kept that guitar in a humidity controlled case when I wasn't playing it. Last week, I figured the humidity was high enough to leave it out for a few days. After the bridge lifted, I moved my humidity gauge upstairs and it read 32%, so a sinking top may be partially responsible for that one.

The fact that I am getting no tearout, leads me to believe that the glue seam is just too thick because the bridge is elevated off the top due to the finish around the perimeter.

Rick, I have never used De-Glue-Goo. Is it safe on finishes? I usually clean up with a damp cloth while the glue is still tacky. Can I find this stuff at local hardware stores or Home Depot?

Thanks for the tips. Going to prepping for another go this evening.

Ken

_________________
http://www.casperguitar.com


Top
 Profile  
 
PostPosted: Tue Apr 20, 2010 11:43 am 
Offline
Contributing Member
Contributing Member
User avatar

Joined: Fri Mar 24, 2006 12:42 pm
Posts: 2360
Location: Windsor Ontario Canada
First name: Fred
Last Name: Tellier
City: Windsor
State: Ontario
Zip/Postal Code: N8T2C6
Country: Canada
Focus: Build
Status: Amateur
Ken

I make a little tool with a single edge razor blade sticking out 1/16" and use it to scrape enough material from the bridge edges to allow it to drop into the masked off space and touch the wood. It takes only a couple minutes to do this and it makes me feel a little more confident about the glue joint. I could probably do it easier and quicker with the router but the scraper works well enough and there is less chance of messing the bridge up.

Fred

_________________
Fred Tellier
http://www.fetellierguitars.com
Facebook page http://www.facebook.com/pages/FE-Tellier-Guitars/163451547003866


Top
 Profile  
 
PostPosted: Tue Apr 20, 2010 12:33 pm 
Offline
Cocobolo
Cocobolo

Joined: Sun Feb 13, 2005 2:47 am
Posts: 306
Location: Seattle
First name: Rick
Last Name: Davis
City: Seattle
State: WA
Country: United States
Focus: Build
Status: Professional
Ken,

In my experience with new and old instruments, De-Glue-Goo has never attacked the finish. Cat Fox, who introduced me to it and who has been repairing instruments for over 5 years, has never had a bad experience with it. I had one older Japanese guitar in the shop recently and the De-Glue-Goo seemed to be dissolving the nasty old finish. On closer inspection, it was just removing 50 years of gunk! I spent a long time cleaning up the rest of the instrument to match the nice area DGG had created.

It's basically acetic acid in a gel and seems pretty benign, except to water-based glues. (It won't touch epoxy; don't know about oddball stuff like urea resin, Gorilla Glue, etc.) It seems to dissolve only glue that is in contact with the air (I'm not enough of a chemist to know exactly how it works) and not to penetrate into the glued joint.

You can use De-Glue-Goo to clean squeeze-out whenever it's tough to clean up completely without damaging the surrounding area. I don't use it for braces, for example, because I can quickly scrape up the hardening glue. I do use it for cleaning squeeze-out on finished surfaces so I don't risk scratching the lacquer.

It's available at the usual woodworking stores. Don't know if Lowe's or Home Depot carry it (probably not), but Rockler and Klingspor have it.


Top
 Profile  
 
PostPosted: Tue Apr 20, 2010 1:47 pm 
Offline
Brazilian Rosewood
Brazilian Rosewood

Joined: Tue Nov 29, 2005 11:44 am
Posts: 2186
Location: Newark, DE
First name: Jim
Last Name: Kirby
Focus: Build
Status: Amateur
Ken,

I have had trouble with bridge glue joint stability on my early guitars (well, they are all still early at this point) using a variety of glues, and recent experience has convinced me that the important factors are:

(1) A very tight fit between the bridge and top surface prior to gluing,
(2) clean surfaces with no residual glue or finish contamination, and
(3) hide glue.

With number three topping the list. The self clamping aspect of a tightly fitted hide glue joint is really nice.

A luthier here in Granada has also told me to slightly relieve the underside of a bridge, just as you would the mating surface of a heel in a heel to body joint, so that the tightest fit is around the perimeter of the bridge.
Just the slightest of relief, using a curved scraper. The hide glue will take care of pulling the interior of the glued surfaces together, leaving the perimeter joint just rock solid.

_________________
Jim Kirby
kirby@udel.edu


Top
 Profile  
 
PostPosted: Tue Apr 20, 2010 4:34 pm 
Offline
Cocobolo
Cocobolo

Joined: Wed Jan 23, 2008 7:41 am
Posts: 223
Location: Naugatuck, CT
Ken C wrote:
I do hit the tops with shellac to protect them while I work on bindings, etc, but I sand back down to bare wood prior to masking and spraying


Yeah, that's what I USUALLY do, except this one time..... idunno

_________________
Rob


Top
 Profile  
 
PostPosted: Tue Apr 20, 2010 6:58 pm 
Offline
Contributing Member
Contributing Member

Joined: Wed Jul 02, 2008 11:44 am
Posts: 1005
Location: SE Michigan
First name: Kenneth
Last Name: Casper
City: Northville
State: MI
Country: U.S.A
Focus: Build
Okay, here's what it looked like when I popped it off. Just had a thought--I remove my bridge mask when I do my final level and later buff. I am wondering if some of my buffing compound got in the wood and is not allowing the glue to bond to the top. The top looks like it has no glue on it all. Appears as if all the glue is on the bridge. Hmmm...the more I think about it, the more I believe this to be the cause. If it is, I need to find some way of really cleaning the wood so the glue will stick.

Ken
Attachment:
IMGP8354.jpg


You do not have the required permissions to view the files attached to this post.

_________________
http://www.casperguitar.com


Top
 Profile  
 
PostPosted: Tue Apr 20, 2010 7:40 pm 
Offline
Cocobolo
Cocobolo

Joined: Wed Jan 23, 2008 7:41 am
Posts: 223
Location: Naugatuck, CT
Alright I believe you now Ken :lol: That's pretty weird that there's no glue on the top....

_________________
Rob


Top
 Profile  
 
PostPosted: Tue Apr 20, 2010 8:00 pm 
Offline
Cocobolo
Cocobolo

Joined: Thu Mar 10, 2005 3:16 am
Posts: 140
Location: United States
More than likely the buffing is the culprit. Even with the 1/16" edge of finish, given a thickness of under .005", then theoretically your glue joint will not be too thick. At the very least, the great majority of the contact surface under the bridge would have been pressed into perfect contact with the bridge, and should have torn off a substantial amount of spruce fibers when it failed. That is one reason I gave up on masking bridges before finishing.


Top
 Profile  
 
PostPosted: Tue Apr 20, 2010 11:26 pm 
Offline
Brazilian Rosewood
Brazilian Rosewood

Joined: Thu Feb 12, 2009 10:27 pm
Posts: 2109
Location: South Carolina
First name: John
Last Name: Cox
Focus: Build
Status: Amateur
Right -- if you really were gluing fresh, bare wood to fresh bare wood you would still expect some evidence of "Stuck pretty good" in the middle there somewhere.... I've never had a bridge come off that easy when prepped right.... especially not when I am trying to get it back off!

Chances are very good that you have a thin layer of residual finish (or something) soaked into that top layer of wood. You can feel it when you finally sand through -- It all of a sudden feels kinda squishy and starts making Spruce fuzzies....

I ran into this, and I now scrape both the guitar top and the underside of the bridge to new, fresh wood immediately before glue-up....

Just as an experiment.. try gluing a scrap bridge to a top scrap... just to see how strong that glue joint is:

Make sure they mate up with a perfect, flush joint.
Scape off both mating surfaces to new, bare wood immediately before glue up.

Now, get out your kid's bottle of Elmer's white glue (We're making a "Temporary" joint here... right?) -- put 1 bead along the back edge of the bridge, clamp down as per usual...

Give it a day or three....

Now... Go back and tear that sucker off by prying on the back edge -- simulating string pull..... If it was anything like mine:
1. It took a crowbar to get that bridge off
2. There was considerable "Collateral" damage...

At least, that is how it went for me....

Thanks

John


Top
 Profile  
 
PostPosted: Wed Apr 21, 2010 4:40 am 
Offline
Cocobolo
Cocobolo

Joined: Sat Jan 30, 2010 11:54 pm
Posts: 186
Location: Miami, FL
First name: Michael
Last Name: Schreiner
City: Miami
State: FL
Zip/Postal Code: 33183
Country: USA
Focus: Build
Status: Semi-pro
Or Maybe... The tape used to mask the bridge area left a residue. Blue tape can be purchased in different "tackynesssss" but still is blue, or maybe it is just old and starting to get "gumey". Hmmmm...
I don't mask, I scrape after finishing.
Michael


Top
 Profile  
 
PostPosted: Wed Apr 21, 2010 7:44 am 
Offline
Brazilian Rosewood
Brazilian Rosewood
User avatar

Joined: Thu Mar 22, 2007 10:59 pm
Posts: 2103
Location: Bucharest, Romania
Country: Romania
Focus: Build
Status: Professional
That looks extremely clean. Definitely not attaching well to the spruce.

_________________
Build log


Top
 Profile  
 
PostPosted: Wed Apr 21, 2010 8:20 am 
Offline
Contributing Member
Contributing Member

Joined: Wed Jul 02, 2008 11:44 am
Posts: 1005
Location: SE Michigan
First name: Kenneth
Last Name: Casper
City: Northville
State: MI
Country: U.S.A
Focus: Build
Yeah, definately not bonding. Not sure how to prep the top for regluing. The spruce looks completely clean, but clearly something is inhibiting the bonding. The tape used for masking was the really thin blue stuff, and I had just purchased it. I think the issue is more with my buffing compounds than the tape. Not sure how best to clean the masked area now. I can scrape the wood, but that will be removing fibers. My understanding is I don't want to break any of the fibers, especially along where the tail edge of the bridge will be glued down. The better approach would be to clean the wood. Wonder if some stripper will float the crap to the top and clean the wood.

Ken

_________________
http://www.casperguitar.com


Top
 Profile  
 
PostPosted: Wed Apr 21, 2010 8:44 am 
Offline
Brazilian Rosewood
Brazilian Rosewood
User avatar

Joined: Thu Mar 22, 2007 10:59 pm
Posts: 2103
Location: Bucharest, Romania
Country: Romania
Focus: Build
Status: Professional
I scrape mine really hard using a freshly sharpened 3/4 chisel, and sometimes a jack plane iron if sharp and at hand, same for the bottom of the bridge. I also try to get a very slight concavity on the bridge same as Jim descried. Not sure how practical is a big blade when you have finish on though, I glue my bridges before finish. Just use a scalpel I guess. I really want to see spruce dust and flurries flying away that means I am exposing fresh clean wood. It is not the same as deep scoring through fibers.

_________________
Build log


Top
 Profile  
 
PostPosted: Wed Apr 21, 2010 9:01 am 
Offline
Brazilian Rosewood
Brazilian Rosewood

Joined: Thu Feb 12, 2009 10:27 pm
Posts: 2109
Location: South Carolina
First name: John
Last Name: Cox
Focus: Build
Status: Amateur
Don't use strippers or solvents -- they can soak whatever is on the surface deeper into the wood.

You want "Fresh" wood. It bonds to the glue the best.

It is time to properly scrape the wood with a good sharp scraper.

Thanks

John


Top
 Profile  
 
PostPosted: Wed Apr 21, 2010 4:11 pm 
Offline
Brazilian Rosewood
Brazilian Rosewood

Joined: Fri Dec 14, 2007 3:21 pm
Posts: 3445
Location: Alexandria MN
Unless I missed it I didn't see you mention your clamping technique. With the Stew Mac type jig I've noticed that unless you have a very rigid clamp in the middle, tightening the wing cauls will relieve pressure in the central part of the bridge. I've actually gone back to using separate clamps on the wings like I started with 12 years ago.
Terry

_________________
It's not what you don't know that hurts you, it's what you do know that's wrong.


Top
 Profile  
 
PostPosted: Wed Apr 21, 2010 9:37 pm 
Offline
Contributing Member
Contributing Member

Joined: Wed Jul 02, 2008 11:44 am
Posts: 1005
Location: SE Michigan
First name: Kenneth
Last Name: Casper
City: Northville
State: MI
Country: U.S.A
Focus: Build
Terence Kennedy wrote:
Unless I missed it I didn't see you mention your clamping technique. With the Stew Mac type jig I've noticed that unless you have a very rigid clamp in the middle, tightening the wing cauls will relieve pressure in the central part of the bridge. I've actually gone back to using separate clamps on the wings like I started with 12 years ago.
Terry


Hi Terry, I have a jig that is essentially a flat block about the size of the bridge. I bolt it down through the bridge though a couple of bridge pin holes. The wings of the block have threaded inserts that I run bolts through to hold down the wings. It works very well and allows me to get pretty even pressure all across the bridge. So I don't think my clamping is at fault.

Didn't have a chance to do anything this evening. I'll see if I can get the area scraped area tomorrow. Wondering if perhaps I should try some different glue such as Titebond. I have never worked with hide glue and am not set up to use it. I have seen cold hide glue in a bottle. I have no idea how that compares to the heated stuff.

Ken

_________________
http://www.casperguitar.com


Top
 Profile  
 
PostPosted: Wed Apr 21, 2010 10:09 pm 
Offline
Brazilian Rosewood
Brazilian Rosewood

Joined: Fri Nov 03, 2006 6:50 pm
Posts: 2711
Location: Victoria, BC
First name: John
Last Name: Abercrombie
Status: Amateur
Ken C wrote:
I have never worked with hide glue and am not set up to use it. I have seen cold hide glue in a bottle. I have no idea how that compares to the heated stuff.
Ken


Ken-
Once you get the gluing surfaces completely free of polishing and buffing compound residues you should be good to go with whatever glue you choose, IMO.
I'd stay away from the 'cold hide glue'. If you want something close to hot hide glue in bonding- but completely different working properties- try fish glue. It's sticky, dries glassy hard and really holds - I had to take apart a fish glue joint that was 12 hrs old and it was an epic battle with steam, hot water, heated palette knives, etc..
Fish glue does need long clamping, but it has nice long working time as well.
LeeValley sells it.
I also use LV 2002 glue in guitar assembly- that's what they were using in Sergei deJonge's shop when I was there taking a class in '07. It's good stuff. (For bridges I generally use fish glue.)

Cheers
John


Top
 Profile  
 
PostPosted: Fri Apr 23, 2010 9:40 pm 
Offline
Koa
Koa

Joined: Fri Sep 30, 2005 10:33 pm
Posts: 954
Location: United States
I will say that I too have gone back to old-fashioned clamping for the bridge, I've found that those bridge clamping jigs that sit on top of the bridge with threaded wing screws just don't seem to get the needed clamping pressure, I sure feel better about using three C clamps.

_________________
Gwaltney Guitars


Top
 Profile  
 
PostPosted: Fri Apr 23, 2010 9:56 pm 
Offline
Contributing Member
Contributing Member

Joined: Wed Jul 02, 2008 11:44 am
Posts: 1005
Location: SE Michigan
First name: Kenneth
Last Name: Casper
City: Northville
State: MI
Country: U.S.A
Focus: Build
Had some time this evening so I scraped the contaminated spruce top on the OM with a razor blade then roughed it up with some 220g paper prior to gluing the bridge back on with some LMII white glue. We'll see how this one goes.

Guess I need to rework my masking and finishing process. Not sure how to change it yet. It has been a simple, but apparently less than effective, process.

Ken

_________________
http://www.casperguitar.com


Top
 Profile  
 
Display posts from previous:  Sort by  
Post new topic Reply to topic  [ 26 posts ]  Go to page 1, 2  Next

All times are UTC - 5 hours


Who is online

Users browsing this forum: No registered users and 45 guests


You cannot post new topics in this forum
You cannot reply to topics in this forum
You cannot edit your posts in this forum
You cannot delete your posts in this forum
You cannot post attachments in this forum

Jump to:  
Powered by phpBB® Forum Software © phpBB Group
phpBB customization services by 2by2host.com