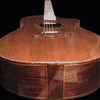
Official Luthiers Forum!

Owned and operated by Lance Kragenbrink
It is currently Thu May 15, 2025 4:51 pm


All times are UTC - 5 hours


Forum rules


Be nice, no cussin and enjoy!


Post new topic Reply to topic  [ 15 posts ] 
Author Message
 Post subject: repairing a cracked top
PostPosted: Mon May 11, 2009 2:14 pm 
Offline
Cocobolo
Cocobolo
User avatar

Joined: Sun Feb 04, 2007 3:48 pm
Posts: 151
Location: United States
Ahh, the dreaded humidity crack from the tail to the bridge...how do YOU repair?

I'm trying my first. After reading here and there on the web, I chose to follow one method involving pressing the crack open from the inside and flooding with CA. Structurally, I'm sure the crack is now fixed...but cosmetically, its now more visible than before the repair...a very dark line in the light spruce top.

To remedy this (I'll try on scrap first), I thought of digging out some of the CA with a very sharp blade, making a very small V-shaped trough in the repair...then filling with Titebond and sanding dust from either side of the repair inthe the glue trough. This method works great for filling small gaps around the bindings and such, thought it may work for this as well.

Can someone suggest a different method?

Thanks

Jon


Top
 Profile  
 
PostPosted: Mon May 11, 2009 5:48 pm 
Offline
Koa
Koa
User avatar

Joined: Sat Jan 03, 2009 7:08 pm
Posts: 524
D'oh, CA to repair a top!? Hide glue or titebond are the glues of choice for soundboard cracks, because they are easy to clean up and don't make a nasty dark line. Forget sawdust and glue, there is no way that is going to look better than what you have. The method that will probably look the best at this point is to do nothing, poking at it will very likely make it worse, unless you are a master at artistic restoration.

The fix that has some chance of looking ok is to cut or route a channel, from the purfling to somewhere under the bridge following the grain lines, and fill it with a matching splint of wood. This is usually done when a humidity crack will not close without extreme measures. I wouldn't do it in this case though.

This is why probably 80% of black topped guitars are black, i have made a few black ones myself!

_________________
Jordan Aceto
Ithaca, NY


Top
 Profile  
 
PostPosted: Mon May 11, 2009 7:26 pm 
Offline
Koa
Koa
User avatar

Joined: Wed Jan 30, 2008 11:16 pm
Posts: 718
The V Trough will blend it in pretty good. Just make sure it matches.

_________________
Here is what a Parlor Guitar is for!
http://www.youtube.com/watch?v=oEa8PkjO6_I


Top
 Profile  
 
PostPosted: Mon May 11, 2009 7:52 pm 
Offline
Brazilian Rosewood
Brazilian Rosewood

Joined: Sat Dec 03, 2005 10:04 am
Posts: 2060
jordan aceto wrote:
D'oh


D'oh, indeed. What web site, pray tell, did this recommended method come from? Should have asked here before doing something irreversible.

I assume this is on a completed, finished (factory?) instrument? Chances are that unless you're an absolute master at filling and touchup, you're just going to head down a long spiral of each step making it worse and more apparent. It was a bad move, but it is what it is now. I say leave it, live and learn.

_________________
Eschew obfuscation, espouse elucidation.


Top
 Profile  
 
PostPosted: Tue May 12, 2009 2:23 pm 
Offline
Brazilian Rosewood
Brazilian Rosewood
User avatar

Joined: Tue Jan 25, 2005 6:16 am
Posts: 2692
A trough with sawdust and glue fill is an awful idea. It will look much worse and be structurally unsound. Do not do this.

CA can be used for a tight--no visible gap--crack as far as structural concerns go. But it will mess up the finish and it's impossible to clean off the excess. So it can be a viable repair method during construction (better for back and sides than for the top), but not a good idea after finishing. It's not clear whether this is a completed guitar.

There's probably no way you will improve the appearance. Cutting out the crack and splinting is 99% likely to look worse, and to open up sometime. It is one of the hardest repairs to get looking good.

It probably would be good to back up the crack with cleats.

_________________
Howard Klepper
http://www.klepperguitars.com

When all else fails, clean the shop.


Top
 Profile  
 
PostPosted: Tue May 12, 2009 2:47 pm 
Offline
Contributing Member
Contributing Member
User avatar

Joined: Wed Oct 08, 2008 11:36 am
Posts: 7453
Location: Southeast US
City: Lenoir City
State: TN
Zip/Postal Code: 37772
Country: US
Focus: Repair
Ok guys, this one hit home - I've got a 15yr old D28 with this exact problem. I know its not unusual, I just haven't tried to fix one myself. I was planning humidify the guitar, if needed, to close up the crack then warm up the top and work in hide glue. When complete I thought I would put in a few cleats.

Does this sound like a reasonable plan?

_________________
Steve Smith
"Music is what feelings sound like"


Top
 Profile  
 
PostPosted: Tue May 12, 2009 3:42 pm 
Offline
Koa
Koa
User avatar

Joined: Sat Jan 03, 2009 7:08 pm
Posts: 524
SteveSmith wrote:
I was planning humidify the guitar, if needed, to close up the crack then warm up the top and work in hide glue. When complete I thought I would put in a few cleats.

Does this sound like a reasonable plan?


Yep, reasonable indeed. I use a long rectangular mirror, that just fits through the soundhole, so that i can see the beads of glue coming through the underside of the top as i work the glue in. The only thing to watch out for, is if the crack is gapingly open, or takes extreme humidity to bring it closed, that is when i start thinking about routing and splinting. It doesn't sound like yours is that bad though.

Howard Klepper wrote:
(better for back and sides than for the top)


Agreed, it is about the best stuff for cracks in most hardwoods, especially rosewoods and ebony, before there is any finish on.

Howard Klepper wrote:
Cutting out the crack and splinting is 99% likely to look worse, and to open up sometime. It is one of the hardest repairs to get looking good.


Agreed that it is tricky, and not recommended for this case. I just thought i would bring it up, kind of crossing options off the list out loud. It is a valid repair though, up here in the northeast during the winters there are lots of guitars with extreme humidity related cracks, and pretty much the only fix is the splint method, it is a fairly common repair, and not that hard to do well, especially without finish to touch up.

_________________
Jordan Aceto
Ithaca, NY


Top
 Profile  
 
PostPosted: Tue May 12, 2009 4:15 pm 
Offline
Cocobolo
Cocobolo
User avatar

Joined: Sun Feb 04, 2007 3:48 pm
Posts: 151
Location: United States
Thanks for the insight, all.

This guitar was my fourth build and is NOT a museum piece. There were enough flaws in the finish to warrant taking it back down to bare wood again, so matching the finish on this repair won't be an issue.

I checked out the reciprocating blade thing by StewMac, supposedly a tool to cut in the channel for a splice. That looks like about the scariest way to do this sort of surgery, if you ask me. Why not just make a straight-edge fence jig from the soundhole to the tail of the guitar, chuck up a teeny-tiny little inlay routing bit in the Dremel, and route a splice channel that way? Nice and square, no fluctuations in width or depth, no "wedging" a splice in....seems pretty fool-proof, really.

Maybe "fool" is the operative word here. :lol:


Top
 Profile  
 
PostPosted: Tue May 12, 2009 5:09 pm 
Offline
Koa
Koa
User avatar

Joined: Sat Jan 03, 2009 7:08 pm
Posts: 524
jsimpson wrote:
Why not just make a straight-edge fence jig from the soundhole to the tail of the guitar, chuck up a teeny-tiny little inlay routing bit in the Dremel, and route a splice channel that way? Nice and square, no fluctuations in width or depth, no "wedging" a splice in....seems pretty fool-proof, really.


That is exactly how i do it, i run it underneath the bridge if i can. I use the same jig that i use for routing saddle slots. Fool proof... not quite, but possible.

Back to your original post, i think more has been made of it than it probably warrants, by me mostly. In all likely hood, after the guitar is finished and done the little dark line won't show up too much at all, or at least not enough to loose sleep over, especially if you like a little amber in your finish. We all have those little spots on our guitars that jump right out at us, because we know right where to look for them, but most anyone else looking at your guitar will be much more charitable and less critical than yourself. It is hard to know when to stop poking at it and call it good, and when to accept nothing but perfection, when there is a big roll of the dice for a minor improvement, that's when i am inclined to stop and let it be.

_________________
Jordan Aceto
Ithaca, NY


Top
 Profile  
 
PostPosted: Tue May 12, 2009 7:53 pm 
Offline
Brazilian Rosewood
Brazilian Rosewood
User avatar

Joined: Tue Jan 25, 2005 6:16 am
Posts: 2692
jordan aceto wrote:
Howard Klepper wrote:
Cutting out the crack and splinting is 99% likely to look worse, and to open up sometime. It is one of the hardest repairs to get looking good.


Agreed that it is tricky, and not recommended for this case. I just thought i would bring it up, kind of crossing options off the list out loud. It is a valid repair though, up here in the northeast during the winters there are lots of guitars with extreme humidity related cracks, and pretty much the only fix is the splint method, it is a fairly common repair, and not that hard to do well, especially without finish to touch up.


All agreed, Jordan. It's splinting on a finished, aged guitar and matching the color and chatoyance of the splint to the top, and then matching the color of the finish that requires real artistry. I've never been near to mastering that one.

_________________
Howard Klepper
http://www.klepperguitars.com

When all else fails, clean the shop.


Top
 Profile  
 
PostPosted: Wed May 13, 2009 6:49 am 
Offline
Koa
Koa
User avatar

Joined: Sat Jan 03, 2009 7:08 pm
Posts: 524
jordan aceto wrote:
It's splinting on a finished, aged guitar and matching the color and chatoyance of the splint to the top, and then matching the color of the finish that requires real artistry.


No one will be arguing that! The only thing that could make it worse would be a sunburst. I have a friend who is far better than me at those jobs, and i try to send them his way as much as possible.

_________________
Jordan Aceto
Ithaca, NY


Top
 Profile  
 
PostPosted: Fri May 15, 2009 11:32 am 
Offline
Contributing Member
Contributing Member
User avatar

Joined: Wed Oct 08, 2008 11:36 am
Posts: 7453
Location: Southeast US
City: Lenoir City
State: TN
Zip/Postal Code: 37772
Country: US
Focus: Repair
jordan aceto wrote:
SteveSmith wrote:
I use a long rectangular mirror, that just fits through the soundhole, so that i can see the beads of glue coming through the underside of the top as i work the glue in.


I need some advice. I'm working on this right now and after humidifying the guitar the crack is very, very tight (couldn't get any better). But I can't get any movement and am not sure what the proper technique is to work some HHG into this thing.

_________________
Steve Smith
"Music is what feelings sound like"


Top
 Profile  
 
PostPosted: Sat May 16, 2009 9:50 am 
Offline
Koa
Koa
User avatar

Joined: Sat Jan 03, 2009 7:08 pm
Posts: 524
jordan aceto wrote:
But I can't get any movement and am not sure what the proper technique is to work some HHG into this thing.


I blob some on and smush it in with my fingers, i press down pretty hard to open and close the crack up and down, which pulls the glue in. I also have a little suction cup, a little bit bigger than a quarter which i sometimes use to force glue in to stubborn cracks, usually i just use fingers though. I use pretty thin HHG for tight cracks. It cleans off the finish no problem, with just a damp rag.

_________________
Jordan Aceto
Ithaca, NY


Top
 Profile  
 
PostPosted: Sat May 16, 2009 9:59 am 
Offline
Brazilian Rosewood
Brazilian Rosewood

Joined: Fri Aug 19, 2005 4:02 am
Posts: 3269
Location: The Woodlands, Texas
First name: Barry
Last Name: Daniels
In addition to Jordan's technique, I place one arm inside the guitar through the soundhole and push up on the crack with a fingertip. This opens the crack up on top a little allowing the glue to penetrate better. After a minute or so, you can usually see a few small drops of glue squeezing out of the crack on the inside, indicating full penetration.


Top
 Profile  
 
PostPosted: Sat May 16, 2009 10:35 am 
Offline
Contributing Member
Contributing Member
User avatar

Joined: Wed Oct 08, 2008 11:36 am
Posts: 7453
Location: Southeast US
City: Lenoir City
State: TN
Zip/Postal Code: 37772
Country: US
Focus: Repair
I cross-posted this on the MIMF cause I needed to get it done yesterday and I ended up just going ahead and doing it. But I feel more confident now since I ended doing just what you two described. I also used HHG and added some cleats inside to reinforce the crack. Thanks!

_________________
Steve Smith
"Music is what feelings sound like"


Top
 Profile  
 
Display posts from previous:  Sort by  
Post new topic Reply to topic  [ 15 posts ] 

All times are UTC - 5 hours


Who is online

Users browsing this forum: No registered users and 11 guests


You cannot post new topics in this forum
You cannot reply to topics in this forum
You cannot edit your posts in this forum
You cannot delete your posts in this forum
You cannot post attachments in this forum

Jump to:  
Powered by phpBB® Forum Software © phpBB Group
phpBB customization services by 2by2host.com