Official Luthiers Forum!

Owned and operated by Lance Kragenbrink
It is currently Fri Aug 08, 2025 8:38 am


All times are UTC - 5 hours


Forum rules


Be nice, no cussin and enjoy!


Post new topic Reply to topic  [ 36 posts ]  Go to page Previous  1, 2
Author Message
PostPosted: Sun Feb 28, 2010 7:59 am 
Offline
Contributing Member
Contributing Member

Joined: Sun Jan 27, 2008 4:10 pm
Posts: 2764
First name: Tom
Last Name: West
State: Nova Scotia
Country: Canada
Focus: Build
Status: Amateur
Have a homemade one similar to the commercial one shown that I have used for years. Also have a rubber router mat and do the routing as described by David Berkowitz. This does take a bit of skill to do correctly but if you can pull it off it does an excellant job.Interesting to see that someone has used this method and the bigger binding jigs and has returned to this method for better results. Maybe sometimes for the amount of production we have we get too jigged up.More jigs also means you need more space,which can be at a premium for some folks.
Tom

_________________
A person who has never made a mistake has never made anything!!!


Top
 Profile  
 
PostPosted: Sun Feb 28, 2010 10:56 am 
Offline
Contributing Member
Contributing Member
User avatar

Joined: Mon Mar 19, 2007 7:05 am
Posts: 9191
Location: United States
First name: Waddy
Last Name: Thomson
City: Charlotte
State: NC
Focus: Build
Status: Semi-pro
I have a Luthier Tools knock off too, and have been using it on the last few guitars. The problem I have with it is that the uneven slopes of the body cause uneven depth of purfling and binding ledges. The width of the table on the tool rides too high as the body curves, and decreases the depth of the cut. I added a little doughnut half circle to cut down on the impact of the variation. The current guitar will tell if it worked. On the purfling ledges the variation was only about .1 mm this time instead of .3 - .4 mm Which to me is the difference between just right and too thin. It is easy to tip, if you aren't careful. I find that I can control it pretty well, if I keep nearly all control on the base that rides against the side, and push slightly away on the top of the trimmer - not enough to tip it, but just enough to keep it from tipping in.

_________________
Waddy

Photobucket Build Album Library

Sound Clips of most of my guitars


Top
 Profile  
 
PostPosted: Sun Feb 28, 2010 1:43 pm 
Offline
Cocobolo
Cocobolo
User avatar

Joined: Sat Oct 21, 2006 7:07 am
Posts: 280
Location: United States
I made a jig from the LMI plans using a stationary router and mobile body cradle. Took a day to make and cost almost nothing. It has turned from a nerve-racking unpleasant job to a routine chore. I do need to deepen the route by hand a bit on the back upper bout but this is pretty simple. John Hall sells a similar jig.

I am lusting after the luthiertools neck jig- looks totally awesome- maybe when I win the lottery.

_________________
It's not the miles ahead, it's the stone in your shoe


In Markham,Virginia


Top
 Profile  
 
PostPosted: Sun Feb 28, 2010 1:52 pm 
Offline
Koa
Koa
User avatar

Joined: Sat Aug 19, 2006 1:29 am
Posts: 1384
Location: United States
I use this style also. I built a home version that lets you use a piece of the binding/purfling as the offset so you never have to set the depth. I will post a photo when I get home later. It took a bit to get used to it but I haven't gouged a top or side in a long time. I agree that it can blow out a little bit on side runout but even that has not happened in a while.

_________________
Burton
http://www.legeytinstruments.com
Brookline, MA.


Top
 Profile  
 
PostPosted: Sun Feb 28, 2010 3:11 pm 
Offline
Contributing Member
Contributing Member
User avatar

Joined: Fri Aug 26, 2005 5:49 pm
Posts: 2915
Location: Norway
Wayne Clark wrote:
Jon,

I recall seeing one of those Taylor factory tour videos where the binding cutter was clamped in place and the tech moved the guitar body over it. He made it look so simple, but I'm sure that came from repeating the same action hundreds of times.


That's how I do it, and I find it easier to do than the other way around. One hand on the guides the guitar on the jig while the other hand "feeds" the guitar to the tool. The hand on the jig / guitar keeps it steady and insures that it does not tip away from the contact points, which on my version of this jig is a pair of bearings and a steel washer glued to the bottom of the base of the jig (not clearly visible in the picture).

Attachment:
15-15.jpg


You do not have the required permissions to view the files attached to this post.

_________________
Rian Gitar og Mandolin


Top
 Profile  
 
PostPosted: Sun Feb 28, 2010 5:02 pm 
Offline
Koa
Koa
User avatar

Joined: Sun Jun 12, 2005 11:46 am
Posts: 720
Location: Australia
I built mine many years ago after reading Jim William's book , but included a more precise depth and width adjustment.It uses the upper part of the Stewmac router base for the depth adjustment and my own arrangement for width adjustment. Never had a problem using it and get very consistant channels.
The handle helps a lot in keeping both bearings contacting the sides avoiding tipping . I'm still using a Dremel as the cutter .( It has zero run-out ) Being less weight than a Lam trimmer , it helps with any top heavy issues. Some folk feel they are underpowered , but I haven't found that to be the case . Maybe because mine is the 240 volt model ? ? I usually do it in two passes and find the spiral down cut bits leave a cleaner edge.

Attachment:
anz81.jpg


Attachment:
anz101.jpg


I made this simple arrangement to hold the guitar yet still allow clearance for the bearings to register against the sides .

Attachment:
anz51.jpg


Attachment:
anz121.jpg


More info on this here :http://www.anzlf.com/viewtopic.php?t=192


You do not have the required permissions to view the files attached to this post.

_________________
CRAIG LAWRENCE of AUSTRALIA
_____________________________________________


Top
 Profile  
 
PostPosted: Mon Mar 01, 2010 5:30 pm 
Offline
Koa
Koa
User avatar

Joined: Sat Aug 19, 2006 1:29 am
Posts: 1384
Location: United States
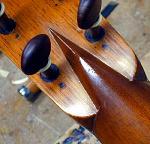
Craig, that looks really sweet!

Here is mine. I made a feature where you set the depth of cut using pieces of your actual binding and purfling. I got the idea from someone describing Mike Mahar's purfling scorer to me, which uses a similar idea. Please forgive the rough construction of the machine :?

The first photo here shows the 2 pieces separated. The lower part rides in the slot in the bigger part. You can see the "donut" part is screwed on and is made from the Lee Valley jig making material. I can never remember the exact letters, uhwm or something like this. When doing an arm bevel you can take it off and use the extra depth to route a larger channel which is very helpful.

Attachment:
jig-from-below.jpg


This next photo shows the 2 pieces attached to each other. There is a threaded knob that locks it in from above. The arm part that rides against the guitar adjusts in and out with the brass screw and can be locked in position with the 2 small allen screws in the upper and lower round guides. It should be set to be perfectly parallel to the router bit and locked in place.

Attachment:
jig-offset-arm.jpg


This is a view from above. You can see the locking threaded knob that holds it all together. Also, you can see that the upper part of the lower section is firmly butted up against the cross piece on the main housing. It should be tight against there when you set your lower dowel (the part that rides against the guitar) parallel to the router bit.

Attachment:
jig-from-above.jpg


Then, you loosen the threaded locking knob and insert a piece of binding between the upper part of the lower arm and the cross piece. and.... whammo your offset is perfectly sized to your piece of binding. You lock the knob back down and go to town. Once that channel is cut you raise the router bit a some and insert your purfling next to your binding and cut the next channel. If you are worried about the glue line swelling things you can insert a piece of friskit material or maybe even some typing paper as some precaution.

Attachment:
jig-from-above-with-binding.jpg


I find this very useful because I usually make my own purfling and this allows me complete flexibility in how thick it can come out. I don't have to worry as much if I am a few thousandths too big or small for my bearing set. Eventually I will remake it a little prettier but for now it works great. I am using 1/4" downcut bits to do the cutting. I got a deal on some long ones, that is why the donut is so large. If I made it again though I would keep the donut that big for the reasons stated above. I had previously made a large version using the same idea that uses a full size router and requires you to move the guitar over the jig. I still use that first and hog out most of the binding ledge with a 1/2 shank router bit. That leaves only a small amount for the lam trimmer to clean up and it never is really working too hard.


You do not have the required permissions to view the files attached to this post.

_________________
Burton
http://www.legeytinstruments.com
Brookline, MA.


Top
 Profile  
 
PostPosted: Mon Mar 01, 2010 9:03 pm 
Offline
Walnut
Walnut

Joined: Wed Aug 27, 2008 9:07 pm
Posts: 9
Location: Naugatuck,
Burton, that is slick!!!


Top
 Profile  
 
PostPosted: Tue Mar 02, 2010 9:08 am 
Offline
Koa
Koa
User avatar

Joined: Sat Aug 19, 2006 1:29 am
Posts: 1384
Location: United States
Thanks Don!

Are you in Naugatuck, CT?

_________________
Burton
http://www.legeytinstruments.com
Brookline, MA.


Top
 Profile  
 
PostPosted: Tue Mar 02, 2010 5:17 pm 
Offline
Cocobolo
Cocobolo
User avatar

Joined: Mon Jan 03, 2005 7:06 am
Posts: 460
Location: United States
I have a similar tool built by Bishop Cochran (prototype). It does take a bit of getting used to, but once you've gotten the hang of it,very easy to use. If you have limited shop space as I do, the fact that it takes up no space while not being used is a great benefit also.

Those of you that are familar with Bishop's tools can attest to the precision of his products. This tool is very well thought out and works beautifully.

_________________
Jimmy Caldwell
http://www.caldwellguitars.com


Top
 Profile  
 
PostPosted: Tue Mar 02, 2010 10:13 pm 
Offline
Walnut
Walnut

Joined: Wed Aug 27, 2008 9:07 pm
Posts: 9
Location: Naugatuck,
Yes Burton, I am


Top
 Profile  
 
Display posts from previous:  Sort by  
Post new topic Reply to topic  [ 36 posts ]  Go to page Previous  1, 2

All times are UTC - 5 hours


Who is online

Users browsing this forum: No registered users and 28 guests


You cannot post new topics in this forum
You cannot reply to topics in this forum
You cannot edit your posts in this forum
You cannot delete your posts in this forum
You cannot post attachments in this forum

Jump to:  
Powered by phpBB® Forum Software © phpBB Group
phpBB customization services by 2by2host.com