Official Luthiers Forum!

Owned and operated by Lance Kragenbrink
It is currently Tue Aug 19, 2025 12:08 pm


All times are UTC - 5 hours


Forum rules


Be nice, no cussin and enjoy!


Post new topic Reply to topic  [ 13 posts ] 
Author Message
 Post subject: #1 Parlor Progress
PostPosted: Wed Mar 26, 2014 9:04 pm 
Offline
Contributing Member
Contributing Member
User avatar

Joined: Tue Mar 19, 2013 3:34 pm
Posts: 1097
First name: Bob
Last Name: Russell
State: Michigan USA
Focus: Repair
Status: Semi-pro
OK, So a lot of you probably thought I was full of it when I said I was building my first guitar over a year ago and have not shown any progress on it...

FIrst I want to thank all of you who have answered some of my questions and have helped me understand the things I didn't get about building. I still have a lot to learn and will probably still have some stupid questions to ask...

I came here thinking it would be pretty easy to scratch build my first guitar since I have been fixing and repairing them for a long time but a lot of you suggested I start with a kit before taking on a scratch built one. Thanks for your advice, It really helped me see the things I didn't know.

What started out as a LMI Parlor kit has turned into a project that I am having a lot of fun building. I came across a picture of a late 1800's German Parlor and fell in love with simplistic looks of it so I decided to design this parlor after it. What I thought was a very simple binding and perfling design was actually a challenge to do.

The guitar is East Indian Rosewood with a Sitka Spruce top. I found a back and side set of unidentified Rosewood that was really dark so I decided to cut the bindings from that. I am still not sure what it is but it is very dark and has a much different smell than the side and back wood of the guitar.

The perfling is Peruvian Walnut and Maple. I chose the Walnut because it is closer to the pictures of the original parlor that I am styling this after.

I decided to French Polish this one and it is the first time I have done it in about 30 years. I use to be pretty good at it so I thought I would try my hand and see if I could pick it up again. This is after about 5 applications, I forgot how much work it was but so far I am pleased with the results (and no lacquer fumes!!!)

Thanks for looking and I will be posting more progress pictures when I get further along.

Cheers,
Bob


You do not have the required permissions to view the files attached to this post.


Top
 Profile  
 
 Post subject: Re: #1 Parlor Progress
PostPosted: Thu Mar 27, 2014 1:19 am 
Offline
Mahogany
Mahogany

Joined: Thu Jun 07, 2012 3:17 pm
Posts: 78
First name: Randy
Last Name: Jones
City: Santa Clara
State: CA
Zip/Postal Code: 95050
Country: United States
Focus: Build
Status: Amateur
Here's hoping the headstock will have the 1968 Mexico City Olympic logo on it :-) Lovely work!


Top
 Profile  
 
 Post subject: Re: #1 Parlor Progress
PostPosted: Thu Mar 27, 2014 1:41 am 
Offline
Contributing Member
Contributing Member
User avatar

Joined: Sat Dec 30, 2006 3:20 am
Posts: 2593
Location: Powell River BC Canada
First name: Danny
Last Name: Vincent
Wow! I like it a lot Bob. It's going to be a very unique look. Parlours are always cool in my books and that's a great rosette / purfling scheme. One suggestion if you're not too far along in the finishing, you could add a wedge on the butt end of the binding. Not unlike a Petit Bouche (Selmer) rosette.http://www.google.ca/search?q=petite+bo ... 04&bih=891. Clean 'er up a little.

Cheers,
Danny


Top
 Profile  
 
 Post subject: Re: #1 Parlor Progress
PostPosted: Thu Mar 27, 2014 8:11 am 
Offline
Contributing Member
Contributing Member

Joined: Fri Oct 14, 2011 10:29 am
Posts: 502
First name: joseph
Last Name: sallis
City: newcastle-upon-tyne
State: tyne and wear
Zip/Postal Code: ne46xe
Country: UK
Focus: Build
Status: Amateur
Looks great, Bob but I would take Danny's advice- those purflings need sorting at the bottom. I have trouble lining up 2 lines never mind the 16 you have! Not a big job for a repair man like yourself.

_________________
We are all in the gutter but some of us are looking at guitars.


Top
 Profile  
 
 Post subject: Re: #1 Parlor Progress
PostPosted: Thu Mar 27, 2014 8:15 am 
Offline
Brazilian Rosewood
Brazilian Rosewood

Joined: Tue May 13, 2008 10:44 am
Posts: 6262
Location: Virginia
Joe Sallis wrote:
Looks great, Bob but I would take Danny's advice- those purflings need sorting at the bottom. I have trouble lining up 2 lines never mind the 16 you have! Not a big job for a repair man like yourself.


Or perhaps an inlay. I like the look of all those lines. I did a rosette similar to that on a Selmer I built last year and it gives off cool optical illusion affects.


Top
 Profile  
 
 Post subject: Re: #1 Parlor Progress
PostPosted: Thu Mar 27, 2014 8:39 am 
Offline
Contributing Member
Contributing Member
User avatar

Joined: Tue Mar 19, 2013 3:34 pm
Posts: 1097
First name: Bob
Last Name: Russell
State: Michigan USA
Focus: Repair
Status: Semi-pro
Thanks guys,

Yes my plan is to put an ebony flourish at that seam. It will be much smaller than what you see on some of the old Romantic guitars. I originally thought about inlaying it but I didn't really want to weaken the top right on the seam so I think I will just make it very thin and make it an overlay.

Mine will also have an Ebony bridge and fretboard instead of the Rosewood and it is also going to be a steel string...

I probably should have posted a couple of shots of the guitar that I am styling this after so here is what I am inspired by.

I decided not to put the extra ring around the outside of the rosette on my wifes suggestion. She said he really liked the look of it without so I took her suggestion.


I am just now starting on the headstock so it will be my first attempt at a slot head... I just got my vintage restoration tuners from SM yesterday so this should be fun...

Cheers,
Bob


You do not have the required permissions to view the files attached to this post.


Top
 Profile  
 
 Post subject: Re: #1 Parlor Progress
PostPosted: Thu Mar 27, 2014 9:04 am 
Offline
Contributing Member
Contributing Member
User avatar

Joined: Mon Aug 23, 2010 11:42 pm
Posts: 1715
First name: John
Last Name: Parchem
City: Seattle
State: Wa
Zip/Postal Code: 98177
Country: USA
Focus: Build
Status: Amateur
Nice looking parlor!

_________________
http://www.Harvestmoonguitars.com


Top
 Profile  
 
 Post subject: Re: #1 Parlor Progress
PostPosted: Thu Mar 27, 2014 1:12 pm 
Offline
Koa
Koa
User avatar

Joined: Thu Dec 18, 2008 11:42 am
Posts: 1135
Location: Hudson, MA
First name: Kevin
Last Name: Quine
City: Hudson
State: MA
Country: Usa
Focus: Build
Status: Amateur
Yikes....You didn't have to use ALL the purfling on one guitar. Save some for your next build
Looks pretty sweet though


Top
 Profile  
 
 Post subject: Re: #1 Parlor Progress
PostPosted: Thu Mar 27, 2014 10:47 pm 
Offline
Cocobolo
Cocobolo

Joined: Mon Apr 23, 2012 9:50 am
Posts: 496
First name: Phil
Last Name: Hartline
City: Warrior
State: Alabama
Country: USA
Focus: Build
Status: Amateur
Looking good Bob, makes me want to get back to mine!

_________________
Phil

http://www.oleninstruments.com

"Those who tilt at windmills are only considered insane by those who can't see the dragon."


Top
 Profile  
 
 Post subject: Re: #1 Parlor Progress
PostPosted: Thu Mar 27, 2014 11:24 pm 
Offline
Brazilian Rosewood
Brazilian Rosewood

Joined: Fri Dec 14, 2007 3:21 pm
Posts: 3446
Location: Alexandria MN
That really looks cool. How deep did you rout for the purfling? Is there much top left glued to the lining?

_________________
It's not what you don't know that hurts you, it's what you do know that's wrong.


Top
 Profile  
 
 Post subject: Re: #1 Parlor Progress
PostPosted: Fri Mar 28, 2014 12:02 am 
Offline
Contributing Member
Contributing Member
User avatar

Joined: Tue Mar 19, 2013 3:34 pm
Posts: 1097
First name: Bob
Last Name: Russell
State: Michigan USA
Focus: Repair
Status: Semi-pro
Quine wrote:
Yikes....You didn't have to use ALL the purfling on one guitar. Save some for your next build
Looks pretty sweet though


I made enough to actually do another one. laughing6-hehe 
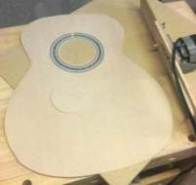
And the practice pieces I went through just figuring out how to make them accurately are enough to do a couple more... But now that I have the system down I can do them in pretty short order and a whole lot cheaper than buying them.


Terence Kennedy wrote:
That really looks cool. How deep did you rout for the purfling? Is there much top left glued to the lining?


If you look at the 4th picture down you can see they are pretty shallow. I cut the channels at .035" and held my breath that I didn't slip. But I figured that once they were all glued in it actually is stronger at the rim. I am still a bit concerned it may have made the top tighter and not allow it to vibrate as much as it would have without them. We will see...

Bob


Top
 Profile  
 
 Post subject: Re: #1 Parlor Progress
PostPosted: Fri Mar 28, 2014 5:11 am 
Offline
Old Growth Brazilian Rosewood
User avatar

Joined: Fri Nov 02, 2007 9:49 am
Posts: 13673
Location: Ann Arbor, Michigan
First name: Hesh
Last Name: Breakstone
City: Ann Arbor
State: Michigan
Country: United States
Status: Professional
She's looking fantastic Bob!!!! Very nicely done!!! [:Y:]

Love that purfling scheme too and looks like you nailed it with your methodology.


Top
 Profile  
 
 Post subject: Re: #1 Parlor Progress
PostPosted: Fri Mar 28, 2014 8:37 am 
Offline
Contributing Member
Contributing Member
User avatar

Joined: Tue Mar 19, 2013 3:34 pm
Posts: 1097
First name: Bob
Last Name: Russell
State: Michigan USA
Focus: Repair
Status: Semi-pro
Thanks Hesh,

And thanks for the feedback when I was at your shop. I pretty much knew what I had to do but you and Dave helped solidify the procedure. Since I had never done anything more then they typical Gibson or Martin b/w/b perfling before this was a challenge.

Only a couple of mistakes and that is at the waist. You can see where they got squeezed together more and left a small gap. A bit of walnut dust filled it in nicely but it is still noticeable. I know that would look better than trying to fill it in with spruce and trying to match the top. It shows right up in that one close up shot but it isn't that predominate in real life... Next time I do something like this I will know to take into account the air gap when they go around a tight bend.

But I over all I am pretty satisfied with it. I figured there would be mistakes since it is my first.

Speaking of MISTAKES.... Last night I really messed up. I got a small piece of fuzz almost dead center in the top while I was French Polishing it. So I carefully plucked it out and figured I could just add a bit more alcolhol to my rubber and just smooth it out...

Note to self: Keep the rubber moving at all times.

duh I stuck the rubber to the top and made a much bigger spot than that little speck of fuzz.

Good thing it is French Polish and reparable.


Bob


Top
 Profile  
 
Display posts from previous:  Sort by  
Post new topic Reply to topic  [ 13 posts ] 

All times are UTC - 5 hours


Who is online

Users browsing this forum: DennisK and 17 guests


You cannot post new topics in this forum
You cannot reply to topics in this forum
You cannot edit your posts in this forum
You cannot delete your posts in this forum
You cannot post attachments in this forum

Jump to:  
Powered by phpBB® Forum Software © phpBB Group
phpBB customization services by 2by2host.com