Official Luthiers Forum!

Owned and operated by Lance Kragenbrink
It is currently Tue Jul 29, 2025 5:51 am


All times are UTC - 5 hours


Forum rules


Be nice, no cussin and enjoy!


Post new topic Reply to topic  [ 33 posts ]  Go to page 1, 2  Next
Author Message
PostPosted: Fri May 02, 2014 6:12 am 
Offline
Contributing Member
Contributing Member

Joined: Sun Jul 24, 2005 7:12 am
Posts: 735
Location: United States
I have been following the 2 threads on the Collins Saddle Mill. If you have not read them, check them out. This mill provides a method for getting super accuracy on the slot width and the flatness of the bottom of the slot.

So, once you have a near perfect saddle slot, you will need a near perfect saddle to fit in it. The accuracy of the saddle is as important as the accuracy of the saddle slot in getting a good fit. I am interested in other luthiers' methods for accurate thicknessing of the saddle. I am also interested in methods for keeping the bottom of the saddle flat as well as square with the sides so that it matches the saddle slot.

Thanks,

James


Top
 Profile  
 
PostPosted: Fri May 02, 2014 6:23 am 
Offline
Brazilian Rosewood
Brazilian Rosewood

Joined: Wed Apr 08, 2009 9:34 am
Posts: 3081
I would imagine you could devise an expensive solution, but I always liked cutting them large from the 5/16" bone I have, and carefully sanding them on my 12" disc close. Double stick it to a square block. Finally get down to hand sanding and last "buff" to my own liking...400 grit. Not a nut and saddle buffer myself.


Top
 Profile  
 
PostPosted: Fri May 02, 2014 6:47 am 
Offline
Contributing Member
Contributing Member
User avatar

Joined: Fri Aug 26, 2005 5:49 pm
Posts: 2915
Location: Norway
I do it like Hans (double stick the piece to a square block and thickness on the disk or belt sander). A slightly more jigged-up procedure that I have seen involves a holder where the extra thickness of the saddle or nut blank protrudes, and you sand down to a fixed stop, which automatically gives you the correct thickness on the remaining part. Its also possible double stick the piece to work board and use the thickness sander, or even a sanding drum and fence one the drill press / spindle sander, I believe LMI or SM sells a commercial version called the "Luthier's Friend" or some such that would work for this. Anyways, always account for the last sanding grits when shaping the saddle, or it may end up too lose in the slot. To keep the bottom square, I have a simple plywood jig that holds the piece for sanding on the belt or disk sander. It also saves your knuckles and fingertips from losing skin...

_________________
Rian Gitar og Mandolin


Top
 Profile  
 
PostPosted: Fri May 02, 2014 7:40 am 
Offline
Contributing Member
Contributing Member

Joined: Mon Jan 24, 2005 9:09 am
Posts: 138
First name: Yukon
Last Name: Stubblebine
City: East Boston
State: MA
Zip/Postal Code: 02128
Country: USA
Focus: Repair
Status: Professional
The Luthier's Friend saves a lot of time. It's a fairly easy design to jury rig yourself - many of us no doubt were doing something very similar before it became a commercial jig. It let's you get close quickly. I still do the final fitting on a surface plate.


Top
 Profile  
 
PostPosted: Fri May 02, 2014 8:01 am 
Offline
Koa
Koa

Joined: Mon Dec 18, 2006 9:42 am
Posts: 1583
Location: United States
I think I saw a post here recently where the bone was simply placed in a slot on a backer board and run through the drum sander.

For the bottom fit, I think it is important that the saddle be in contact at both ends, but not as important for the saddle to touch in the middle--kind of like a violin bridge. If an end is raised, it flexes and absorbs the vibrations. I have done this. Some luthiers will cut the saddle into individual pieces for each string, and them some will even scoop out the bottom of each piece so it is on two legs and cannot rock.

If you make an exact fit to the slot, what happens if there is some doming under tension and the bone bridge does not deform to match the arc in the slot?


Top
 Profile  
 
PostPosted: Fri May 02, 2014 8:18 am 
Offline
Brazilian Rosewood
Brazilian Rosewood

Joined: Wed Apr 08, 2009 9:34 am
Posts: 3081
wbergman wrote:
If you make an exact fit to the slot, what happens if there is some doming under tension and the bone bridge does not deform to match the arc in the slot?


If I have an outstanding guitar, I will put the guitar in a jig, string it up, jack up the inside, and re-slot the bottom of the saddle slot.


Top
 Profile  
 
PostPosted: Fri May 02, 2014 8:20 am 
Offline
Contributing Member
Contributing Member

Joined: Mon Jan 03, 2005 7:46 am
Posts: 1315
Location: Branson, MO
First name: stan
Last Name: thomison
City: branson
State: mo
Zip/Postal Code: 65616
Country: united states
Focus: Build
Status: Professional
Hold it with my fingers and sand it down on belt sander and use calipers for thickness checks. Low tech, but quick and accurate.

However, don't round or shape ends as it is hard to hold onto and I know they will not be able to find my fingerprints on anything as they have been sanded off the last 15 years.

So maybe a piece of wood with double stick on it better. I just never remember to do that until after I have made the saddles and swear I will do that the next time. But alas, I don't.


Top
 Profile  
 
PostPosted: Fri May 02, 2014 8:37 am 
Offline
Contributing Member
Contributing Member
User avatar

Joined: Fri Jul 10, 2009 4:44 am
Posts: 5583
First name: colin
Last Name: north
Country: Scotland.
Focus: Build
Status: Semi-pro
Over sized blank. home made luthier's friend )120 grit) until close. (I have used a drum sander/ds tape, but didn't like it
Then work up the grits on a flat surface holding the saddle down with fingertips (gloves! -I've removed skin) to around 1000grit, to a "neat fit" - won't drop out, but a finger grip pull will remove it.
Then arch and fit the top of the saddle.
When happy, polish the top of the saddle above the bridge slot only, I use 4 sided nail (micro-mesh) sticks.

_________________
The name catgut is confusing. There are two explanations for the mix up.

Catgut is an abbreviation of the word cattle gut. Gut strings are made from sheep or goat intestines, in the past even from horse, mule or donkey intestines.

Otherwise it could be from the word kitgut or kitstring. Kit meant fiddle, not kitten.


Top
 Profile  
 
PostPosted: Fri May 02, 2014 8:40 am 
Offline
Contributing Member
Contributing Member
User avatar

Joined: Tue Mar 19, 2013 3:34 pm
Posts: 1097
First name: Bob
Last Name: Russell
State: Michigan USA
Focus: Repair
Status: Semi-pro
Call me simple but I do all of mine by hand on a board that I have 3 pieces of stick-it paper, 80 - 120 - 240 grit. I also have an ingenious jig made up of a 1" X 1/2" X 1/4" piece of wood to square up the bottom of the saddle. I do this with the guitar sitting on my bench and test fit as I go.

Unless you are doing a production run of 10+ guitars and every second of your time needs to be accounted for I just don't see a need for any fancy expensive jig. I personally enjoy spending the 10 or 15 minutes working bone into a nut or saddle.

I think some people think guitar making and repair can be turned into some kind of science with reproducible results on each and every piece. That is fine if you are producing 15,000 units per year but then I don't consider that to be the work of a luthier.


When did guitar making stop being an art?

Cheers,
Bob


Top
 Profile  
 
PostPosted: Fri May 02, 2014 8:44 am 
Offline
Brazilian Rosewood
Brazilian Rosewood

Joined: Tue May 13, 2008 10:44 am
Posts: 6262
Location: Virginia
Sand paper glued to MDF. If you wrap your fingers in masking tape so the sticky side is out then it makes a good hold on the saddle. Make sure you spin the work around after so many counted strokes so that you even out the bias in your sanding technique.


Top
 Profile  
 
PostPosted: Fri May 02, 2014 8:54 am 
Offline
Brazilian Rosewood
Brazilian Rosewood

Joined: Sun Mar 30, 2008 8:20 am
Posts: 5968
I use sand paper and a flat surface to thickness, a file and a small vise to flatten the bottom.


Top
 Profile  
 
PostPosted: Fri May 02, 2014 9:06 am 
Offline
Contributing Member
Contributing Member

Joined: Fri Dec 23, 2011 10:17 am
Posts: 295
First name: Linus
City: Brooklyn
State: NY
Zip/Postal Code: 11215
Country: USA
Focus: Build
Status: Amateur
I'm new to guitar building but worked in a repair shop for a number of years doing to a ton of set ups. I thicknessed saddles on a 6" wide belt sander holding them with my fingers. I occasionally wore down my calluses from playing but never anything more. On rare occasion a saddle got away from me and shot across the room. No big deal.

I rounded the edges on the belt sander as well.

Once it slipped in the slot I dropped it in and ran a fine pencil line on the saddle across the top of the bridge. This became my reference for getting the height and curve of the top of the saddle.

The most important thing is make little adjustments and keep checking the result.

Finish sanding was with sandpaper on a flat block working up to steel wool for the buff.


Top
 Profile  
 
PostPosted: Fri May 02, 2014 9:51 am 
Offline
Brazilian Rosewood
Brazilian Rosewood

Joined: Wed Feb 20, 2008 7:15 pm
Posts: 7547
First name: Ed
Last Name: Bond
City: Nanaimo
Country: Canada
Focus: Build
Status: Professional
Image
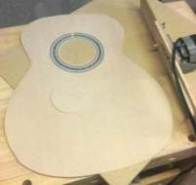
small disc sander drum sander doohickey add on...

Imagekind or like a croupiers stick. Just a thin piece of scrap with a slot cut out for either a nut or a saddle. Just push it through and let it fall out the other side. You especially don't want to try to catch it from the back in case you r fingers get pulled into the contraption.


Top
 Profile  
 
PostPosted: Fri May 02, 2014 11:18 am 
Offline
Brazilian Rosewood
Brazilian Rosewood

Joined: Fri Dec 14, 2007 3:21 pm
Posts: 3445
Location: Alexandria MN
I made a carrier for saddles for my thickness sander. I get them close and then hand sand on a glass plate with a little holder that makes it easier to get even pressure. I usually find something to make a little fence to get the bottom flat and 90 degrees to the side.

I also use the Gilbert drill press disk sander for thicknessing, especially nuts.

I used to be a polish to the max guy but they really look like plastic then so now I leave them at a point where they look more like bone, maybe abut halfway through the grits with micromesh. You can certainly turn a perfect fitting saddle into a loose one polishing so I try to polish mainly the part that shows.

Getting the ends to fit perfectly against the rounded slot end without a gap is always a challenge.

Image

Image

Image

Image

_________________
It's not what you don't know that hurts you, it's what you do know that's wrong.


Top
 Profile  
 
PostPosted: Fri May 02, 2014 11:38 am 
Offline
Old Growth Brazilian Rosewood
User avatar

Joined: Fri Nov 02, 2007 9:49 am
Posts: 13636
Location: Ann Arbor, Michigan
First name: Hesh
Last Name: Breakstone
City: Ann Arbor
State: Michigan
Country: United States
Status: Professional
I'm a bit of a wussy.... thicknessing my saddles in that I don't want to sand my finger tips off on the big-arse, wear an athletic cup when you use it belt sander. So I use a small block of wood with some duct tape on it to hold the blank and thickness on the belt sander to within a few thou of the desired thickness. I also have calipers in hand while doing this.

Then it's back to my bench to swipe the saddle on one of my leveling beams with 220 grit on it. I trial fit, swipe some more, trial fit some more, and keep in mind that I am going to take the saddle to our nut buffer too so I don't want to remove all of the material yet. You also want to, or at least we do, remove all scratches so keep that in mind when approaching final thickness.

So for me it's a belt sander and hand sanding and the nut buffer.

Often in our biz we have to fit a sallde to a f*ctory made slot that may be off by .010" from one end to the other.... So my blanks also get marked as to the top, front, etc. so that I can keep the imperfect orrientation as need be.

Often too instead of struggling with an imperfect slot we simply use the Collins Saddle mill to true up an existing slot. It's also an opportunity to correct scale length, compensation, depth and not just uniformity of the slot.

By the way I really enjoy working with bone blanks and find it to be one of the most relaxing things that I do and fun for me as well.


Top
 Profile  
 
PostPosted: Fri May 02, 2014 12:16 pm 
Offline
Cocobolo
Cocobolo

Joined: Tue Jun 30, 2009 3:20 pm
Posts: 456
Focus: Build
i'm fortunate enough to own a small milling machine, so that's what i use.


Top
 Profile  
 
PostPosted: Fri May 02, 2014 12:30 pm 
Offline
Koa
Koa

Joined: Mon Dec 18, 2006 9:42 am
Posts: 1583
Location: United States
By the way, some builders put an imperceptible taper on the nut so that it drops in from the bass side and cannot slide out the treble side, so that you don't drop the nut if you take all the strings off. When I replicate that, it is easy to do just by hand with sandpaper on a board. You just push a little harder on the spot you want thinner.


Top
 Profile  
 
PostPosted: Fri May 02, 2014 1:52 pm 
Offline
Brazilian Rosewood
Brazilian Rosewood

Joined: Sat Jan 15, 2005 12:50 pm
Posts: 3933
Location: United States
I don't have a sander, so I use a plane jig. Glue a pair of rails to a piece of plywood so the plane will just run between them. Glue in a couple of spacers along the edges, so the plane will ride above the plywood on the edges outside of the slot by the thickness of the saddle. Glue in a stop. Drop in a piece of bone, and plane until it stops cutting. If you've set everything up right you can get amazing accuracy this way.

I find my old Stanley low-angle plane works best for this. I use a shorter bevel, and a slight bevel on the bottom as well, so that the edge is well backed up. The planes with the harder irons tend to chip, but the relatively softer steel on the Stanley holds surprisingly well.

I often just get bone at the pet store. I can rough it on the band saw and plane the surfaces fairly quickly. Usually I leave just a little to dress off on a diamond stone, which leaves a nice flat surface. Then I shoot the bottom with the plane, trim to length and arch the top. Making your own allows you to use wider saddles than much of what you can get, allowing for plenty of meat to adjust intonation.


These users thanked the author Alan Carruth for the post: Nick Royle (Fri May 02, 2014 7:18 pm)
Top
 Profile  
 
PostPosted: Fri May 02, 2014 3:25 pm 
Offline
Koa
Koa
User avatar

Joined: Thu Dec 18, 2008 11:42 am
Posts: 1135
Location: Hudson, MA
First name: Kevin
Last Name: Quine
City: Hudson
State: MA
Country: Usa
Focus: Build
Status: Amateur
Flat surface and sand paper for me. Start with 100 grit to thin it down then finer grits when it gets close to fitting in the slot. I turn the blank often and check with calipers to make sure I don't thin one end more than the other.
Watch those edges though...they get razor sharp. Its hard to get blood stains off bone


Top
 Profile  
 
PostPosted: Fri May 02, 2014 3:56 pm 
Offline
Koa
Koa

Joined: Sun Jul 26, 2009 9:37 am
Posts: 697
First name: Murray
Last Name: MacLeod
City: Edinburgh
Country: UK
I have adopted the system which was advised to me by Rory Dowling of Taran guitars, back in the day when we shared neighboring workshops.

You cut a piece of 3/4" MDF 24" x 1.5" and glue a thin strip of hardwood less than 1/8" thick, and about 1/4" wide along the edge, on the 1.5" face. This becomes a reusable fixture which you can use again and again .

You manually sand one face of the oversized bone blank to be perfectly flat and attach that flat side with double sided tape to your MDF strip, making sure that it is supported by the thin glued-on fillet along the bottom.

You then run the assembly through the tablesaw (with a zero-clearance insert ) ensuring that you have a sharp triple chip blade in the saw, and also ensuring that your initial cut is oversize.

You check the DRO reading at which you made the initial cut, and measure the thickness of the bone blank with your depth caliper. Subtract the required thickness of the bone blank from the actual thickness, and advance the fence in by that amount, less a few thou for final sanding for a snug fit.

Simples ... and it takes far longer to explain it than it does to actually do it ... you do of course need to have a DRO on your tablesaw fence , but I would imagine that there are very few saws nowadays which don't have this. (Or of course you can do it with an Incra fence just as accurately )


Top
 Profile  
 
PostPosted: Fri May 02, 2014 4:46 pm 
Offline
Contributing Member
Contributing Member

Joined: Tue Jan 03, 2006 1:47 pm
Posts: 1624
Location: United States
First name: Larry
Last Name: Hawes
Focus: Build
Status: Amateur
Maybe I'm reading the OP wrong but I route a 1/8" wide slot and buy 1/8" wide saddles. Is that the problem you're trying to solve?

I also have a small mill with a Stew Mac 1/8" bit for cutting slots, off the guitar, before installation btw.

_________________
Thank You and Best To All


Top
 Profile  
 
PostPosted: Fri May 02, 2014 5:06 pm 
Offline
Contributing Member
Contributing Member

Joined: Sun Jul 24, 2005 7:12 am
Posts: 735
Location: United States
Thanks for all the replies.
I use 2 3/4" wide self adhesive sand paper stuck on a flat surface. I have a 6" long plywood block with channels for 3 saddles side by side. I can make 3 with the same number of strokes that i can make 1. The channels are made by gluing strips of spruce just far enough apart that the saddle blank will fit in between. I have a stop at both ends of each saddle made from the same spruce strips. I glued spruce strips for runners on the edge of my block, just far enough a part so they will straddle the the sand paper and ride on the flat surface that the sand paper is attached to. The runners are just a few thou thicker than my finished saddle. I mark the direction and the channel # on the saddle blanks when I start so that I can sand only 1 side of the blank. I check thickness at each end and in the middle of each saddle as I progress. If the middle is thicker than the ends I put a 1/2" long strip of masking tape in the center of the blank as an adjustment. If the center is too thin, I put the tape on the thicker end/ends. I l have some very thin strips of veneer that I can put in the channel,under the blank, if I need to make the entire blank thinner. After I get it close to fitting, I go to a finer grit sand paper and proceed by hand. Sand it, check it, sand it, check it, sand it check it....etc. until I get the fit I need.

I use a straight edge block to keep my saddle square when I flatten the bottom edge. Based on what someone suggested above, I think I will cut a slot in wood block that the blank will fit in with just a few thousands of the edge protruding. Then I can sand until the bone is flush with the edge of the wood block.

James


Top
 Profile  
 
PostPosted: Fri May 02, 2014 5:09 pm 
Offline
Contributing Member
Contributing Member

Joined: Sun Jul 24, 2005 7:12 am
Posts: 735
Location: United States
LarryH wrote:
Maybe I'm reading the OP wrong but I route a 1/8" wide slot and buy 1/8" wide saddles. Is that the problem you're trying to solve?

I also have a small mill with a Stew Mac 1/8" bit for cutting slots, off the guitar, before installation btw.


I seldom find blanks that will fit consistantly fit the slots I cut. I buy the blanks a little oversize and work it down for a snug fit. Most of the ones I am fitting are vintage guitars with the bridge on the guitar. Some times I am filling slots with BRW and re-cutting them. Sometimes it is a slot in a new bridge installed on a guitar.

James


Top
 Profile  
 
PostPosted: Fri May 02, 2014 5:50 pm 
Offline
Koa
Koa
User avatar

Joined: Tue Jan 25, 2005 6:35 am
Posts: 671
Location: United States
Focus: Build
Status: Professional
Like Hesh, I do it by hand, but I add a couple of steps. Bone blanks, particularly for saddles can have some arch along their length, so I flatten one side on the belt sander and then sand it up to 400 on that surface and mark it with a pencil mark. I flip over the blank and sand it with either the belt sander or a flat surface with 120 until I'm within a few thousands of where it's going to need to be. I then work up the grits to 220 and look at the fit. If it's just starting to enter, I'll switch grits to 320 and do some of the last fitting with that and do the very last bit with 400. I'm a believer in a slip in fit. I want it to go in easy and fall out if I turn the guitar over. Too tight a fit doesn't work well with pickups, and it prevents problems when the guitar leaves the shop to someone where its much more humid and they can't get the saddle out because the wood has swollen and won't let go of the saddle.


Top
 Profile  
 
PostPosted: Fri May 02, 2014 6:44 pm 
Offline
Old Growth Brazilian Rosewood
User avatar

Joined: Fri Nov 02, 2007 9:49 am
Posts: 13636
Location: Ann Arbor, Michigan
First name: Hesh
Last Name: Breakstone
City: Ann Arbor
State: Michigan
Country: United States
Status: Professional
murrmac wrote:
I have adopted the system which was advised to me by Rory Dowling of Taran guitars, back in the day when we shared neighboring workshops.

You cut a piece of 3/4" MDF 24" x 1.5" and glue a thin strip of hardwood less than 1/8" thick, and about 1/4" wide along the edge, on the 1.5" face. This becomes a reusable fixture which you can use again and again .

You manually sand one face of the oversized bone blank to be perfectly flat and attach that flat side with double sided tape to your MDF strip, making sure that it is supported by the thin glued-on fillet along the bottom.

You then run the assembly through the tablesaw (with a zero-clearance insert ) ensuring that you have a sharp triple chip blade in the saw, and also ensuring that your initial cut is oversize.

You check the DRO reading at which you made the initial cut, and measure the thickness of the bone blank with your depth caliper. Subtract the required thickness of the bone blank from the actual thickness, and advance the fence in by that amount, less a few thou for final sanding for a snug fit.

Simples ... and it takes far longer to explain it than it does to actually do it ... you do of course need to have a DRO on your tablesaw fence , but I would imagine that there are very few saws nowadays which don't have this. (Or of course you can do it with an Incra fence just as accurately )


This is a great post for vintage guitar enthusiasts because a number of makers back in the day also likely used a method very similar to this. We often see the saw marks (they didn't seem to care about saw marks) indicating that this was how they did it.

This is also the first time that anyone has explained a process to do this with the table saw that I have read.

Thanks Murray, great post and the kind of stuff that fascinates me.

Some years back Dave Collins got interested in how they buffed frets back in the day at the original Gibson plant on Parsons Street. We could see the tell tale signs of a wire wheel on the fret boards. This research led to the development of our four wheel fret buffer which makes sanding frets effortless and very fast.

I love hearing about how things were done in the past. We have an 1870's Martin that the handwork is superb on everything on the instrument. Would love to dig up one of those guys and ask them how they did things.


Top
 Profile  
 
Display posts from previous:  Sort by  
Post new topic Reply to topic  [ 33 posts ]  Go to page 1, 2  Next

All times are UTC - 5 hours


Who is online

Users browsing this forum: Bing [Bot], ChuckB and 6 guests


You cannot post new topics in this forum
You cannot reply to topics in this forum
You cannot edit your posts in this forum
You cannot delete your posts in this forum
You cannot post attachments in this forum

Jump to:  
Powered by phpBB® Forum Software © phpBB Group
phpBB customization services by 2by2host.com