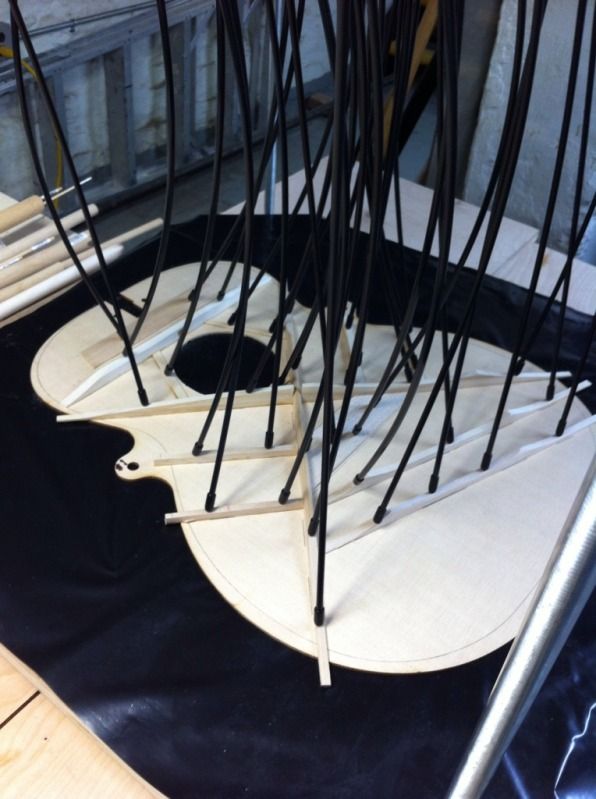
Starting my first build. A pair of mahogony OM's.
It seems that the first step in any build is the jig's and forms.
So I'm well on my way to having a form made. Here are the layers glued together.
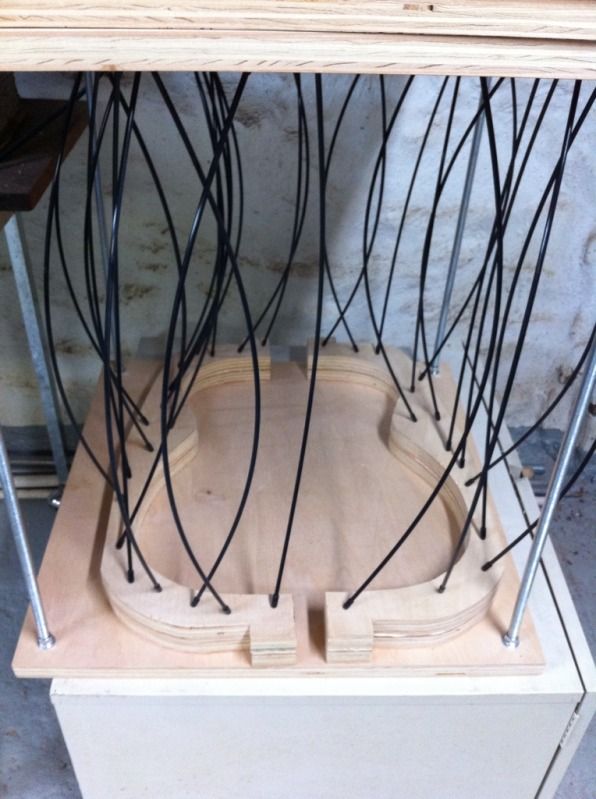
It's exciting to start down this road.
| Official Luthiers Forum! http://www.luthiersforum.com/forum/ |
|
| Starting my first build: a pair of mahogony OM's. http://www.luthiersforum.com/forum/viewtopic.php?f=10122&t=37876 |
Page 1 of 1 |
| Author: | Linus [ Sun Sep 30, 2012 5:51 pm ] |
| Post subject: | Starting my first build: a pair of mahogony OM's. |
Starting my first build. A pair of mahogony OM's. It seems that the first step in any build is the jig's and forms. So I'm well on my way to having a form made. Here are the layers glued together. It's exciting to start down this road. |
|
| Author: | Barry Daniels [ Wed Oct 03, 2012 10:17 am ] |
| Post subject: | Re: Starting my first build: a pair of mahogony OM's. |
I suggest you build one first and then use the knowledge you've gained to make the second one better. |
|
| Author: | Tony_in_NYC [ Wed Oct 03, 2012 11:51 am ] |
| Post subject: | Re: Starting my first build: a pair of mahogony OM's. |
It is exciting alright. And darn expensive in the long run!! But so much fun. |
|
| Author: | Linus [ Thu Oct 04, 2012 1:25 pm ] |
| Post subject: | Re: Starting my first build: a pair of mahogony OM's. |
Barry Daniels wrote: I suggest you build one first and then use the knowledge you've gained to make the second one better. Point well taken. |
|
| Author: | Linus [ Wed Oct 10, 2012 11:36 am ] |
| Post subject: | Re: Starting my first build: a pair of mahogony OM's. |
 I got the neck block, heal block, and kerfing glued in. I just got the top bracing glued in as well. |
|
| Author: | Linus [ Tue Oct 16, 2012 1:42 pm ] |
| Post subject: | Re: Starting my first build: a pair of mahogony OM's. |
I got a bit more time to work on my first OM kit. I got another 1/4 of the kerfing glued in (1 more to go). 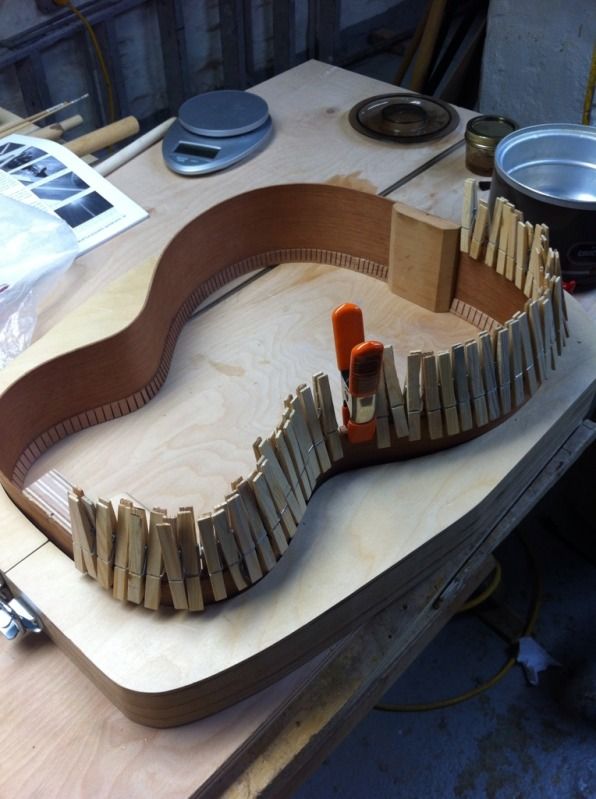 I sanded the other side kerfing on the hollow form so it's radiused. Then I glued the back.  Lots of choices for the next step: shape the top braces, glue the back strip... |
|
| Author: | Linus [ Wed Oct 31, 2012 9:52 pm ] |
| Post subject: | Re: Starting my first build: a pair of mahogony OM's. |
Got a little more done. Joined the back, routed the channel for the backstrip, and scraped it level. 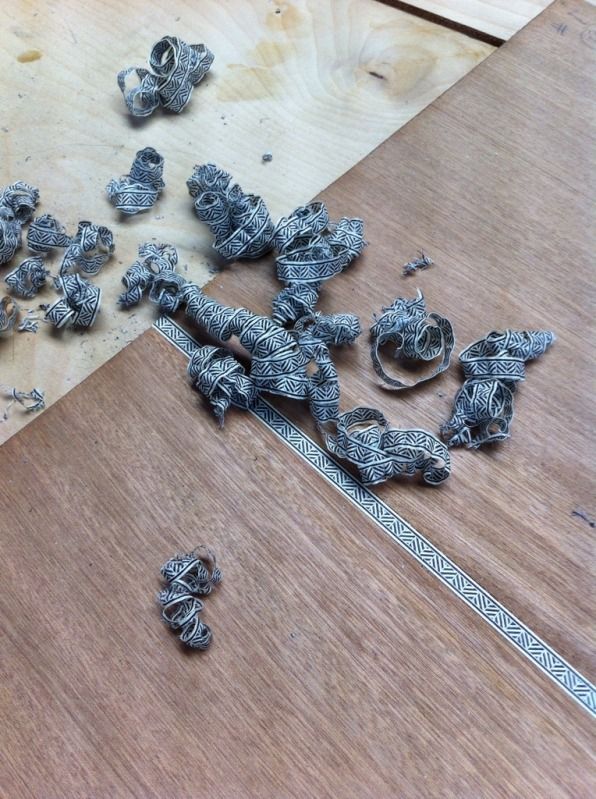
|
|
| Author: | Mike OMelia [ Mon Nov 19, 2012 7:11 pm ] |
| Post subject: | Re: Starting my first build: a pair of mahogony OM's. |
Barry Daniels wrote: I suggest you build one first and then use the knowledge you've gained to make the second one better. +1. Good work |
|
| Author: | Linus [ Tue Nov 20, 2012 2:37 pm ] |
| Post subject: | Re: Starting my first build: a pair of mahogony OM's. |
I've gotten a bit more done recently. I glued the back braces in. 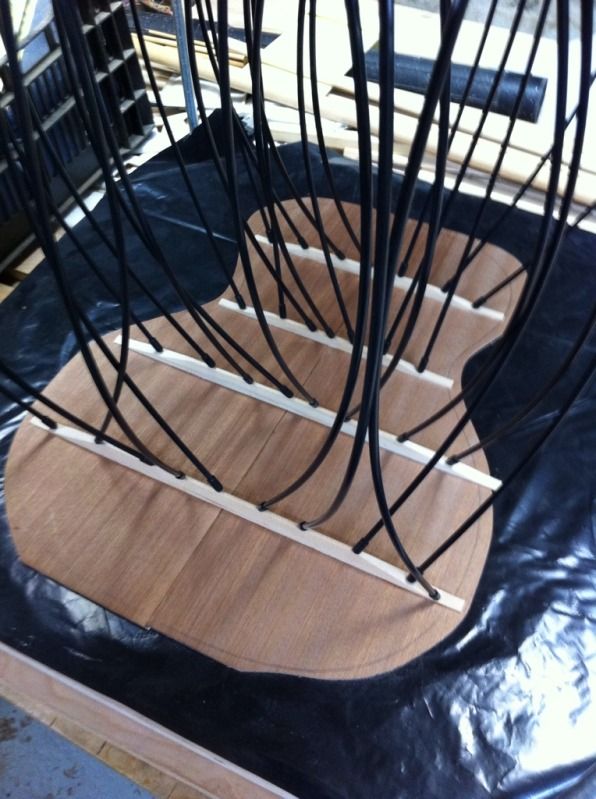 I glued the top and back on and trimmed the overhang flush. I forgot to take pics of that step though. And today I installed the binding. 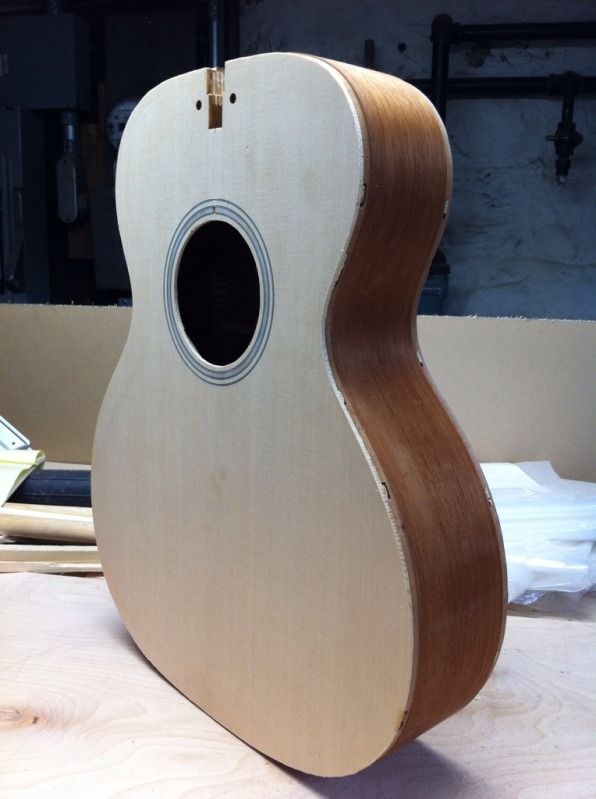 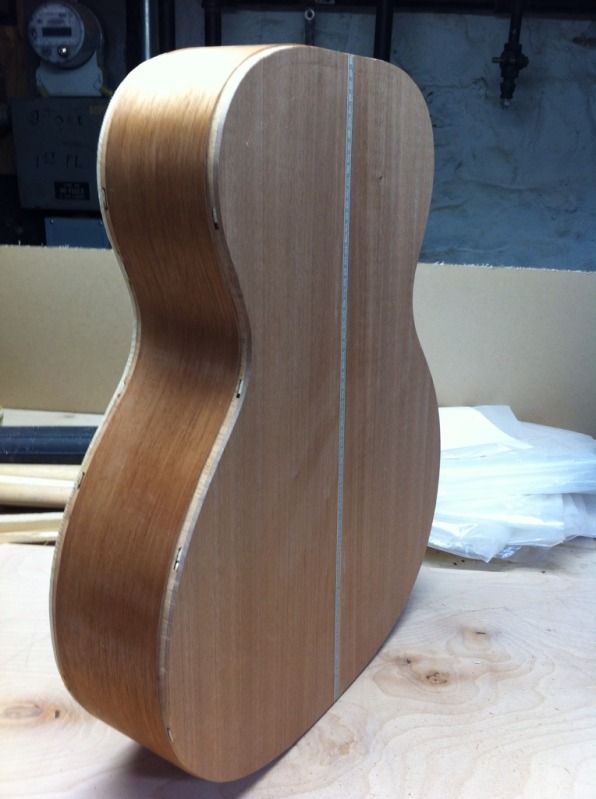 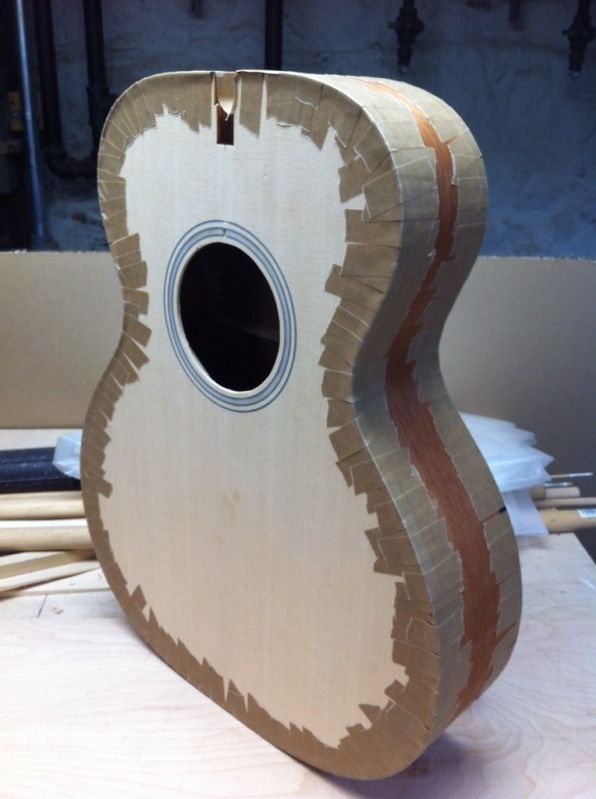
|
|
| Author: | CharlieT [ Tue Nov 20, 2012 7:00 pm ] |
| Post subject: | Re: Starting my first build: a pair of mahogony OM's. |
Looking good, Linus! ![[:Y:]](./images/smilies/smiley20.gif "Thumbs Up")
|
|
| Author: | sploughney [ Tue Nov 20, 2012 8:36 pm ] |
| Post subject: | Re: Starting my first build: a pair of mahogony OM's. |
I've got such an itch to start building again. As I'm sure you now know, once you scratch...it's hard to stop. Great work! I cant wait to see it finished. |
|
| Author: | Linus [ Tue Mar 26, 2013 8:56 pm ] |
| Post subject: | Re: Starting my first build: a pair of mahogony OM's. |
I was negligent in keeping this thread up to date. But I've been chipping away at this first build and finally finished. I learned a ton. I had some setback, but I learned from them too. And the end result is a pretty great little guitar that will ship this weekend to my neice's husband. They have just had twin baby boys and hopefully he'll play this guitar for the boys. I decided on a french polish finish. I didn't use a separate pore filler but tried the pumice method I had read about. It took FOREVER. I'm sure it was operator error but I'll be trying Z-Poxy next time. 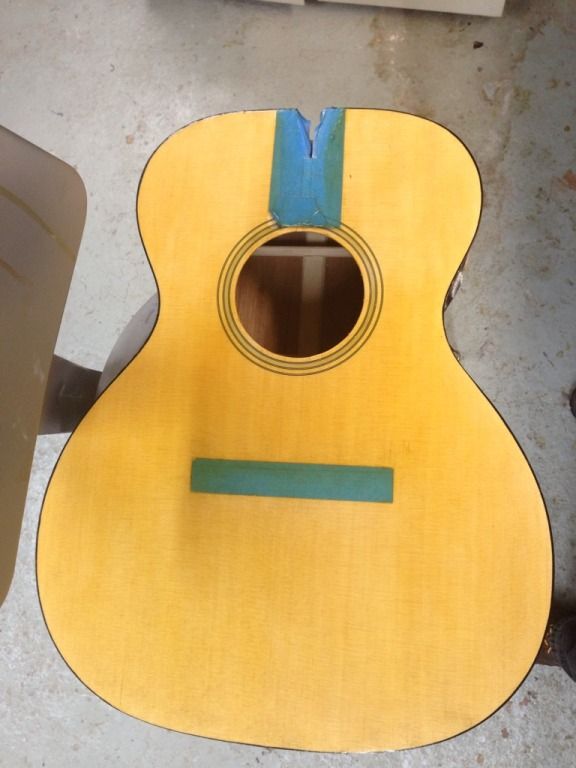 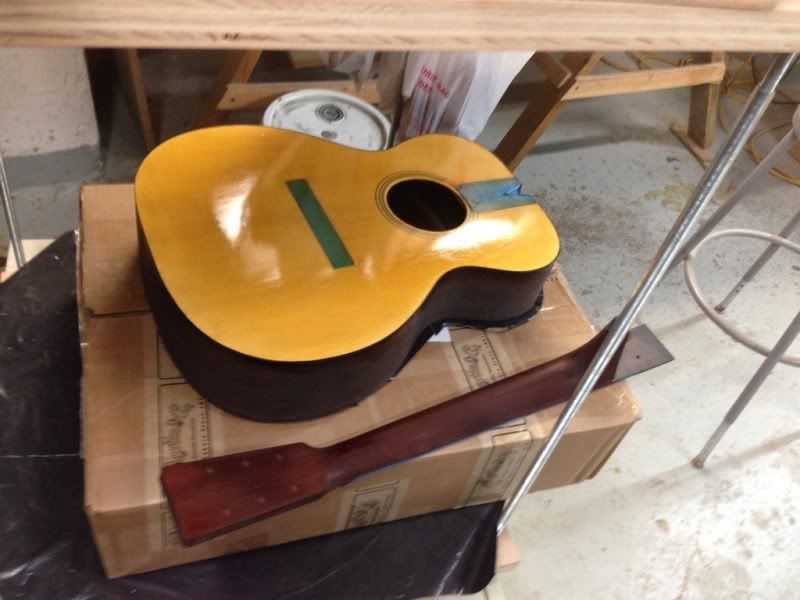 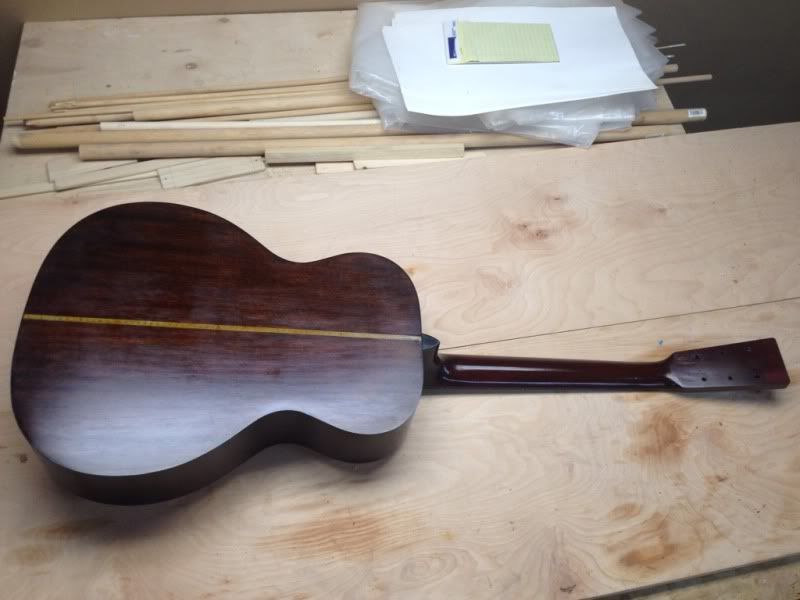 I bought the KMG bridge setter and used the clamp they make as well. It worked really well. 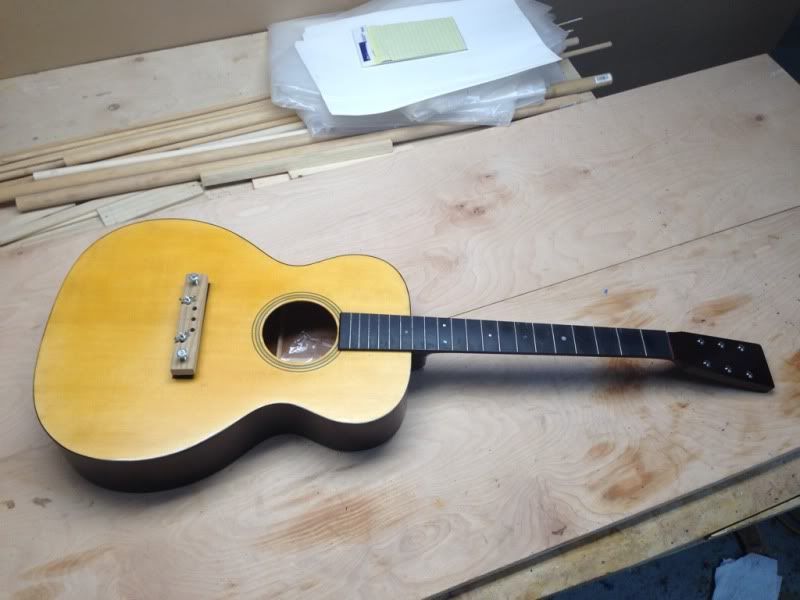 I finished it up then discovered my first major setback. 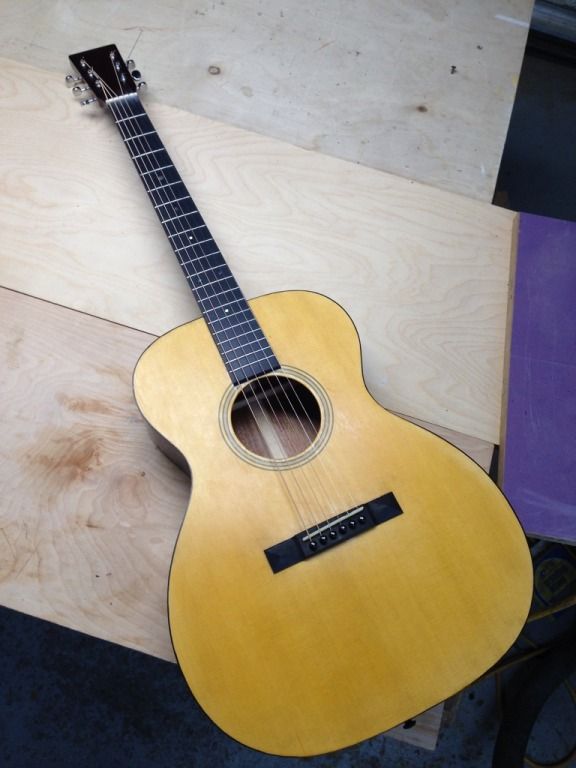 The neck angle was too shallow. The action was too low. I didn't measure closely enough when I was clamping/gluing the neck on. Grrr.... SO... I figured it would be easier for me to adjust the neck angle if I had full access to the neck angle so I took the fretboard off. 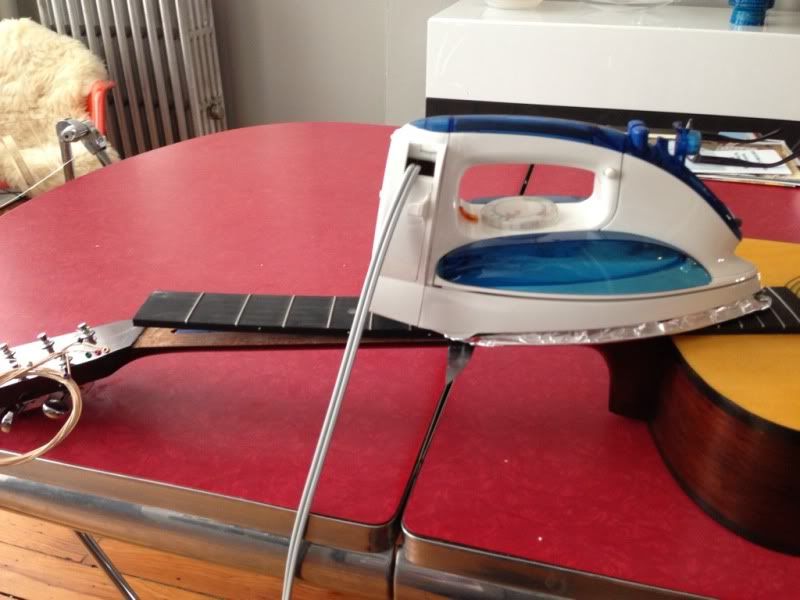 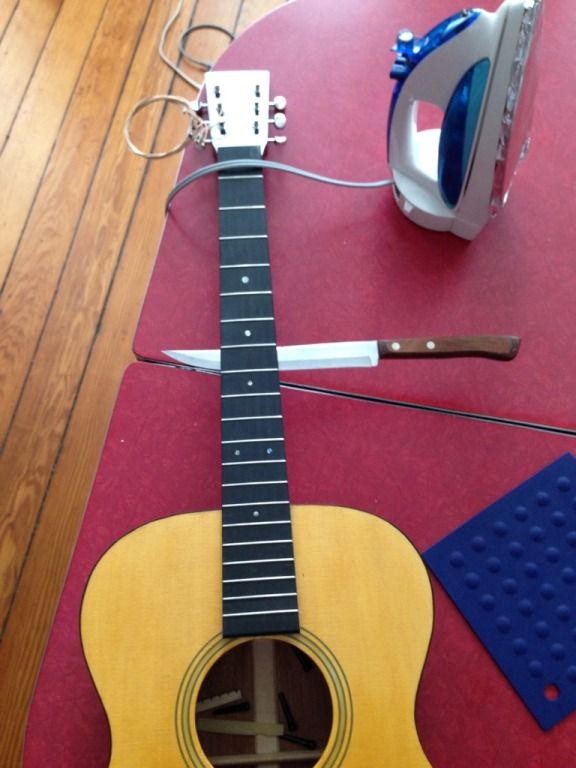 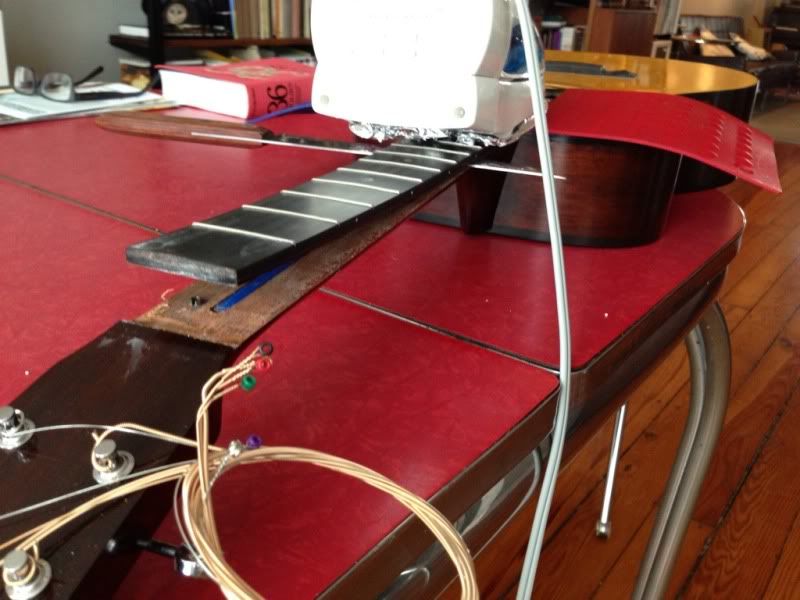 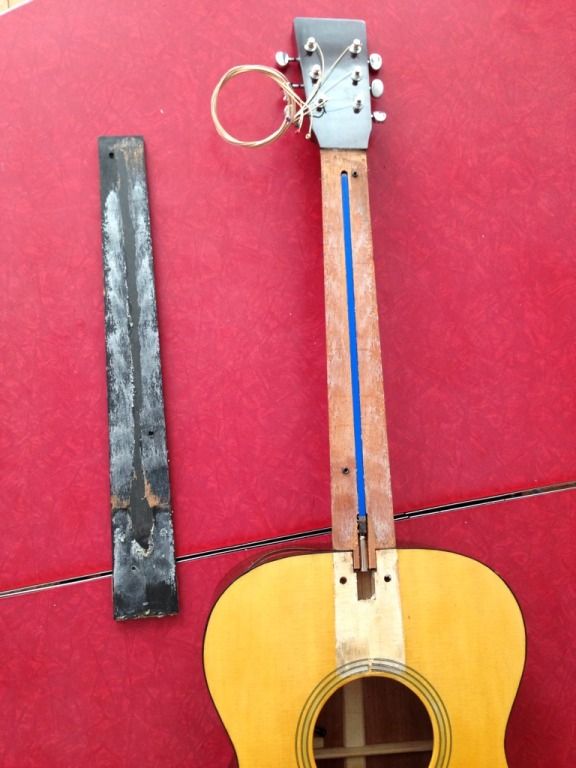 I made the proper adjustments and glued the neck back on. 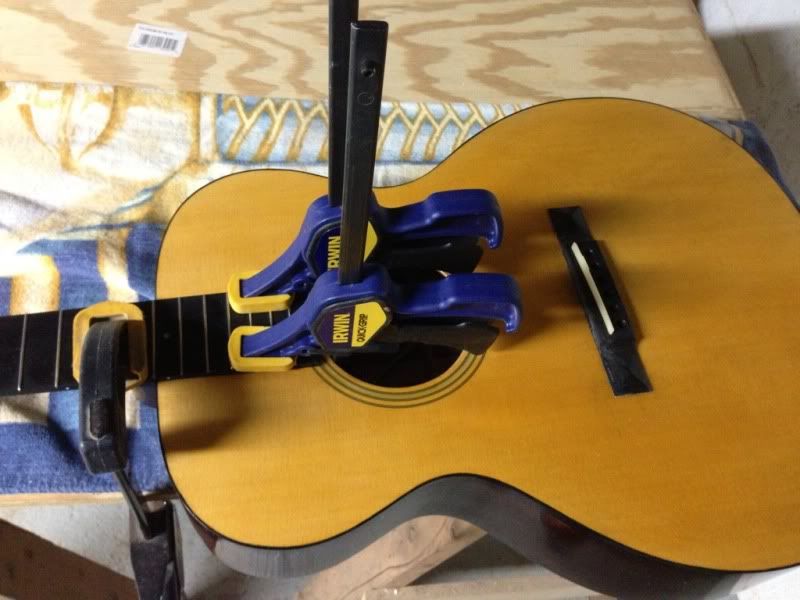 And then it was done!! |
|
| Author: | Linus [ Tue Mar 26, 2013 9:07 pm ] |
| Post subject: | Re: Starting my first build: a pair of mahogony OM's. |
And here is a link to a little video of the guitar in action. http://s14.photobucket.com/user/mbet/media/61AB50DA-CAC1-4EF7-8896-03AC1E320831-4246-000001F2B01280E4_zpsc8e63284.mp4.html |
|
| Author: | Tony_in_NYC [ Tue Mar 26, 2013 11:12 pm ] |
| Post subject: | Re: Starting my first build: a pair of mahogony OM's. |
Looks good! |
|
| Author: | Greg B [ Thu Mar 28, 2013 11:22 am ] |
| Post subject: | Re: Starting my first build: a pair of mahogony OM's. |
Quote: I didn't use a separate pore filler but tried the pumice method I had read about. It took FOREVER. I'm sure it was operator error but I'll be trying Z-Poxy next time. No operator error - pumice filling takes a long time, though of course you get faster after doing it a couple times. Z-poxy frankly is not much faster, at least for me, though i keep doing it 'cuz I love the visual effect of clear filler. Paste filler is BY FAR the fastest and easiest. I'm always kind of surprised it doesn't get recommended more to beginners. Pretty much wipe it off and go on to the next step. LMI micro-bead water based pore filler is a close second, just make sure to dilute it to a thick cream consistency. Requires a tiny bit more sanding typically than traditional oil-based filler, but no smell and water clean up is nice. |
|
| Author: | Linus [ Thu Mar 28, 2013 1:09 pm ] |
| Post subject: | Re: Starting my first build: a pair of mahogony OM's. |
Greg B wrote: Quote: Paste filler is BY FAR the fastest and easiest. I'm always kind of surprised it doesn't get recommended more to beginners. Pretty much wipe it off and go on to the next step. LMI micro-bead water based pore filler is a close second, just make sure to dilute it to a thick cream consistency. Requires a tiny bit more sanding typically than traditional oil-based filler, but no smell and water clean up is nice. I DID use Timbermate mahogony colored paste filler on the back of the neck but didn't really care for it. It was so stiff it went on thick. I sanded it thinner but it gave the neck a cheap looking uniform color. It just didn't look great. I stained the back/sides/neck a fairly dark reddish brown so once it was stained it wasn't really noticiable but it kept me from using it on the body of the guitar. I'm sure in more experienced hands the result would have been better. But now I have (slightly) more experienced hands. We'll see the the next build brings. |
|
| Author: | Greg B [ Thu Mar 28, 2013 9:03 pm ] |
| Post subject: | Re: Starting my first build: a pair of mahogony OM's. |
Linus wrote: I DID use Timbermate mahogony colored paste filler on the back of the neck but didn't really care for it. Yeah, somehow that doesn't surprise me. I've tried several PVA/water based fillers and they all looked horrible. Not sure if Timbermate would be any different. By paste filler I mean the old skool kind, like Martin and everyone else uses. It's oil based, and you have to tint it with stain. Wipes off with old burlap, etc. Congrats on your first guitar!! |
|
| Author: | FishtownMike [ Sat Mar 30, 2013 1:49 am ] |
| Post subject: | Re: Starting my first build: a pair of mahogony OM's. |
Look great! Nice job Linus. I prefer the oil based Pore-O-Pac grain filler from behlen myself. .Mike |
|
| Author: | Linus [ Sun Dec 01, 2013 12:54 am ] |
| Post subject: | Re: Starting my first build: a pair of mahogony OM's. |
Guitar #1 was finally finished and sent to my niece and her husband so he can sing to the brand new twin baby boys. Here is a you tube link of me playing it. http://youtu.be/4ijHHbdcMjs In the meantime I've gotten really far on guitar number 2. It's a mahagony OM as well. 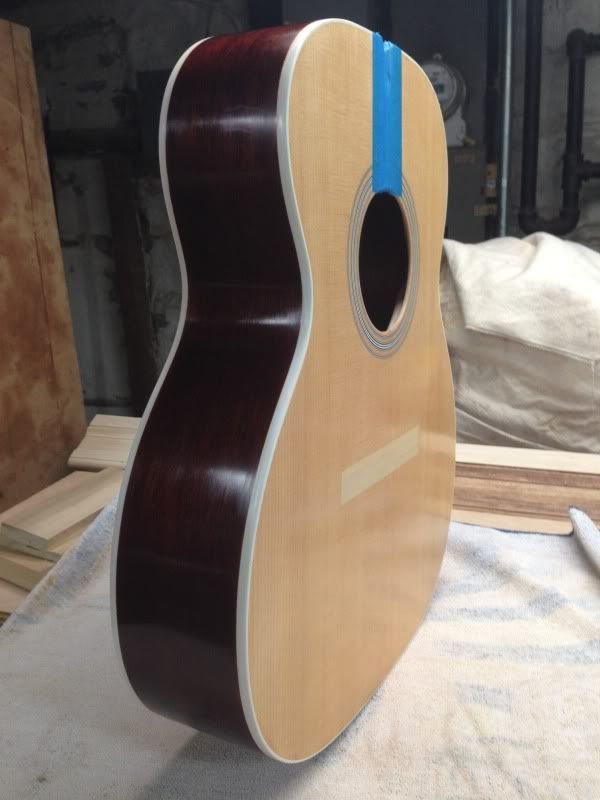 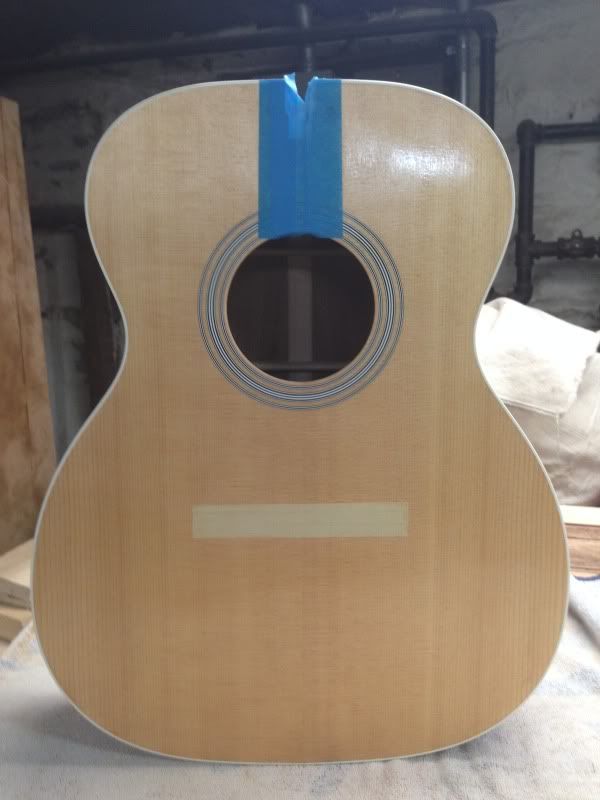 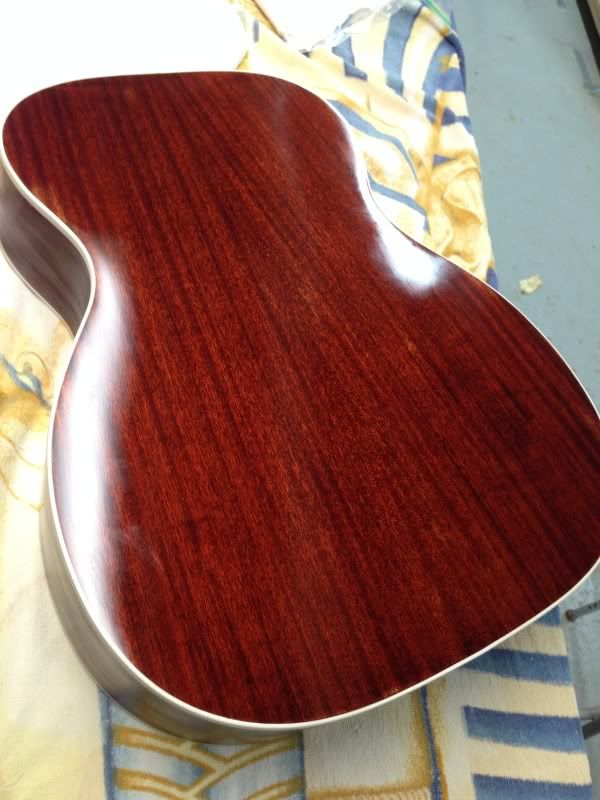 I used Z-Poxy pore filler for the first time and really like it. I decided to paint a stinger headstock design since I've always liked them and I had a pitch pocket on the back of the headstock to hide. 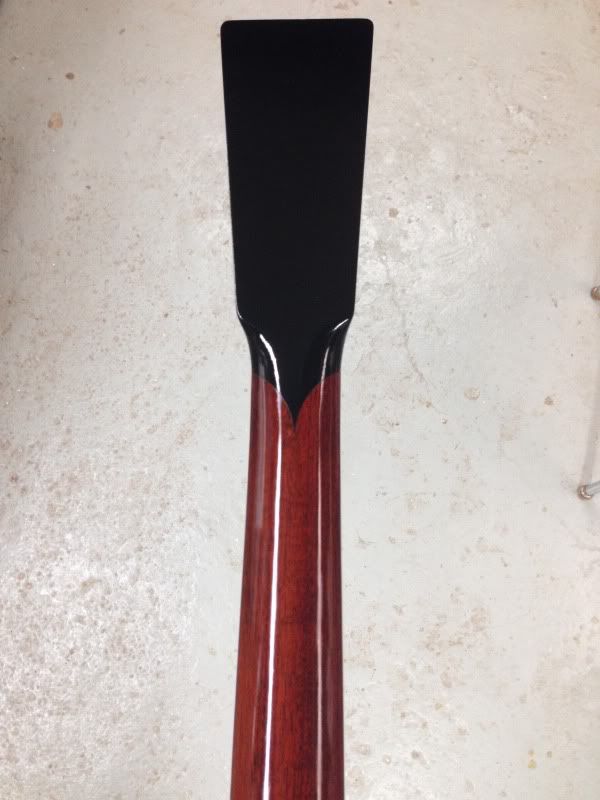 I have a bunch more french polish sessions to do so a few more weeks work left. I've already begun work on #3. Another mahogony OM. 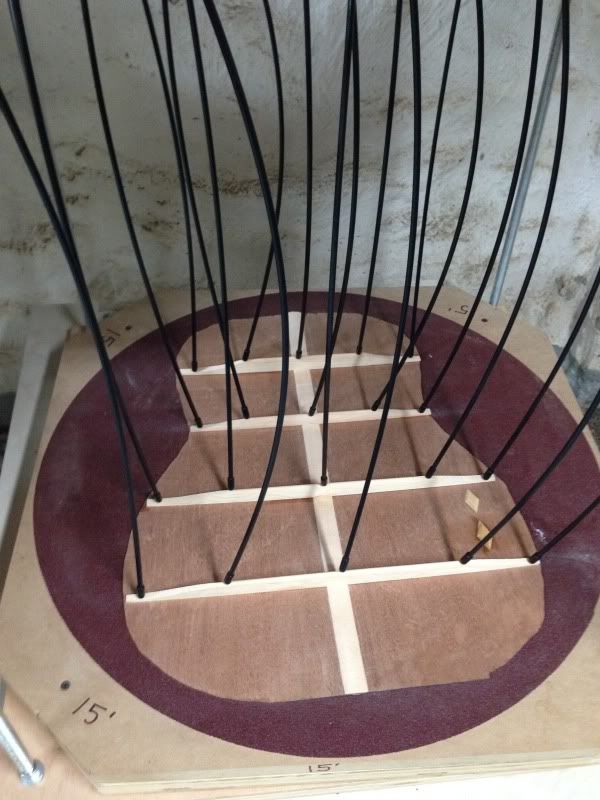 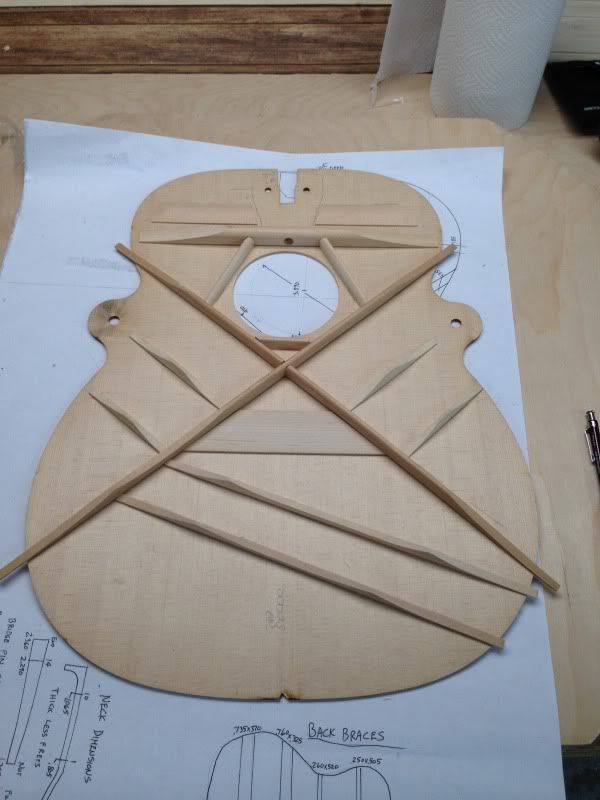 I'm really loving this hobby. It's really rewarding. I'd like to take a week long course this year to increase my skills. We'll see if I can make that happen. |
|
| Author: | Ruby50 [ Sun Dec 01, 2013 11:08 am ] |
| Post subject: | Re: Starting my first build: a pair of mahogony OM's. |
Very nice - what is the stain color on the mahogany? I have used TImbermate filler with fine success - very easy to use. If it is too thick, just add a few drops of water. And both Martin and Gibson use a dark Walnut filler on mahogany so the grain stands out a little and I have found this to work just right. http://www.flickr.com/photos/ruby1638/s ... 246830246/ |
|
| Author: | Linus [ Sun Dec 01, 2013 1:01 pm ] |
| Post subject: | Re: Starting my first build: a pair of mahogony OM's. |
The stain is a W.D. Lockwood "Antique Mahogany" water based dye from ToolsForWorkingWood.com Great stuff. |
|
| Author: | sprocket [ Sun Dec 01, 2013 3:51 pm ] |
| Post subject: | Re: Starting my first build: a pair of mahogony OM's. |
In for a great start Linus ! Keep it on . |
|
| Author: | Tony_in_NYC [ Mon Dec 02, 2013 6:29 am ] |
| Post subject: | Re: Starting my first build: a pair of mahogony OM's. |
Nice work Linus! It looks as though you like mahogany! |
|
| Author: | Linus [ Mon Dec 02, 2013 2:50 pm ] |
| Post subject: | Re: Starting my first build: a pair of mahogony OM's. |
Thanks Tony. I've got a couple sets of mahogany so that's where I'm starting. Next will be some mismatched sides and backs that I'll try to hot pipe bend. We'll see how that goes. When the holidays are done I'd love to meet up with you. We are both in Brooklyn. You're builds look great. Lots for me to learn I'm sure. |
|
| Author: | Linus [ Tue Apr 01, 2014 10:27 pm ] |
| Post subject: | Re: Starting my first build: a pair of mahogony OM's. |
I got stalled out for a few weeks due to other responsibilities but am finally finishing up build number 2. I made a mistake and placed the braced top a bit too far forward when I glued it to the rim. I had made a small bridge plate and ended up missing the edge of the bridge plate when I drilled the bridge pin holes. |
|
| Page 1 of 1 | All times are UTC - 5 hours |
| Powered by phpBB® Forum Software © phpBB Group http://www.phpbb.com/ |
|