Official Luthiers Forum!
http://www.luthiersforum.com/forum/

tutorial on fitting a bridge patch
http://www.luthiersforum.com/forum/viewtopic.php?f=10102&t=11849
Page 1 of 1

Author:  Jim Watts [ Sun Apr 29, 2007 2:13 pm ]
Post subject: 

I thought I post a tutorial on the way I fit a bridge patch as I'm sure it's differnt than most if not all. I like to do it after the X's are glued on vs. prior like most others.
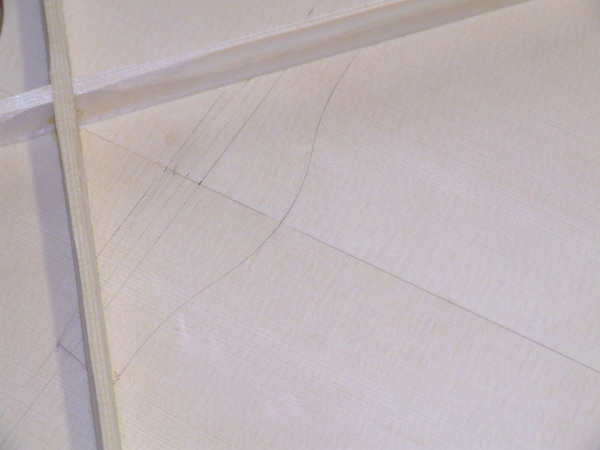
I start with a very accurate layout just like other methods.


I the install the X's and tape up the area with one layer of masking tape like so and trim the tape to the X's


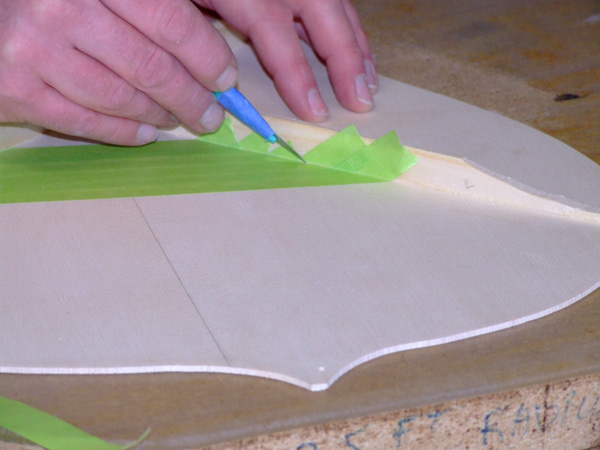
I then lay down a couple of other layers of tape in different direction to help hold the whole thing together.


I like a large radius on my bridge patches so I draw it on now using a beam compass.


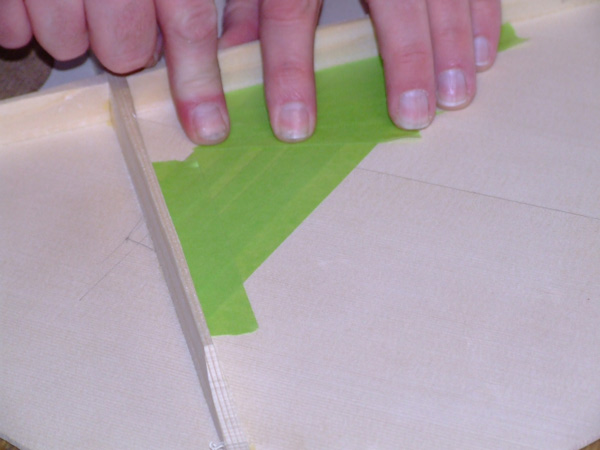
I then care fully peel and trim the tape to the shape of the bridge patch.


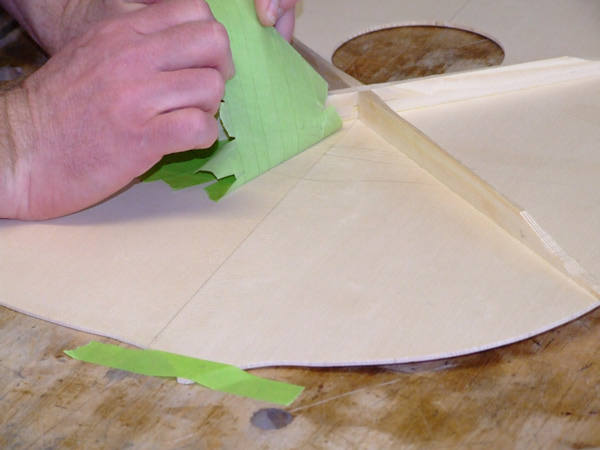
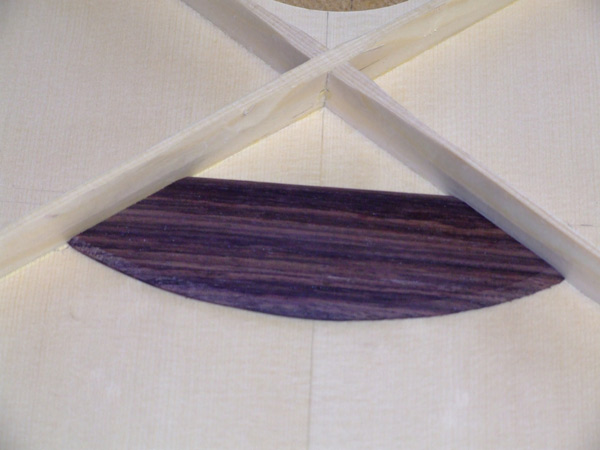
Tape the trimed pattern down to your material. I like cut off from rosewood backs myself.


Cut to size carefully and you have a nice fitting patch just in the right spot.


This all goes very quick, about the same amount of time it took me post this.
Maybe someone will find this of use.
Jim

Author:  WaddyThomson [ Sun Apr 29, 2007 2:28 pm ]
Post subject: 

Very nice Jim.  Simple and straightforward.  Hard to mess up using that method.


Author:  Doug O [ Sun Apr 29, 2007 2:51 pm ]
Post subject: 

Very nice tutorial Jim.  Thanks. 


I see that you orient the grain of the bridge patch perpendicular to the top.  I have been considering turning the grain 90 degrees, the logic being that it will be more resistant to cracking from the pull of the strings as well as more in sync with the movement of the top.  Any opinions? 


Author:  Jim Watts [ Sun Apr 29, 2007 3:07 pm ]
Post subject: 

I haven't had any problem that I know of in the 10+ years of orienting them this way. My string aren't in line with the grain however for this reason.
I think some may orient the grain at abouth 30 or so and that makes alot of sense to me. I just always forget to do it when I make these. maybe next time I'll try that, if I remember.
I don't think I'd go 90 degrees though. You'd sacrafice alot of cross grain stiffness.

Author:  Bill Greene [ Sun Apr 29, 2007 10:58 pm ]
Post subject: 

Jim:

My thanks as well...this was a nice tutorial. Gave me a few ideas for my own work. Thanks again.

Bill

Author:  JJ Donohue [ Sun Apr 29, 2007 11:00 pm ]
Post subject: 

Nice method, Jim. Thanks for posting.

Do you find any advantage of a curved BP over a straight one?

Author:  Dave Anderson [ Sun Apr 29, 2007 11:39 pm ]
Post subject: 

Good tutorial Jim. Thats a good way to get a perfect fit against your X. Thanks much !

Author:  Jim Watts [ Mon Apr 30, 2007 3:45 am ]
Post subject: 

JJ, I like a large bridge patch to help counter the torque of the bridge over time. The radius helps me to keep the weight down on it. I also thin out my bridge patch at the front and back.
Jim

Author:  robertD [ Mon Apr 30, 2007 9:00 pm ]
Post subject: 

Thanks Jim,

That’s a great way to make a templet!

May I ask, do you notch under the X braces to allow the bridge plate to go under them a bit?

Robert

Author:  Jim Watts [ Tue May 01, 2007 2:24 am ]
Post subject: 

Robert,
I don't notch the the bridge plate under the X. I just fit tight up against it.

Author:  curtis [ Tue May 01, 2007 7:03 am ]
Post subject: 

good work!


'like the fact its as quick as it is acurate!


Author:  Ron Belanger [ Tue May 01, 2007 9:19 am ]
Post subject: 

Good tutorial. That's easy. I like easy!! Thanks Jim

< ="text/">_popupControl();

Author:  peterm [ Tue May 01, 2007 2:34 pm ]
Post subject: 

Great tutorial!!!
I do run the grain on my patches totally 90 degrees...I can see both points but it makes a lot more sense to me to run it at 90 degrees.

Author:  CarltonM [ Wed May 02, 2007 2:08 pm ]
Post subject: 

I like it! Thanks Jim.

Page 1 of 1 All times are UTC - 5 hours
Powered by phpBB® Forum Software © phpBB Group
http://www.phpbb.com/