Hi all,
I just completed what was, at least for me, a challenging brace re-glue on my old Maton so thought I might share for any noobs that may find themselves in a similar position and decide to have a go at DIY.
This old lady has a double X braced top (mentioned in an earlier thread about bridgeplate nightmare)). The secondary X brace, situated entirely within the lower bout, has legs running across either end of the bridgeplate which junction into the main X bracings as shown.
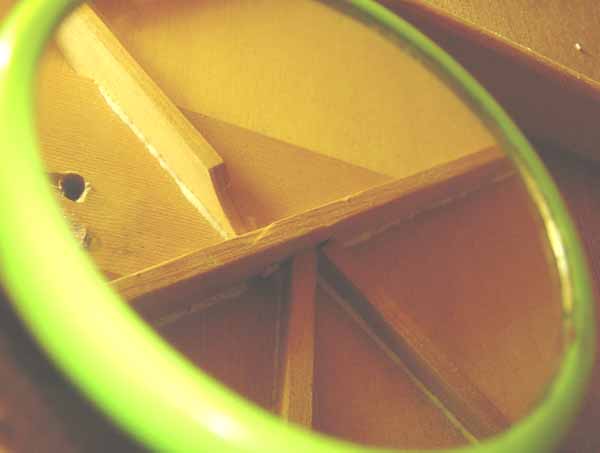
This really is one guitar that you just would not want to replace the bridgeplate on. However my problem was at the other end of that secondary X brace. (Sorry, no before pic cause I did not think that this would really interest anyone until I had the thing clamped up.) The other end of that brace extends to the very back of the guitar where it meets the kerfed linings a short distance from the side of the tail block on the treble side where it finishes flush and untucked.
It was that end of the brace, near the tailblock, which had come unglued for about 4" and, aside from the obvious negative affects upon tone, it was also threatening to come completely unstuck (just like the repairer) and introduce more dramatic problems.
The challenge?? Not being a little fellow, it was quite impossible for me to reach my arm down to the very back of the guitar because my forearm filled the soundhole about 1/2 way in. So for me at least, this repair was comparable to an elephant trying to extract a teaspoon from a flea's bottom with a crowbar

Even for a smaller person the problem would remain, how do you see what the heck you are doing way back there when your arm is completely blocking any vision via an inspection mirror either through the sound hole, or the bridgepin holes? Also if you cannot reach a brace jack, how do you clamp this sucker once you have cleaned out the old and put in the new glue?? And, to top it off, how once you make a mess way back there working with glue, back to front and inside out in a mirror, how do you then clean up so no-one knows you have been futzing around???
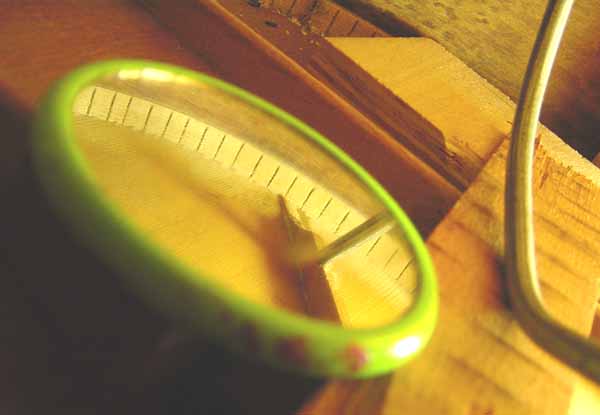
Well ya need special service tools. And number one, (Aside from a small mirror equipped with little blocks glued either side of it's back so it can straddle the back bracings so that you can see that particular part of the top you wish to work on) is a glue application device.
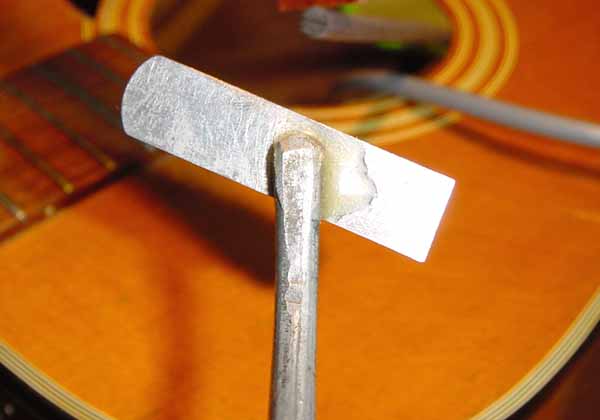
Showing the underside, or that part of the tool that will face down, away from the top of the guitar, this is simply just a piece of feeler gauge epoxied at just THAT angle onto a length of 1/4" mild steel rod flattened at the end and bent just so. These angles are determined via trial and error with inspection light and mirror. For an inspection light, just wire up a small energy saver neon. These run much much cooler than a standard incandescent and the last thing we need is heat building up inside the box softening the good glue which is still holding everything together.
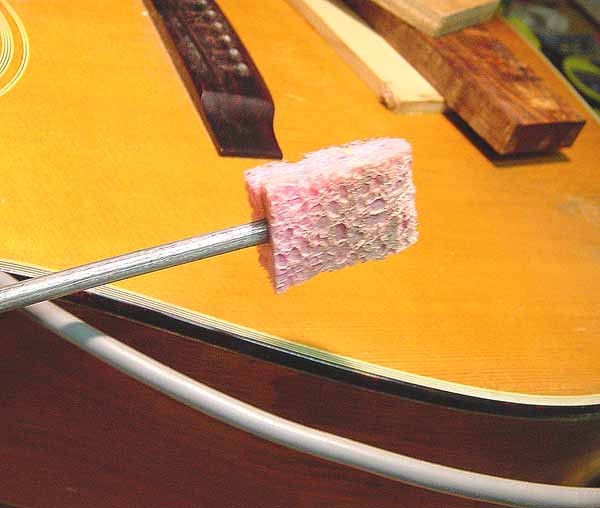
Next, before we apply glue, we need to have ready a clean up device. This one is just another length of 1/4" rod bent just so with a bit of kitchen sponge folded over the end and CA'ed into place.
Now we need to open the joint a little. To do this I used a flat piece of board on the very top placed over the offending brace, just back from the unglued section. This is depressed via a small gobar and the joint opens just nicely.
Once done, you can then apply sufficient glue between the brace and the underside of the top using the rod and feeler gauge tool to deliver the glue into the joint a little at a time. Just be sure to place a bit of paper inside of the guitar to catch any drips from falling on the back before you start.
You then clean up any mess by moistening the clean up tool and scrubbing off the excess glue. Careful not to make the sponge too wet as you do not want to contaminate the glue that you worked into the joint.
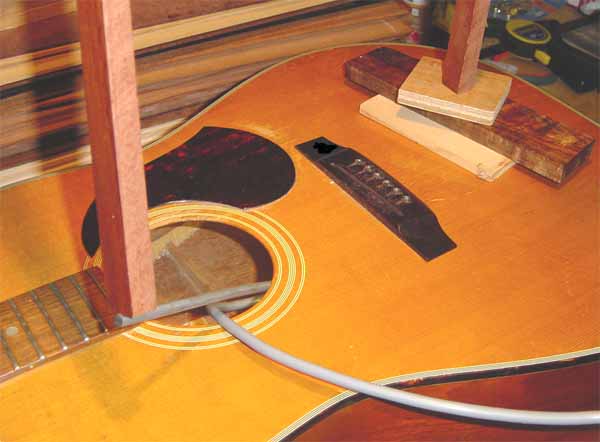
Now you just need to clamp this baby. To do this I used yet another length of rod bent just so. First I supported the outside back of the guitar against downward pressure from the inside. Next I placed a flat piece of wood to span the back braces and spread the load upon which will sit the bottom of the bent clamping rod.
To help counter some of the upward pressure from the top from the clamping rod, I left the top just a little depressed using the small gobar I used to open the glue joint. I then carefully maneuvered the end of the bent clamping rod into position to sit directly onto the brace and then levered the brace upward against the top until I could see good squeeze out (To match the rest of the bracing
 ).
).
Once in place, I then used yet another gobar on the end of the clamping rod left poking out of the soundhole to hold it's own spring tension between the gobar, the flat piece of wood which spans the back braces and the other end securing the newly glued brace.
Anyhow, whist this method is not very polished and would probably not suit the pro shops (or to steal a phrase from my mate Tim, "it's all a little agricultural") it does indeed work for the one offs

Just remember, dry try all your custom made tools first to get the fit right and be extra careful cause I reckon that the spring loaded clamp I made could easily punch a hole clean through the top if it slipped off the brace.

Just hope this helps someone out there with a similar problem who is surfing the WWW for an answer.
Cheers
Kim