Official Luthiers Forum! http://www.luthiersforum.com/forum/ |
|
Tutorial-Bench sander Miters (Pics) http://www.luthiersforum.com/forum/viewtopic.php?f=10102&t=11488 |
Page 1 of 1 |
Author: | Alain Desforges [ Tue Apr 03, 2007 5:45 am ] |
Post subject: | |
Ok, ladies and gents… I haven’t been in the shop for a very long time. It sure felt good to get back to building a bit. I was about to bind my fingerboard when I got to thinking that I would be a great opportunity to make a little show and tell on how I go about sanding my miters. When a piece is very small (height wise) I won’t hesitate of using just a chisel, but when the piece is higher as is the case of binding, I found nothing better or quicker than my trusty bench-top sander. This is a little method I developed as I went along and now I'm very happy with the results. It's not pretty but it works great for me. 
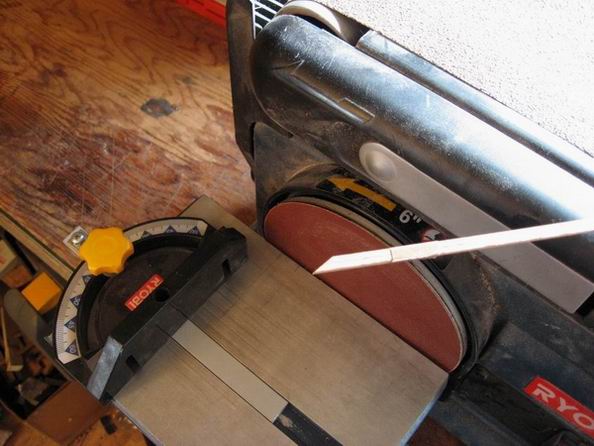
First, I check to make sure the table is set perfectly square to the wheel.
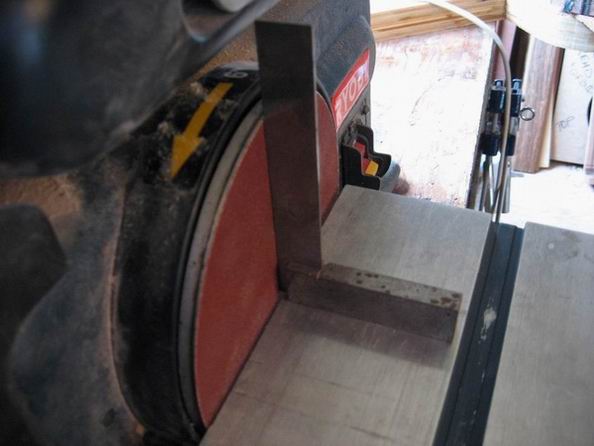
 ![]() Next is the fence. ![]() Then I tape the two pieces to be mitered together. For the angle, I pretty much just eyeball it. As long as the two pieces get the same angle, you should be o.k. ![]() 
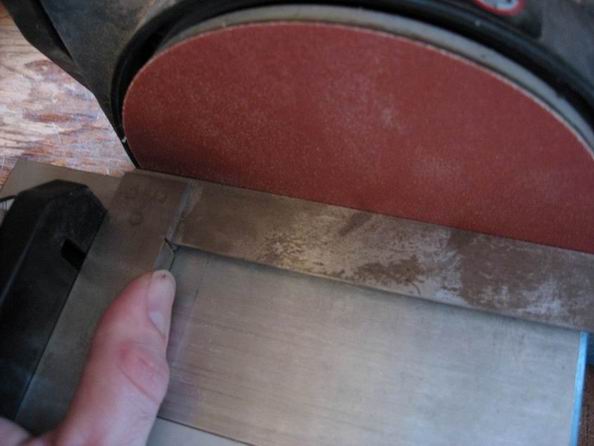
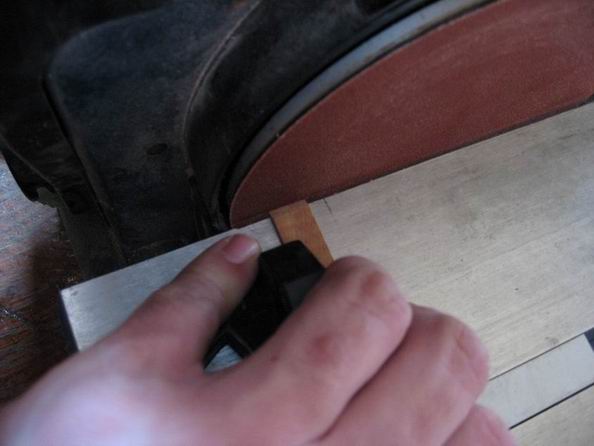
A little something I found very useful. When I'm done, I take the two pieces, set them side by side and WITHOUT turning on the power to the sander (I reapeat, the sander is OFF) using the fence, I very gently clean up the sharp point. We're talking minimal pressure and about 1 inch of travel... ![]() The result. Two very clean miters. ![]() 
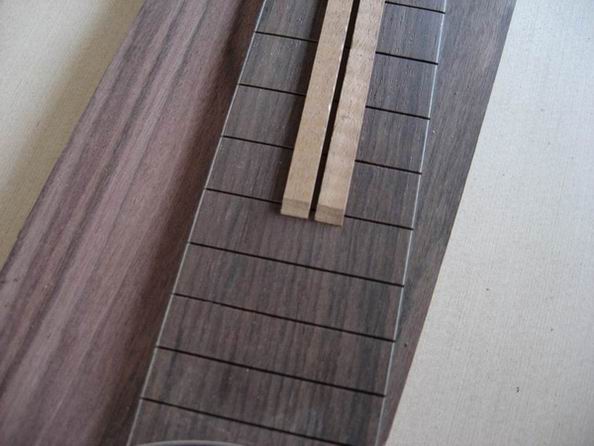
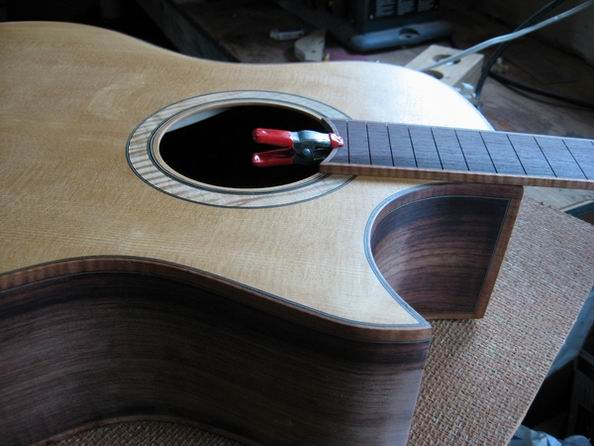
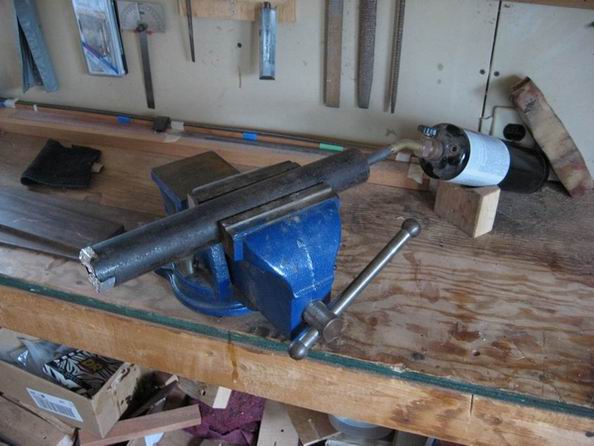
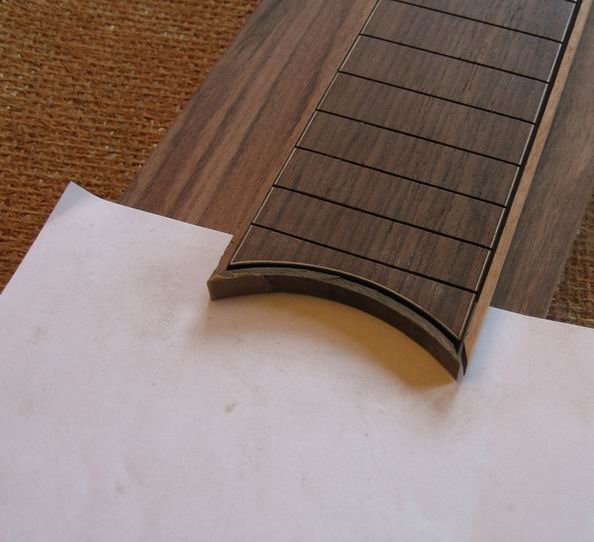
Now for me, the extention mimics the soundhole. I used my very high-tech bending apparatus pictured here: (note the technology dripping from that crepe block!) ![]() Once the little piece is bent at the right angle, it's back to the bench-top sander to give it the right angles. For me, it's a lot of back and forth. I take off a bit off here and there until I'm satisfied with the fit. I know it sounds very obvious but make sure to have a piece significantly longer than you really need. The sander can take quite a bit off without you realizing it. When I get eally close to the final fit, I'll swith to a hand file to take off last thou or so... or maybe not... it's up to you! ![]() ![]() 
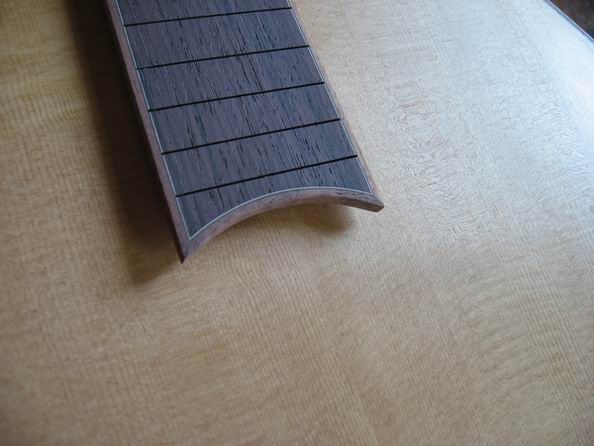
Voila! Just needs some glue... ![]() Note that my FB was tapered and slotted already. I've also already glued on the purflings (before slotting). I did the purfling (which are full height) the exact same way for the exception that I used a little piece of backing wood to sand the angle in them since they are so soft and maleable. Hope this can help some of you. 
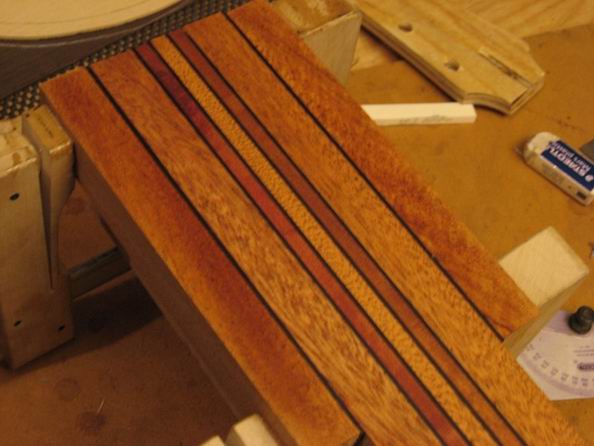
Oh yeah, this is where this FB should eventually wind up. Atop my 9 piece laminated neck (actually 13 if you count the 'extentions' with their lams - shown here just clamped on for a visual). ![]() Cheers, Al |
Author: | Chansen [ Tue Apr 03, 2007 6:06 am ] |
Post subject: | |
That is nice little trick! Thanks! |
Author: | Heath Blair [ Tue Apr 03, 2007 6:11 am ] |
Post subject: | |
thanks, that was a simple, yet insightful piece of info! |
Author: | Bill Greene [ Tue Apr 03, 2007 6:34 am ] |
Post subject: | |
Wow, I appreciate that...I've wondered how that might be done. Thanks! |
Author: | Andy Zimmerman [ Tue Apr 03, 2007 8:22 am ] |
Post subject: | |
Very nice tutorial Thanks Andy |
Author: | Alain Desforges [ Tue Apr 03, 2007 4:24 pm ] |
Post subject: | |
Glad I could help. Hesh, I've learned so much from you and your great tutorials that I'm very glad I can return the favor. I'm still in your debt... |
Author: | redennis3 [ Tue Apr 03, 2007 5:22 pm ] |
Post subject: | |
You learn something new here every day, thanks Alain |
Author: | Dave Anderson [ Wed Apr 04, 2007 12:58 am ] |
Post subject: | |
Good Tutorial Alain ![]() ![]() Thanks much! |
Author: | Barry Daniels [ Wed Apr 04, 2007 1:59 am ] |
Post subject: | |
What am I missing. Wouldn't doubling the two pieces compound the error if you are slightly off 45 degrees? I use the disk sander on my shopsmith to do the same operation. But I set the angle on my miter gauge to the exact angle needed. I found that my tapered fingerboard actually likes an angle setting of 44 degrees. |
Author: | Barry Daniels [ Wed Apr 04, 2007 2:02 am ] |
Post subject: | |
Oh, I looked again and saw that the two pieces are for the sides of the fingerboard and they do not join together. My fingerboard uses a straight end so I can cut all the pieces on the sander. Different strokes. |
Author: | Alain Desforges [ Fri Apr 06, 2007 12:33 pm ] |
Post subject: | |
O.K. so here's the outcome. I used my ever favorite HHG to do the glue-up... ![]() And here's where it should rest... ![]() Thanks again! |
Author: | CarltonM [ Fri Apr 06, 2007 2:45 pm ] |
Post subject: | |
Alain, that looks terrific! Beautiful 'board and guitar. The neck seems a bit shallow, though.... |
Author: | John K [ Fri Apr 06, 2007 11:35 pm ] |
Post subject: | |
good looking guitar and great tutorial Thanks Alain John |
Author: | SteveCourtright [ Sat Apr 07, 2007 12:51 am ] |
Post subject: | |
Nice work, Alain and thanks for the tut! |
Author: | Alain Desforges [ Sat Apr 07, 2007 4:27 am ] |
Post subject: | |
[QUOTE=CarltonM] Alain, that looks terrific! Beautiful 'board and guitar. The neck seems a bit shallow, though....[/QUOTE] ![]() ![]() |
Page 1 of 1 | All times are UTC - 5 hours |
Powered by phpBB® Forum Software © phpBB Group http://www.phpbb.com/ |