Official Luthiers Forum! http://www.luthiersforum.com/forum/ |
|
adding a side purfling to binding http://www.luthiersforum.com/forum/viewtopic.php?f=10101&t=48930 |
Page 1 of 2 |
Author: | jack [ Sun Jan 29, 2017 9:58 am ] |
Post subject: | adding a side purfling to binding |
Hello, I am interested in the way members go about the task of adding a side purfling to their wooden binding prior to bending the assembly. glues, technique , any information will be appreciated. thanks, jack |
Author: | Clinchriver [ Sun Jan 29, 2017 10:20 am ] |
Post subject: | Re: adding a side purfling to binding |
jack wrote: Hello, I am interested in the way members go about the task of adding a side purfling to their wooden binding prior to bending the assembly. glues, technique , any information will be appreciated. thanks, jack I was gluing, BW purfling + binding with titebond III using clothes pins for clamps, paying attention to keeping all three perfectly aligned, not very much wiggle room for sanding to final dimension. My last effort, I scored some nice cocobolo boards, cut into 1-1/4" strips thickness sanded to .190, combined with quartered curly maple and pau santo .030" also glued up with titebond III. Cleaned up one edge and cut into .100" strips on my bandsaw and ran through the thickness sander with 120 grit to .080" Bends great. |
Author: | SteveSmith [ Sun Jan 29, 2017 11:59 am ] |
Post subject: | Re: adding a side purfling to binding |
That looks good Greg! |
Author: | Terence Kennedy [ Sun Jan 29, 2017 12:37 pm ] |
Post subject: | Re: adding a side purfling to binding |
Check the archives, there was a good thread on this within the last couple of years. |
Author: | meddlingfool [ Sun Jan 29, 2017 2:00 pm ] |
Post subject: | Re: adding a side purfling to binding |
We use just regular titebond, and piles of the squarefaced binder clips... |
Author: | Tim L [ Sun Jan 29, 2017 2:22 pm ] |
Post subject: | Re: adding a side purfling to binding |
I do the purfling layup first in 1" strips. Use parchment paper on the table, followed by the purfling sandwich, another piece of parchment. I moisten the outside only of the sandwich to counteract the cupping action from moisture when using Titbond III. If I'm doing enough strips of the same size I lay a large piece of aluminum over the whole thing to weight it down. Anything heavy will do. If you don't have anything flat and heavy a light clamping between flat surfaces will work. I then leave it for a couple of days just to make sure it stays flat while drying. When dry I glue it onto a binding blank of the same width and when that is dry it gets ripped it into strips on the small bandsaw, using a simple fixture I made to keep things consistent, run it through the drum sander and it is ready to use. It takes a while but when done I have enough strips to make several guitars. Always nice to have some extras laying around for the piece that breaks or delams. |
Author: | Alan Carruth [ Sun Jan 29, 2017 3:56 pm ] |
Post subject: | Re: adding a side purfling to binding |
I do more or less what Tim does. I'll start with a piece of binding wood that's about 1" wide by 1/4" thick. It's usually flat cut so that the quartered grain will show on the wider side face when it's all done. This should be prepped to be uniform in thickness and level. Normally I'll use sliced veneers for the side lines. These days the standard thickness for that is.5mm, but you can get .3 in different colors from LMII. Sometimes you can find the old American standard veneer that is between .7mm and .8mm thick (1/28"). It's nice to have different thicknesses for the contrast. I cut 1" wide pieces of that as well. Everything gets scraped smooth just before gluing. For glue I'm using Titebond 3, and I thin it out about 25% with water. I found that, particularly on hot or dry days, the glue would start to set up before I got the last go-bars on, so one end of the layup would not be glued as well. The extra water slows that down a little, and does not seem to weaken the glue line to speak of. You'll need to shake this well before using. I do the glue up in a go-bar deck. Mine is just a sturdy plywood box on the ceiling above one of the benches. The dowel go-bars go into the box when not in use. I have a long piece of UHMW that I lay down on the bench to keep the glue off. I have everything ready before the glue gets spread. Stack the wood strips up in bottom to top order: purfling lines on the top and the binding strip on the bottom. I usually stack the go-bars up next to the UHMW. I've got a glue spreading knife ready, my sprayer, and a lot of paper towels. Pick up the piece of veneer that will be the bottom of the stack: the line that goes next to the side. I find that a light misting with water on both sides will keep it from curling away from the glue, so I do that. Lay it down along the UHMW, and spread on a thin coat of glue, trying to avoid gaps. Take the next veneer line, if there is one, spritz that, and then spread glue on one surface. Put that down on the veneer layer that's already there, glue side down, and spread glue on top of it. Yes: I spread glue on both surfaces. As the wooden airplane makers say: "The way to be sure you got glue someplace is to put it there." Continue until you run out of veneer lines. The binding wood doesn't need to be sprayed with water. Just spread glue on the face, set it down and make sure everything is pretty well aligned. One nice thing about the thinned out T3 is that it's not as 'greasy' as the full strength stuff: there's very little tendency for the layers to slide around as you're clamping them. If you're careful starting out, and don't get the go-bars too off line so that they're pushing sideways, you should have no problem keeping things lined up. I start with go-bars from one end, and work my way to the other. I put two on the corners, then move down about an inch (or the thickness of my finger) and put one in the middle. Repeat. Endlessly. When you get to the other end make sure you have go-bars on the corners there too. There is a tendency for the binding strip to curl up away from the glue, and you need to convince it that that's a bad idea. This takes lots of go-bars, but fortunately, dowels don't cost too much. Leave the stack in the deck for at least 24 hours. I've never had warping issues with this from using water based glue so long as the stack is left in the clamps until it's really dry. If you're making a veneer layup, such as B/W, that will often (usually) twist or cup a bit after gluing because of differential cross grain expansion with changes in humidity. That's not the glue's fault. BTW; for veneer layups I just use a piece of plexi as a caul on top instead of the binding wood, and, of course, omit the last glue application. This can take a long time to dry, but Ill often take it out of the deck after a few hours, sandwich the layup between pieces of Masonite, with the rough side toward the layup, and re-clamp it. That helps let the water out. Once the glue is dry I use a hand plane to shoot off the edges. Then I cut two binding strips off on the band saw, go back and shoot the edges again. That way you've always got a smooth surface. I use my old Wagner Safety Planer to thin the strips down, running then against a fence. This makes them smooth and uniform enough that I can usually clamp them all down with a caul at one end and scrape off the tool marks, working away from the clamp. With any luck I'll get five strips from that 1" layup, so there's an extra for when you mess up. Some time I'm going to glue together all the spare binding strips that I have in the back room and make a side.... I usually bend them all together. You can tape them tightly every couple of inches, with the purfling lines facing inward on both sides (you WILL remember to bend two lefts and two rights, won't you?). The pressure from the tape helps keep the thin side lines from buckling too much at the waist. If you use Super Soft you'll need to bind them together with thread: that stuff is an excellent solvent for the adhesive on masking tape. Hope this helps. |
Author: | oval soundhole [ Mon Jan 30, 2017 5:47 pm ] |
Post subject: | Re: adding a side purfling to binding |
Clinchriver wrote: I was gluing, BW purling + binding with titebond III using clothes pins for clamps, paying attention to keeping all three perfectly aligned, not very muck wiggle room for sanding to final dimension. My last effort, I scored some nice cocobolo boards, cut into 1-1/4" strips thickness sanded to .190, combined with quartered curly maple and pau santo .030" also glued up with titebond III. Cleaned up one edge and cut into .100" strips on my bandsaw and ran through the thickness sander with 120 grit to .080" Bends great. Greg that looks phenomenal! The black lines are pau santo? They almost look like ebony/fiber |
Author: | Clinchriver [ Mon Jan 30, 2017 7:30 pm ] |
Post subject: | Re: adding a side purfling to binding |
oval soundhole wrote: Clinchriver wrote: I was gluing, BW purling + binding with titebond III using clothes pins for clamps, paying attention to keeping all three perfectly aligned, not very muck wiggle room for sanding to final dimension. My last effort, I scored some nice cocobolo boards, cut into 1-1/4" strips thickness sanded to .190, combined with quartered curly maple and pau santo .030" also glued up with titebond III. Cleaned up one edge and cut into .100" strips on my bandsaw and ran through the thickness sander with 120 grit to .080" Bends great. Greg that looks phenomenal! The black lines are pau santo? They almost look like ebony/fiber Yes, I found a nice piece at our local hardwood dealer and it oxidizes to a beautiful black sheen. |
Author: | Ken Jones [ Mon Jan 30, 2017 9:47 pm ] |
Post subject: | adding a side purfling to binding |
Here's my response to this same question from a couple years back: Ken Jones wrote: 
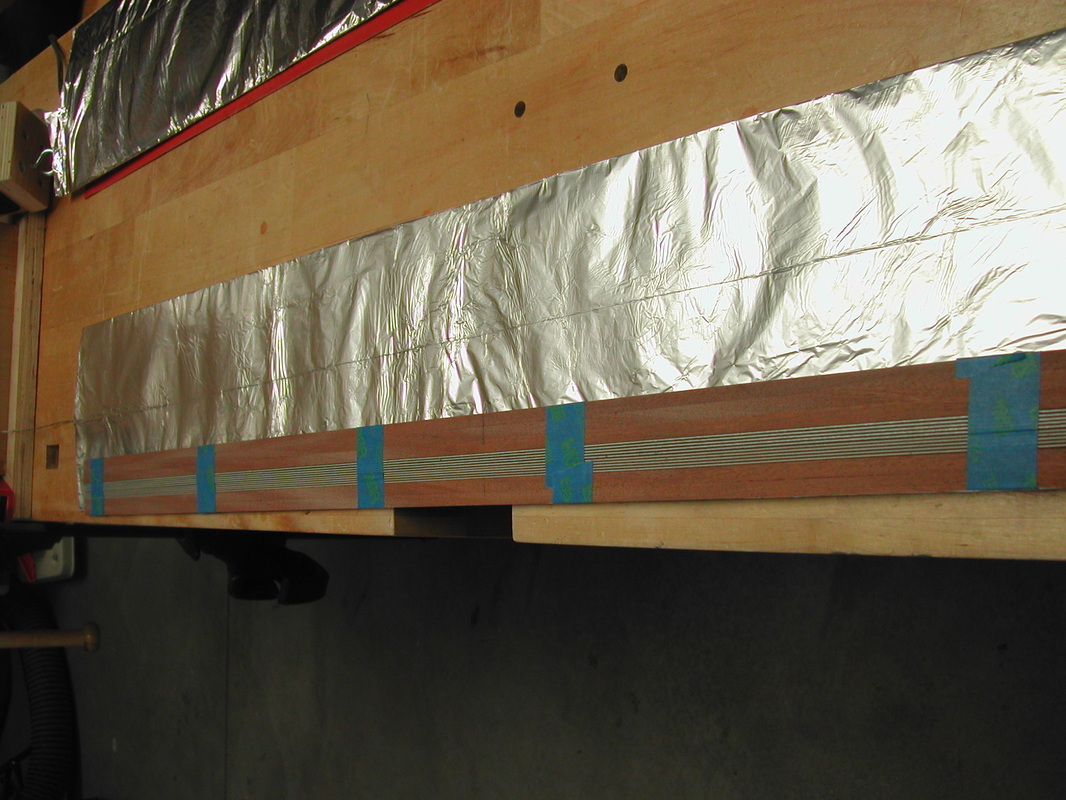
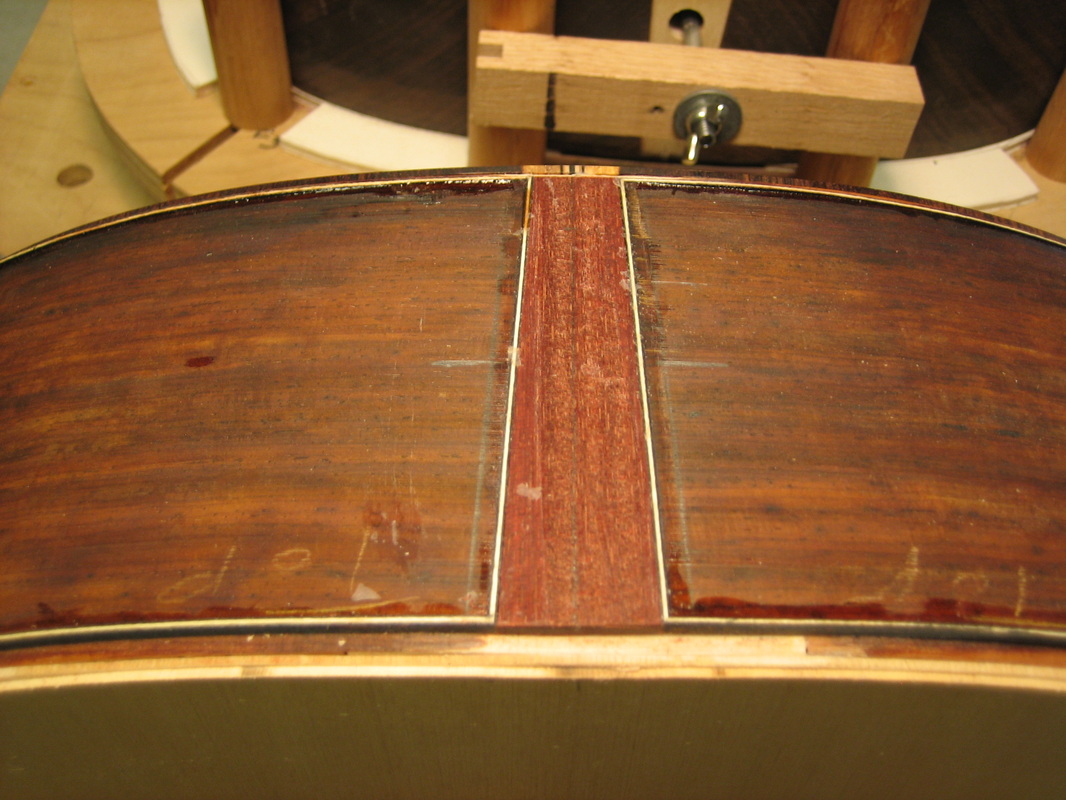
I used the clothespin method for years, with good results, but always felt it was cumbersome and time-consuming. So I finally took an hour to make a jig that's both simple and very effective. Rather than describe it, I'll attach a pic that I think illustrates the idea pretty well. ![]() ![]() The base is made of some kind of dimensionally-stable extruded plastic molding bought at Home Depot. I replaced the wood fence with a similarly-sized piece of aluminum, and all surfaces that might come in contact with glue are lined with adhesive-backed UHMW film. Works like a charm. Using CA, I can glue up all my bindings in minutes versus hours. Ken Jones Mountain Song Guitars Sent from my iPhone using Tapatalk |
Author: | Pmaj7 [ Tue Jan 31, 2017 2:10 am ] |
Post subject: | Re: adding a side purfling to binding |
Ken, how does that ca take to bending? |
Author: | Ken Jones [ Tue Jan 31, 2017 9:18 am ] |
Post subject: | Re: adding a side purfling to binding |
pat macaluso wrote: Ken, how does that ca take to bending? It can separate if using really high heat or doing a tight bend, but I have the same experience with stuff I get directly from Gurian. Sent from my iPhone using Tapatalk |
Author: | Craig Bumgarner [ Tue Jan 31, 2017 9:50 am ] |
Post subject: | Re: adding a side purfling to binding |
For glue, I use Titebond III like others have said. To "clamp" together, I layout a strip of 1" masking tape on a flat surface, stick the binding to it, apply glue to the purfling edge and "tack" the purfling in place against the binding starting at one end and use the fingernails on my thumb and forefinger to push it tight against the binding while pushing it down against the tape. It is sort of a sliding motion as I tack the purfling down from one end to the other. I used to wrap the remaining tape around, but I've found that is not necessary and can skew the result. I fuss over the joint for a minute or two as the glue grabs. If I see a place that is not tight, I can massage it into place and the glue & tape hold it there. Quick, simple and works for me. |
Author: | Quine [ Tue Jan 31, 2017 11:28 am ] |
Post subject: | Re: adding a side purfling to binding |
I buy it pre-glued up from StewMac or LMII. Its more money but saves me the aggravation |
Author: | Woodie G [ Tue Jan 31, 2017 6:24 pm ] |
Post subject: | Re: adding a side purfling to binding |
We tend to use combinations that require low volume fabrication, so CA in a jig that uses a single feather board arrangement, sand to .005" over channel width, then bend. We accelerate the CA with GluBoost - the glue is not affected by Super Soft 2, and it's quick. One trick is to thickness the bindings to .005" narrower than the purflings to provide an edge to scree against - less CA transfer to anything other than the binding and purfling. Also - fiber edges like to roll, so allow them to lead into the sander. |
Author: | giltzow [ Thu Feb 02, 2017 12:48 pm ] |
Post subject: | Re: adding a side purfling to binding |
Hi Jack Here is another method for getting the bindings and purfling together. First bend the bindings and purfling : ![]() Then superglue the purfling to the binding ledge ![]() Then add the bindings (I use fish glue): ![]() Not what you asked for (gluing the purfling to bindings before bending) but another way to do it that works pretty well. Does take a little more time but saves time later - I don't usually have any gaps to fill. |
Author: | jfmckenna [ Thu Feb 02, 2017 1:50 pm ] |
Post subject: | Re: adding a side purfling to binding |
I do it the same way that Tim and Alan described it but I usually use wider than 1in boards if possible. Might as well get as many slices as you can. If I don't have wide boards to use and just have regular sized strips then they have to be done one at a time. Then I use the Stew Mac binding lamiation tool and CA. I have never had a problem bending with the purfling delaminating under heat using CA. http://www.stewmac.com/Luthier_Tools/To ... nator.html These days if it's rosewood or Koa or something easily accessible through suppliers I just buy it. But often times enough I want to use something that is not readily available. |
Author: | Pmaj7 [ Tue Feb 07, 2017 5:36 pm ] |
Post subject: | Re: adding a side purfling to binding |
My first try using small clips. It took way too long! Probably better to use bigger clips and the turbo clothes pins took too long as well. And these are only 16" sections. ![]() |
Author: | mqbernardo [ Tue Feb 07, 2017 7:54 pm ] |
Post subject: | Re: adding a side purfling to binding |
I make a veneer stack with PU glue. once dry I cut the foamy stuff out with a knife. Then joint the edges with a long plane and cut slices slightly wider than the binding channel on my small proxxon table saw. Then I tape the stripes snugly, wrap them in foil and bend them. I then glue the purfling to the binding on the guitar, with rope. Has worked for me, but maybe I can optimise the process. I do this mostly because I don't have access to long enough flasawn rosewood boards, if I did I'd do it like Allan. |
Author: | mqbernardo [ Tue Feb 07, 2017 7:57 pm ] |
Post subject: | Re: adding a side purfling to binding |
Oh, now I see you wanted info on purflings and binding glued before binding and that Michael had already shown a way more or less similar to mine. Sorry for the redundancy. |
Author: | Pmaj7 [ Tue Feb 07, 2017 10:29 pm ] |
Post subject: | Re: adding a side purfling to binding |
So, I just tried the "Maryland Method" as I happened to have the SM gizmo, and MUCH faster. After 1/2 doz I was down to under 3 min ea 32". Not including sanding. .09 strips were much easier to get the ca on than the .07. Of course, super glue everywhere. But, I had a chance to try out my new Bob Smith odorless, and I am glad to report that I am still breathing as of now. Woodie G wrote: fiber edges like to roll, so allow them to lead into the sander. Good idea! I usually end up with a hook on the fiber that i need to scrape off.![]() |
Author: | Cush [ Wed Feb 08, 2017 1:16 pm ] |
Post subject: | Re: adding a side purfling to binding |
I like to glue the purfling in first then add the binding on top in two or more steps. Here I used fiber binding with pre made purfling strips. This is a photo taken before I scraped the binding flush. |
Author: | WendyW [ Mon May 15, 2017 7:10 pm ] |
Post subject: | Re: adding a side purfling to binding |
In the past, I have glued individual binding and purfling using CA glue and a jig that I made. For my current build I want to glue 1" strips of veneer to 1'' wide biding material and then cut into strips. The only time I have ever used Titebond III was when I built a gate for my yard. I did not like the color of the dried glue. The glue line, where visible, was a greenish yellow tint. Any problems with that when gluing purfling to binding material? I know I know, you shouldn't see a glue line..... |
Author: | Clinchriver [ Mon May 15, 2017 7:24 pm ] |
Post subject: | Re: adding a side purfling to binding |
WendyW wrote: In the past, I have glued individual binding and purfling using CA glue and a jig that I made. For my current build I want to glue 1" strips of veneer to 1'' wide biding material and then cut into strips. The only time I have ever used Titebond III was when I built a gate for my yard. I did not like the color of the dried glue. The glue line, where visible, was a greenish yellow tint. Any problems with that when gluing purfling to binding material? I know I know, you shouldn't see a glue line..... Look at the second post, all glued with Titebond III, primarily for its resistance to heat, no glue line. These were made with a 1"-1/4" wide X .190 cocobolo, glued to 1"-1/4" X .030" curly maple and1"-1/4" .030" pau santo, sliced on the bandsaw to .100" then sanded to .080" |
Author: | Pmaj7 [ Tue May 16, 2017 5:02 pm ] |
Post subject: | Re: adding a side purfling to binding |
Cush wrote: I like to glue the purfling in first then add the binding on top in two or more steps. Here I used fiber binding with pre made purfling strips. This is a photo taken before I scraped the binding flush. How is you experience with fiber binding? What kind of finish has worked? Sent from my SM-G930T using Tapatalk |
Page 1 of 2 | All times are UTC - 5 hours |
Powered by phpBB® Forum Software © phpBB Group http://www.phpbb.com/ |