Official Luthiers Forum!
http://www.luthiersforum.com/forum/

Everett Bevel ?
http://www.luthiersforum.com/forum/viewtopic.php?f=10101&t=44695
Page 1 of 1

Author:  DannyV [ Sun Dec 07, 2014 12:57 pm ]
Post subject:  Everett Bevel ?

After doing 3 bevels I had the opportunity to see the Everett DVD on how to. I'm going to incorporate some of it into the next one I do, one for me!! bliss A couple questions.

Is bending the sanded down binding as easy as it looks in the dvd? Any tips on that would be most welcome.

How has your success been with doing the veneering by his method? I've been using Titebond and taping the crap out of it with very good results. He said in the video "you have one shot at it". Where do you go if you blow that one shot?

Thanks!
Author:  johnparchem [ Sun Dec 07, 2014 3:18 pm ]
Post subject:  Re: Everett Bevel ?

I have done two so far based on Kent's DVD. I was able to bend ebony binding down the bevel, When you lay out the Bevel take some care to understand what the angle looks like just after the non-beveled channel and avoid a sharp bend there. On my first I had the bevel going down pretty steeply so that I did have a difficult bend. I had less trouble on the second.

I ironed on the veneer like he showed. You have more than one shot as you can remove any veneer you put on and try again with a clean veneer. Just have extra.

The other experience tips I would point out: Do not use a the top cutout to fill behind the top purfling as he does; instead use a scrap of the binding or other wood matching the bevel veneer. The way that the veneer is put on and trimmed, the veneer right next to the purflings is very very thin. So is it very easy to sand into the fill next to the binding. If it is the top fill it will show horribly.

Lastly Do not apply the veneer to the top and sides until they are basically finished sanded. Trim the veneer with a scraper and try to avoid sanding the top or sides much.

Author:  Pat Hawley [ Sun Dec 07, 2014 4:02 pm ]
Post subject:  Re: Everett Bevel ?

I haven't seen the Everett video but, based on what you are saying it sounds like you are bending binding down to go below an arm rest. It can be tricky to hold the binding in place. Aside from getting it tight along its bottom, it will want to flare out and not be tight against the side. What I have found works well is to use small screws that have a flat head (I used some from some old tuning machines) along the top edge of the binding to both hold it down and draw it in while gluing. After you have finished sanding the bevel, you will have small screw holes to fill in before they are covered with the veneer. Make sure you do this because, even though they are small, they can cause problems with the veneer if just left unfilled. In fact, this is how I was forced to find out that you do have more than one shot at doing the veneer!

Pat

Author:  Fred Tellier [ Sun Dec 07, 2014 4:55 pm ]
Post subject:  Re: Everett Bevel ?

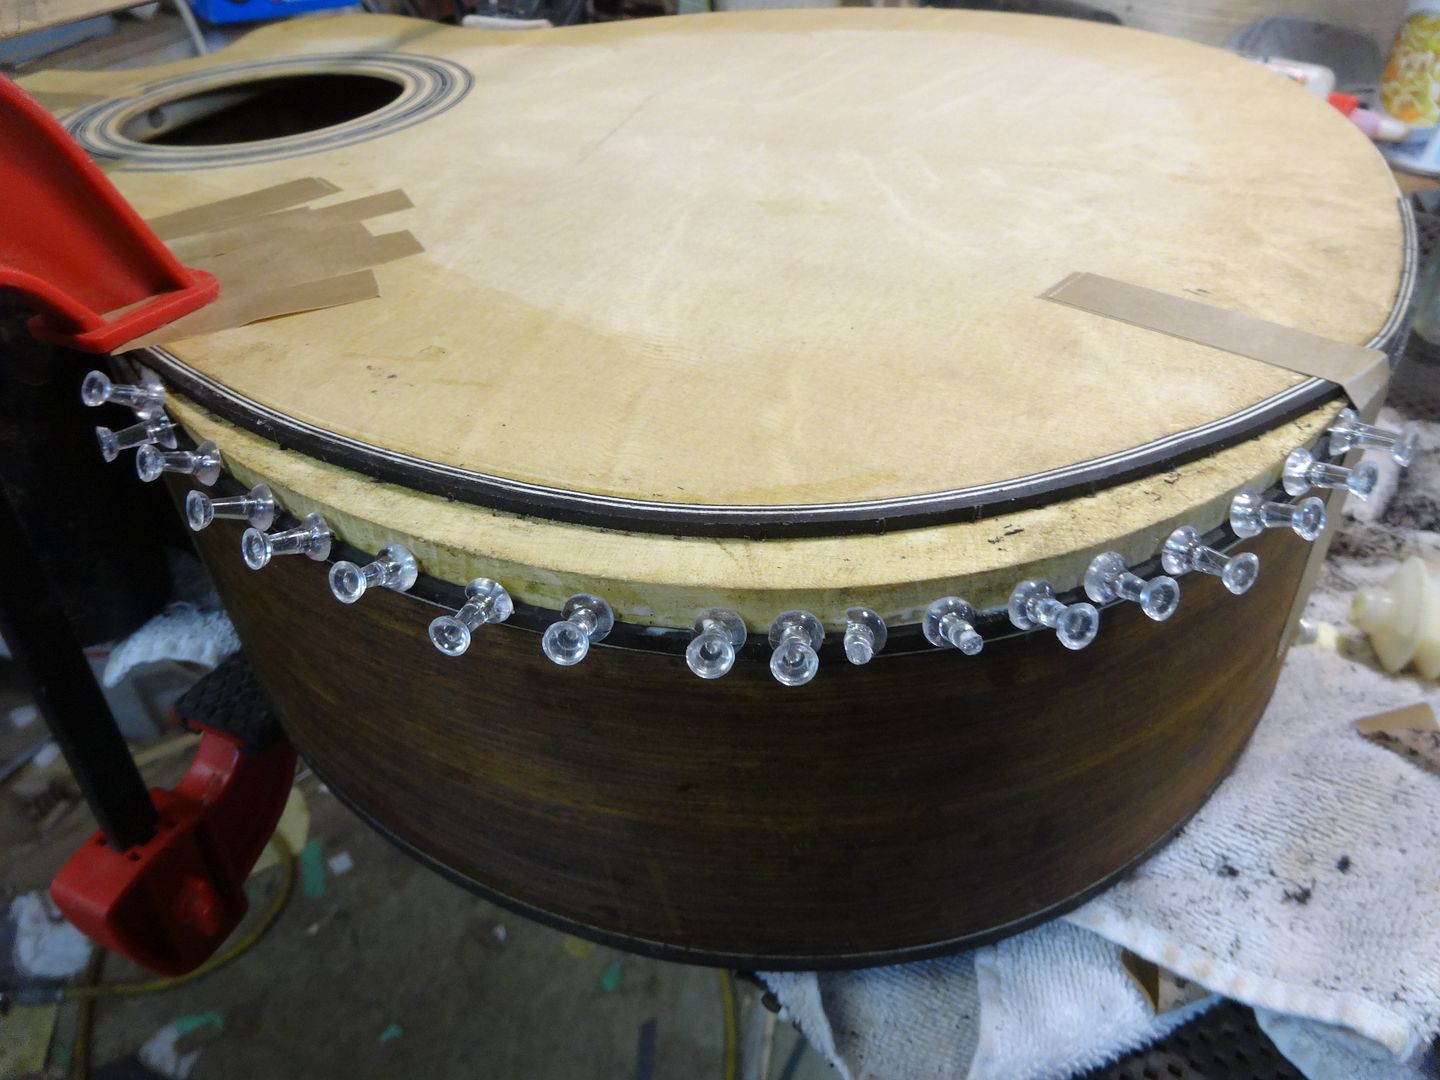
I use map pins as shown in Kent's video one of the tings I learned from it that made my arm bevel technique better.

As for bending the binding down into the bevel area a smooth transition and supersoft II makes it easier.

Image

Fred

Author:  DannyV [ Sun Dec 07, 2014 7:58 pm ]
Post subject:  Re: Everett Bevel ?

I found out the hard way that you had to do all sanding before veneer the hard way on my first one John. [headinwall]

Fred, in the video Kent said to add an extra black purfling line to the top. Looks like you stepped that up a notch?

Author:  Fred Tellier [ Sun Dec 07, 2014 9:45 pm ]
Post subject:  Re: Everett Bevel ?

Quote:
in the video Kent said to add an extra black purfling line to the top. Looks like you stepped that up a notch?


Yes I use a couple strips of binding material just to be safe.

Fred

Author:  TonyKarol [ Mon Dec 08, 2014 7:07 pm ]
Post subject:  Re: Everett Bevel ?

I figured out my way, and its just like Fred's ... extra binding on top for the veneer to sand into ... always looks good !!! I use fish glue, and wrap the veneer on after taping it in pace with surgical tubing .. the long set time plus the pressure from the wrap means the veneer always sits down tight ...

Author:  Pat Hawley [ Tue Dec 09, 2014 5:59 pm ]
Post subject:  Re: Everett Bevel ?

Before I used screws, I used pins. I found it difficult to push them all the way in without drilling a hole for them and when I drilled a hole for them they didn't pull the binding in tight. Perhaps I just need a smaller hole to get more friction. Regardless, screws are working well for me.

Pat

Author:  Fred Tellier [ Tue Dec 09, 2014 11:03 pm ]
Post subject:  Re: Everett Bevel ?

Pat hammer them in at an angle, that trick plus cutting the bevel shape into the side before the kerf lining and wood core and cutting the top for the bevel before gluing to the sides was worth the price of the dvd.

Fred

Author:  DannyV [ Wed Dec 10, 2014 12:13 am ]
Post subject:  Re: Everett Bevel ?

I have been using Spruce for the block and pins go in pretty easy. I have some fairly soft Alder that I might give a try. It should handle well also.

I've been using the O'Brien/Bamburg toot as a guide. Left a lot to the imagination and on the second one I did I discovered if you bevel the purfling, you could sand it back to a pretty perfect line. It does work but pretty stressful for my liking. Looks like a lot less pucker factor in this method. I shaped a side and got the bevel block glued in this last weekend. One very big advantage of this method is you ca comfortably make the inner blog no more than 1/4" over size. The other bevels I did had blocks much larger than needed out of fear of them ending up too small. I'm liking this better.

Thanks All.

Author:  Mike OMelia [ Thu Apr 02, 2015 11:44 pm ]
Post subject:  Re: Everett Bevel ?

Ok, so I'm doing 6 of these. My first was a pain. Doing the part where you bend down the binding. I sanded thin the binding as in the video. But I found I had to heat bend the binding. And even that was not enough. So, how do you do this part?

Author:  Pat Hawley [ Fri Apr 03, 2015 6:56 am ]
Post subject:  Re: Everett Bevel ?

Bottom line, as you can tell by the fact that people are using pins, nails or (in my case) screws to hold the binding down some force is required. Also, it isn't necessary to go too deep down the side to get the proper angle for the arm rest - it goes more into the top than the side.
Pat

Author:  Mike OMelia [ Fri Apr 03, 2015 8:24 am ]
Post subject:  Re: Everett Bevel ?

Thanks Pat. However, I followed the advice of cutting deeper on the side than the top (as in the DVD). I have 5 bodies ready to go. The 6th, I already did and that is where I discovered the difficulty of bending down the curve. I found that heat bending was not very useful.

Author:  Pat Hawley [ Fri Apr 03, 2015 9:55 am ]
Post subject:  Re: Everett Bevel ?

The recommendation is to go deeper into the side than the top? Interesting. I haven't seen the DVD and who am I to question it's author but when I look at my arm angle when it hits a guitar it appears to me that it's shallower with respect to the top than to the side, assuming of course, that you have a reasonably flat stomach! I do, however, recognize the desire to minimize the intrusion into the top to keep the impact on the top as small as possible. To that end, I try to keep my arm-rests relatively small. It doesn't take a huge arm-rest to make a big difference in comfort. Also, in my opinion, all arm-rests detract from the looks of the guitar regardless of how well they are done. I just don't like how they interfere with the curved and symmetric look of the lower bout. But that's just my taste in aesthetics and their function makes them a net positive value. When I get around to building a guitar for myself, I will have one.

Pat

Author:  Pat Hawley [ Fri Apr 03, 2015 10:20 am ]
Post subject:  Re: Everett Bevel ?

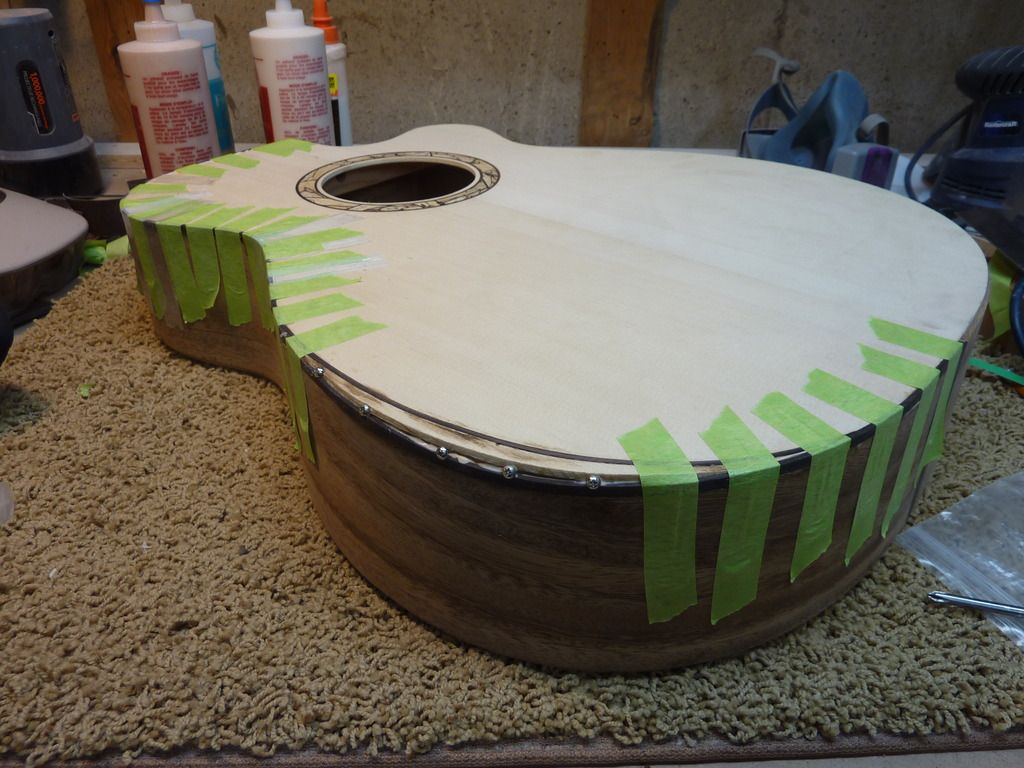
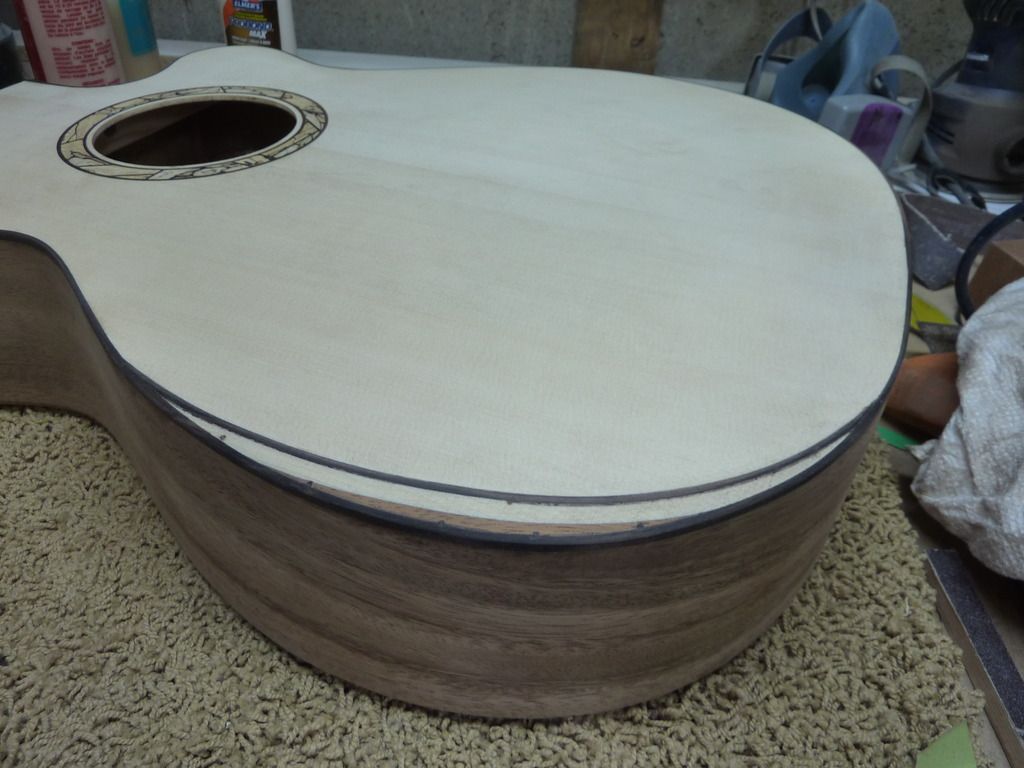
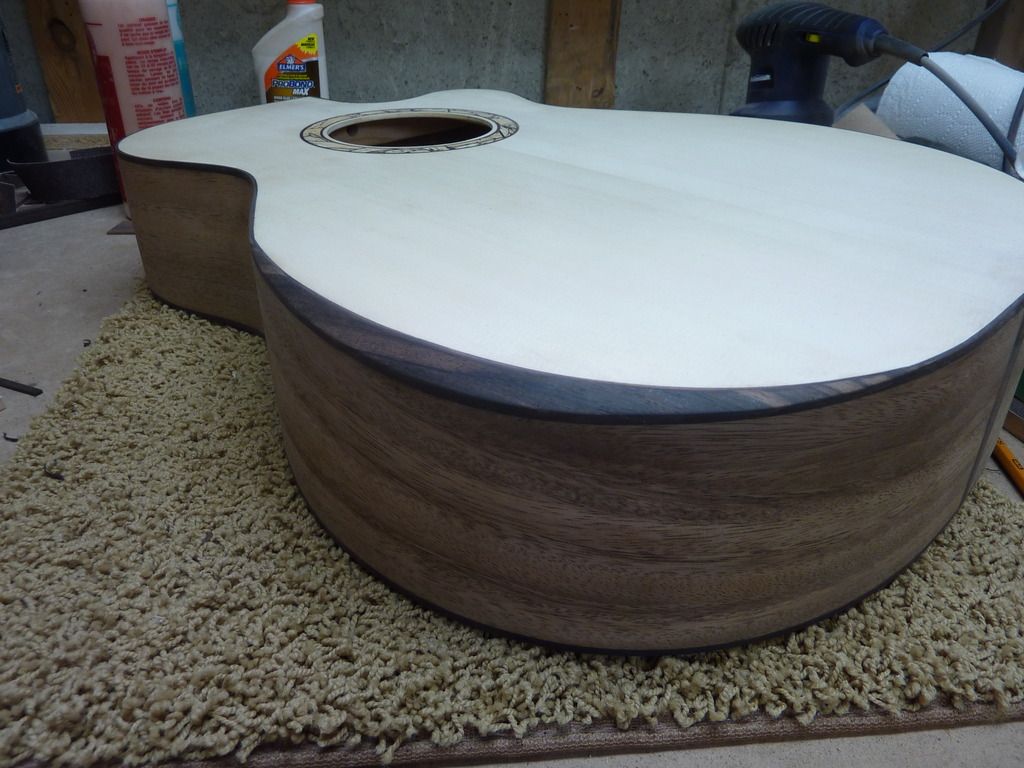
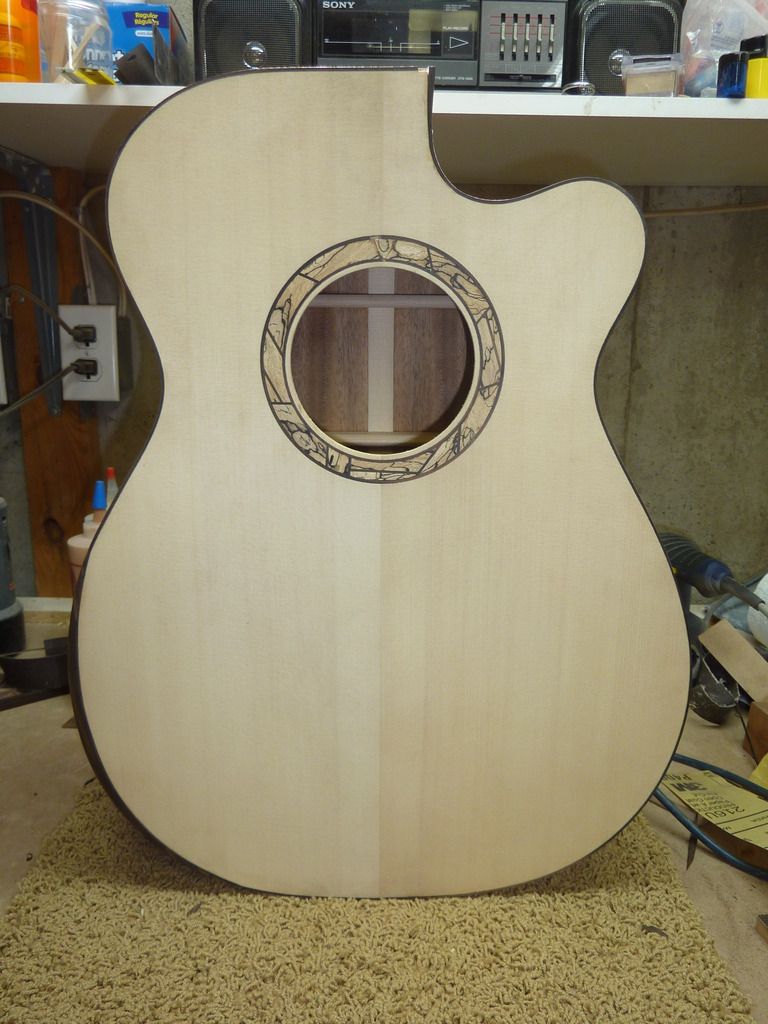
For what it may be worth, here are some pictures of an arm-rest I recently completed:

This first picture is to show that I did not go very low with the binding below the arm-rest and that I used screws to both keep the binding down in place and pull in its top edge as it wants to flare out.

Image

After rasping and sanding the corner away. It is important to fill in the holes left by the screws prior to putting on the veneer:

Image

The finished arm-rest. It is about 1 cm wide at its widest point:

Image

Front view of guitar body. The binding is thicker up by the neck joint area because I'm doing a contoured cutaway so the router went deeper in this area. I knew this would happen and put in a wedge of binding to fill the gap. This will all be under the finger board:

Image

Three-quarter view of guitar body:

Image


This might not be to your taste, but an arm rest of this size, i.e. going this far down into the side, is functional and not too, too hard to do.

Pat

Author:  Mike OMelia [ Fri Apr 03, 2015 11:39 am ]
Post subject:  Re: Everett Bevel ?

Yes, Kent makes a point about stealing real estate from the top for this purpose. He has no data to support it, just a feeling that if you take too much from the top, you might effect sound board resonance. He actually specifies 1/2" (peak ingression) for top and 3/4" for side. The way he (and I as a result of following his instructions) make the rest core leaves 1/4" overlap for gluing to side and top.

Author:  Mike OMelia [ Sat Apr 04, 2015 9:58 pm ]
Post subject:  Re: Everett Bevel ?

The first one I did was with bloodwood. I had lots of problems. I can't believe Kent does not use heat bending given the slopes and all. Today I tackled 3 of the bodies using African Blackwood binding. I spent a little more time working out the crease points. Then even more time on the heat pipe. Worked out much better. I'll post some pics soon

Author:  Ken Jones [ Sun Apr 05, 2015 7:49 am ]
Post subject:  Re: Everett Bevel ?

I feel that the most aesthetically unappealing thing about bevels is the kink in the binding at the binding/bevel transition. That why I like making mine with a fluid transition, appearing that the binding just widens in that area. This approach makes that transitional bend in the binding much less of an issue. Also, I feel that to make it worth all the extra effort, the bevel should be close to a 45 degree angle relative to the top and back, thereby equally reducing the sharpness of both edges.

And once armrest bevels cease to be challenging enough, try a ribrest bevel. It's big fun!
Image


Ken Jones
Mountain Song Guitars

Author:  Mike OMelia [ Sun Apr 05, 2015 9:00 am ]
Post subject:  Re: Everett Bevel ?

Ken, could u post a picture example of the issue that you mentioned? And one of how you corrected it? I agree with the angle. Of course, Kent's approach leads to a smaller angle, around 34 degrees. I don't have enough experience to judge this.

BTW, I did come up with a technique to pre-shape the interior of the rest core (the slope) before gluing. That of course lead to clamping issues. So I made shaped cauls that hung off the edge of the core (the technique). The idea of shaping after gluing did not appeal to me. :)

Author:  DannyV [ Sun Apr 05, 2015 12:38 pm ]
Post subject:  Re: Everett Bevel ?

What Ken is talking about is mentioned in the DVD mike. Fairing the transition so there is no hard angle. Just a smooth line from bevel to binding. Once you cut your binding channel you can do the final fairing in with a file. Some people do like the Laskin look. It can look pretty striking. I'm on the fence.

I like the look of a 45 degree bevel also. I shoot for 3/4 x 3/4" on mind but I have only put them on a 16" guitar. If I was going to put one on a smaller guitar, the bevel would likely be smaller.

FWIW that iron on approach really doesn't appeal to me. Titebond and a lot of tape. Three black one's that I have done were also African Blackwood binding. Dyed black veneer works well for the bevel. I fact, after using it on bevels, I'm thinking of using it for headstocks also. Under finish it looks like any other black wood.

Author:  DannyV [ Sun Apr 05, 2015 12:43 pm ]
Post subject:  Re: Everett Bevel ?

BTW Ken. Beauty!!!!!!!! I've got a set of Myrtle I'me looking forward to using.

Page 1 of 1 All times are UTC - 5 hours
Powered by phpBB® Forum Software © phpBB Group
http://www.phpbb.com/