Official Luthiers Forum! http://www.luthiersforum.com/forum/ |
|
Backstrapping / hand stop / volute tutorial http://www.luthiersforum.com/forum/viewtopic.php?f=10101&t=25874 |
Page 1 of 2 |
Author: | Arnt Rian [ Wed Feb 03, 2010 4:56 pm ] |
Post subject: | Backstrapping / hand stop / volute tutorial |
Since this topic was brought up recently, I thought I’d post some pictures of how I make this style of headstock / neck transition. Most of the pictures are from a “build thread” I did over on Luthier Community, where they appeared in different posts. I’ve cut and pasted together as best I could the ones I thought would be relevant for this tutorial. My apologies if things aren’t as neatly structured as they could have been... OK, here goes. After gluing up my slip matched two piece neck blank, I surface the headstock front on the belt sander. ![]() 
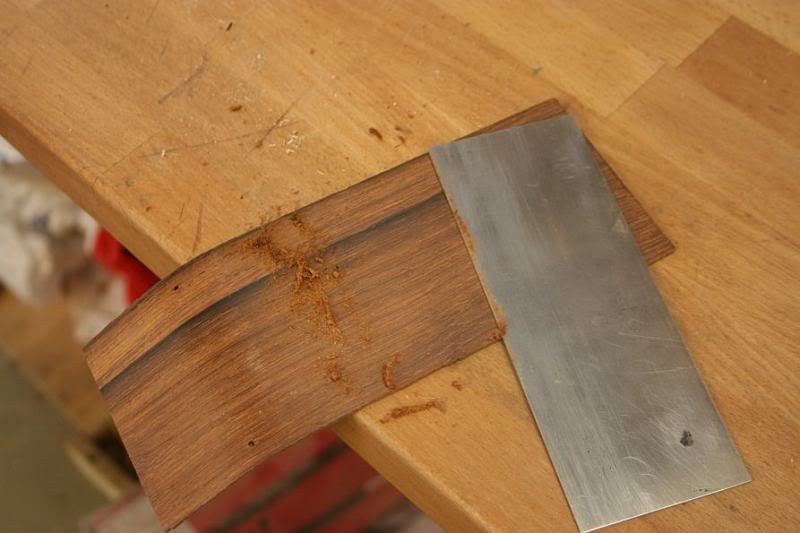
I mark the neck shaft / headstock transition, and sand to the line. ![]() 
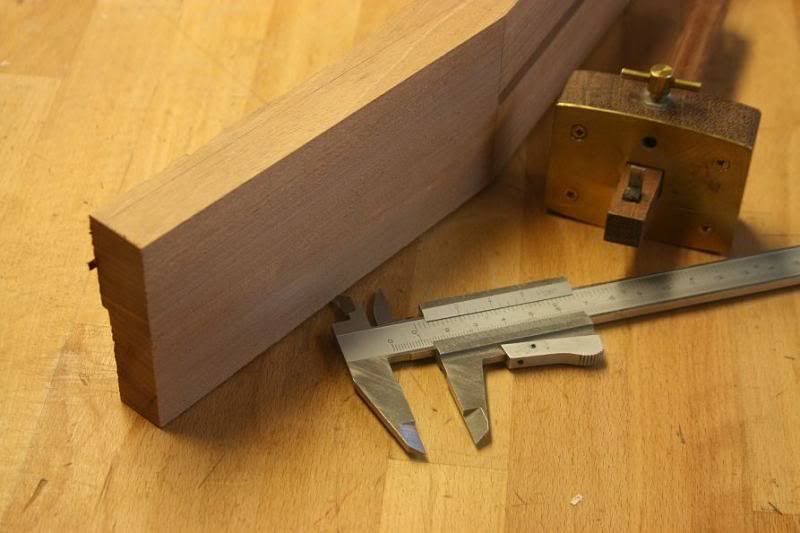
This will be a slothead, and I aim for a final thickness of 19 mm. I will use both front and back headstock veneers, which both will be 1.5 mm, so I need to thin the headstock to 16 mm. I mark this distance with a marking gauge. ![]() 
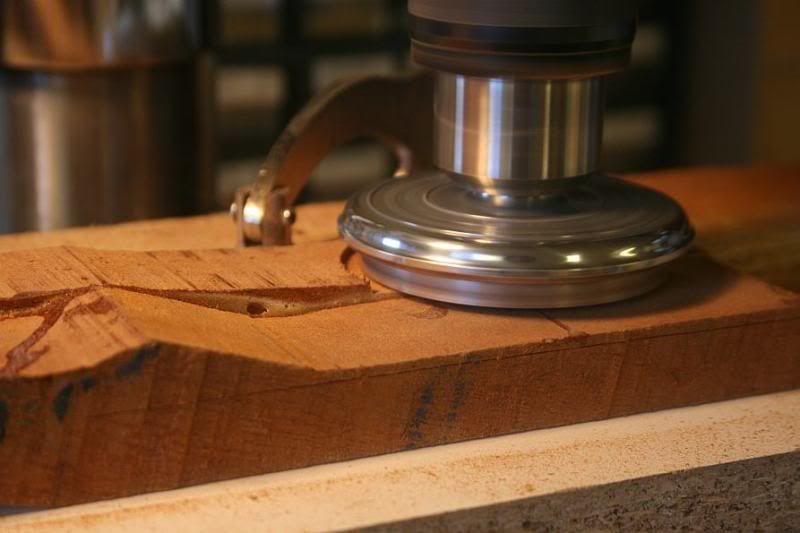
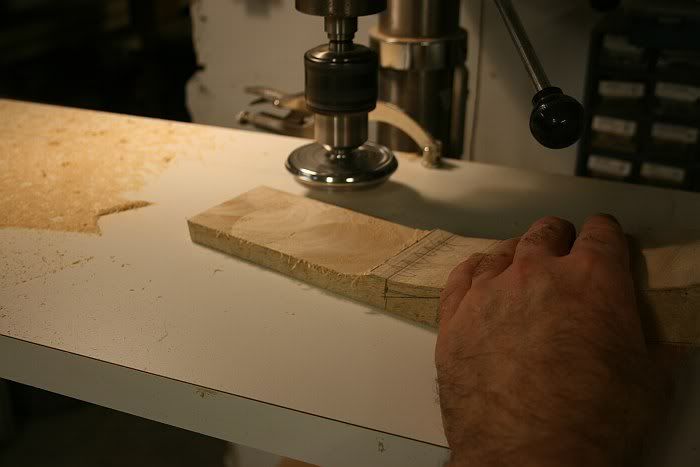
Most of the wood wasting is done with a Safe-T planer. ![]() 
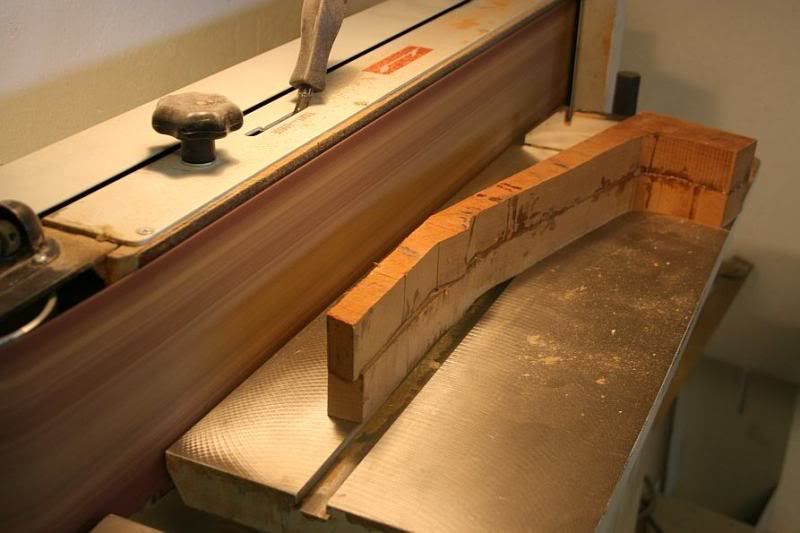
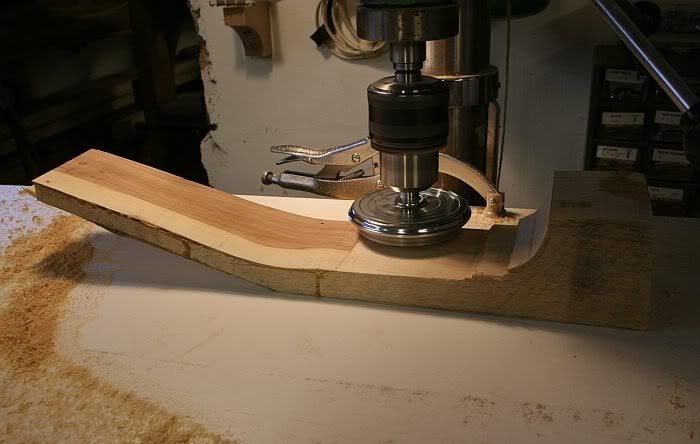
The last mm or so is removed with the drum sander ![]() 
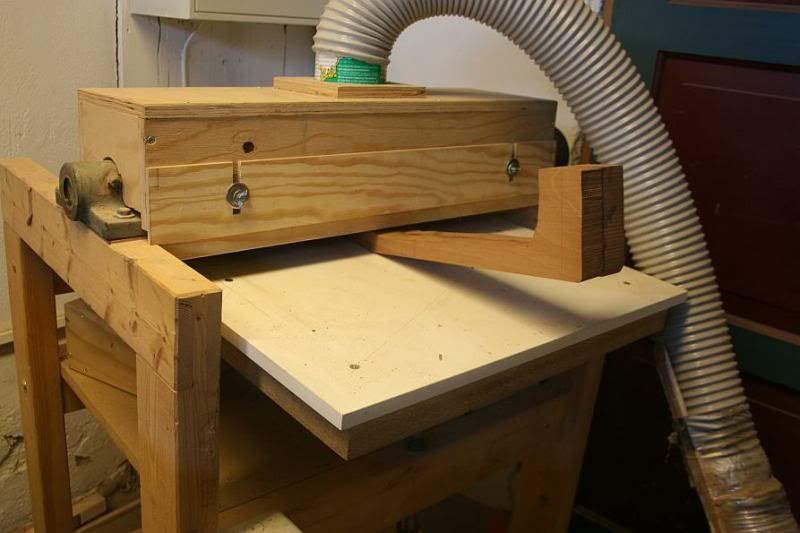
The radius of the drum determines the geometry of my volute
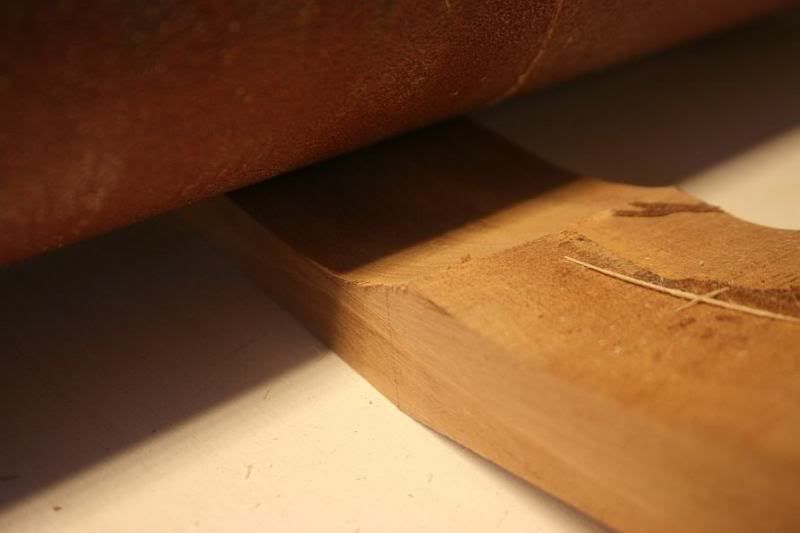
 ![]() So far so good ![]() Bending the back veneer on the hot pipe... ![]() ...until it matches ![]() 
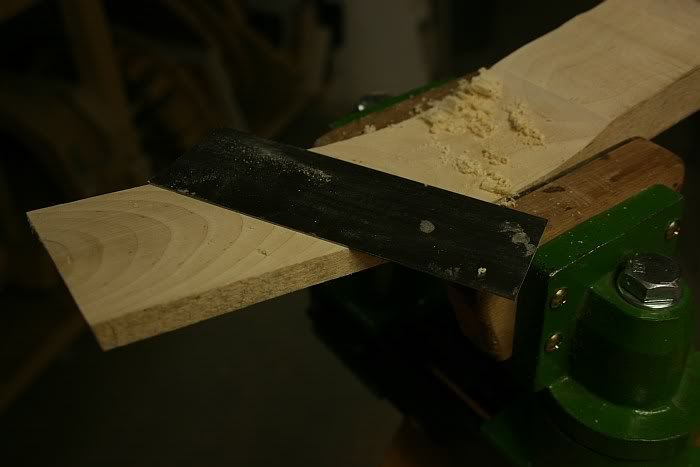
Scraping the gluing surface. The sander has 80 grit paper which doesn’t leave the wood very smooth . I run the scraper over all gluing surfaces immediately before applying the glue as a matter of course. ![]() 
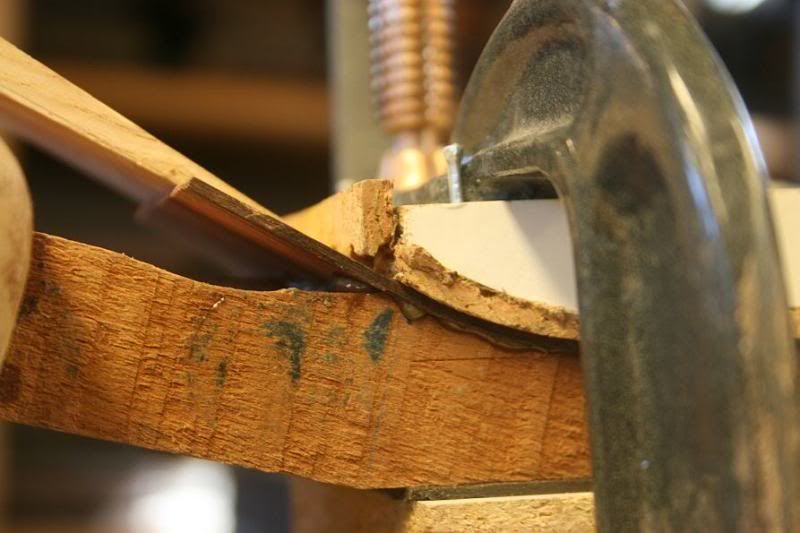
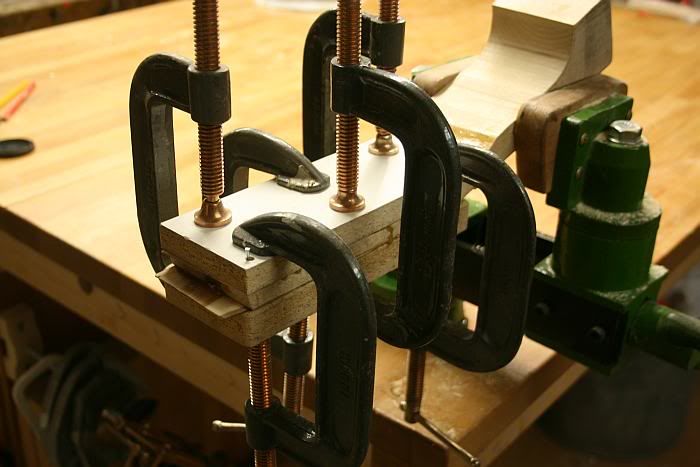
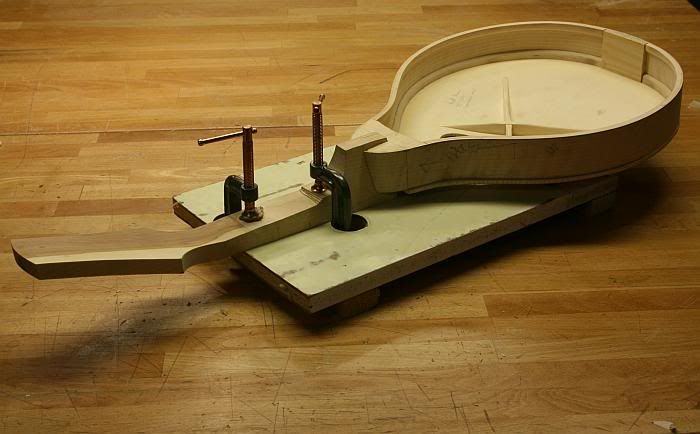
Detail shot of the glue up sandwich. The back veneer has a cork lined caul which matches its curve. For good measure I jam a couple of wedges in there to make sure the back strap gets sufficient clamping pressure. The glue squeeze out is reassuring... ![]() 
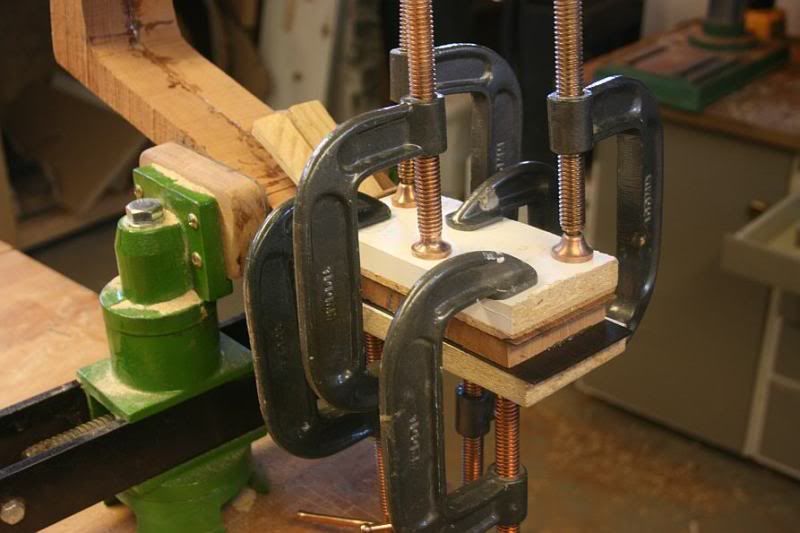
So, there it is, all clamped up ![]() 
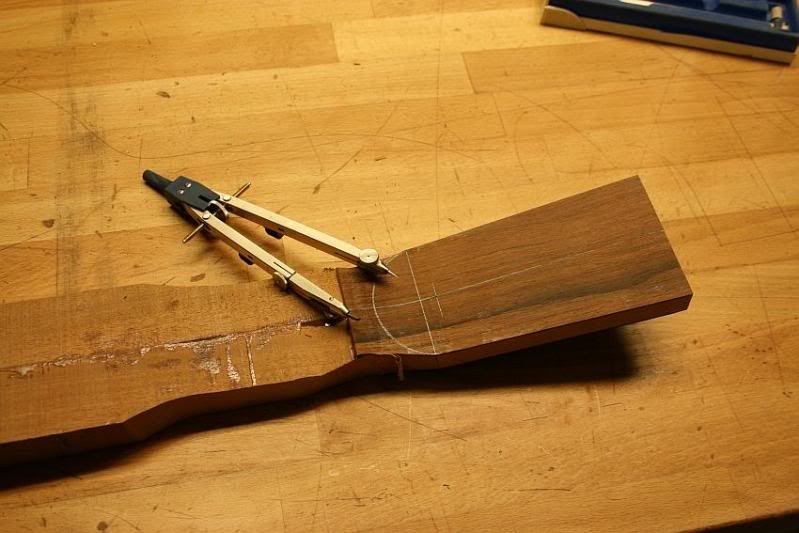
After shaping the headstock outline, it is time to work on the volute. I start by drafting the shape with a compass. No jigs or anything for this, so they turn out a little different each time, which is OK by me. ![]() Removing the bulk of the wood with a sharp chisel ![]() Rasping with the Nicholson #49 (or is it the #50?) ![]() Some more rasping... ![]() When I remember, I like to put in the nut when I shape the neck. It ensures a perfectly fitting nut, and keeps the fragile edges around the nut slot intact. Here I’m trimming the headstock veneer back with a guide caul. ![]() Shaping the nut bottom to fit the headstock angle. I made this nut holder to save save my fingertips from that merciless belt sander ![]() 
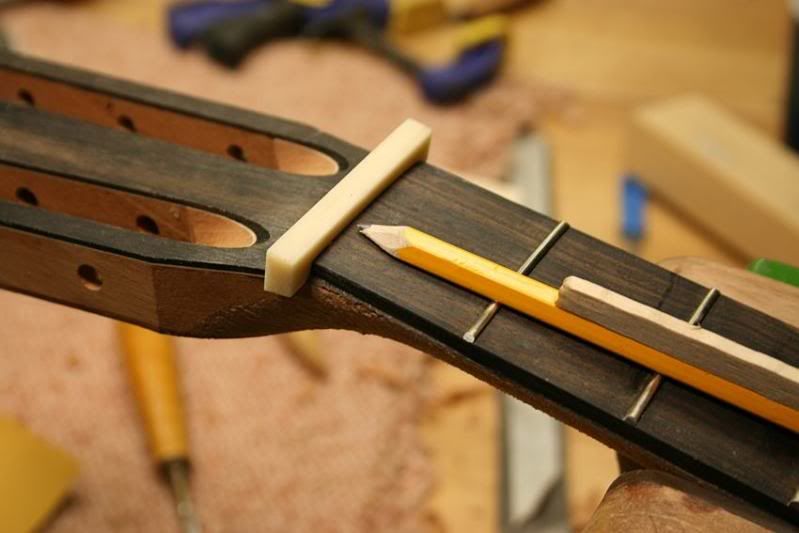
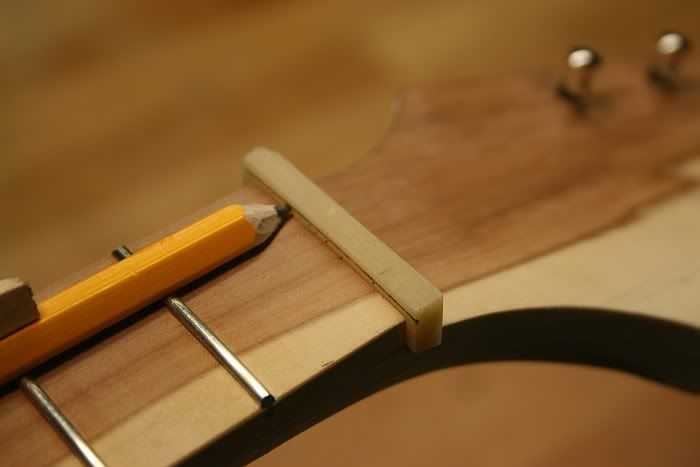
With the nut it place, I trace the fret position and all surrounding edges on it with a half pencil. ![]() 
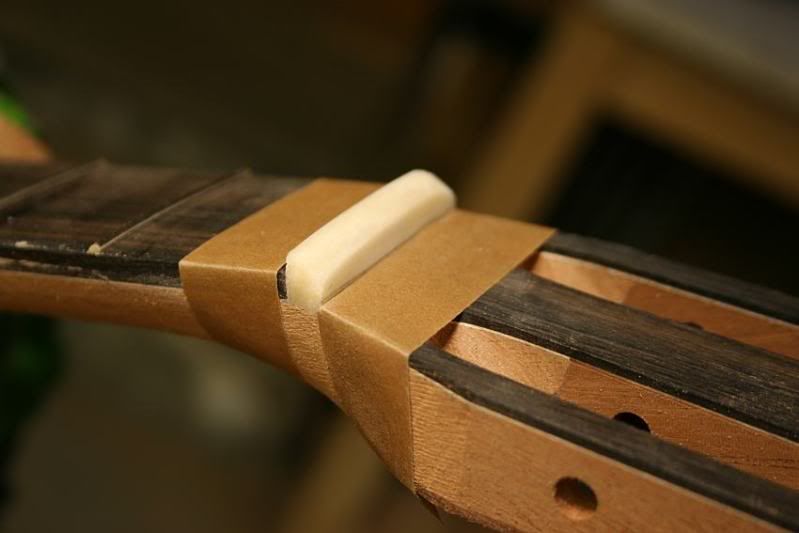
I then rough shape the nut around these marks on the belt sander again, before it is temporarily glued in place. The tape is there protect the headstock and fingerbaord edges. ![]() 
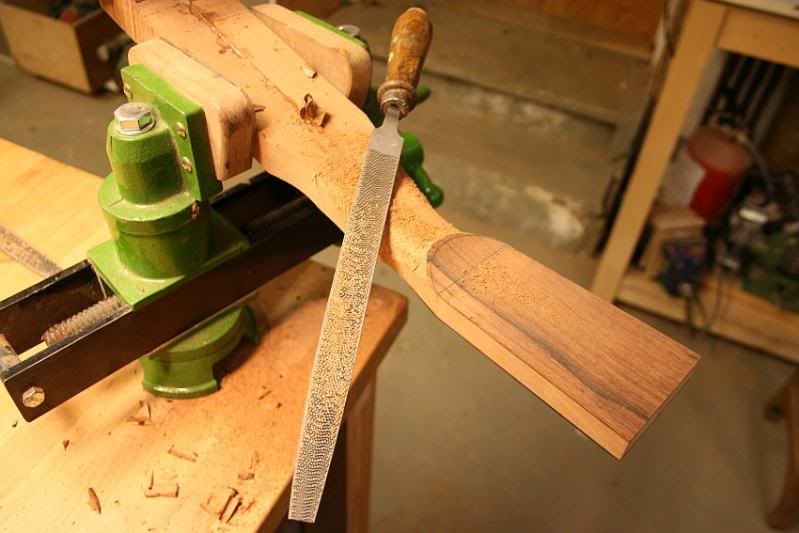
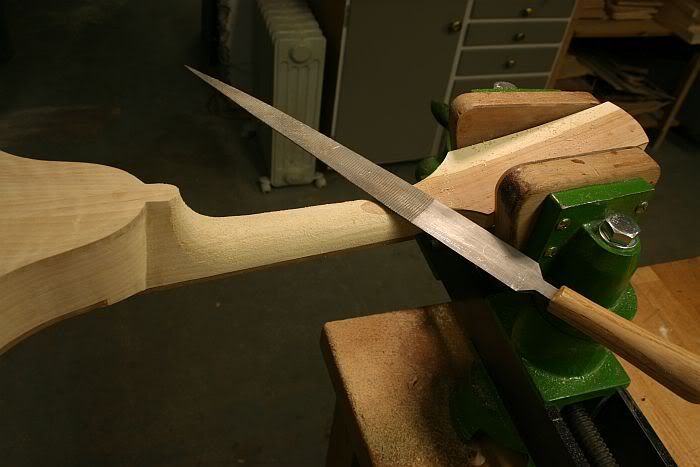
With all the rough shaping of the neck done, I use a file and finally sandpaper to blend in all the surfaces. ![]() 
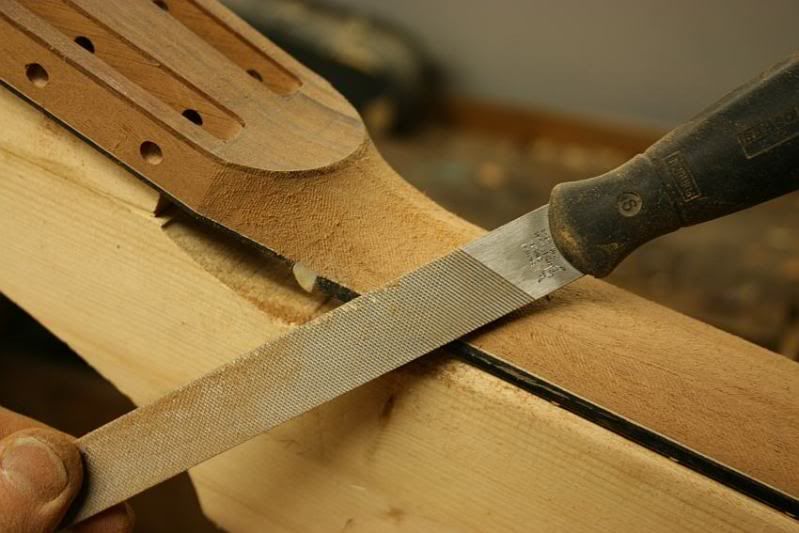
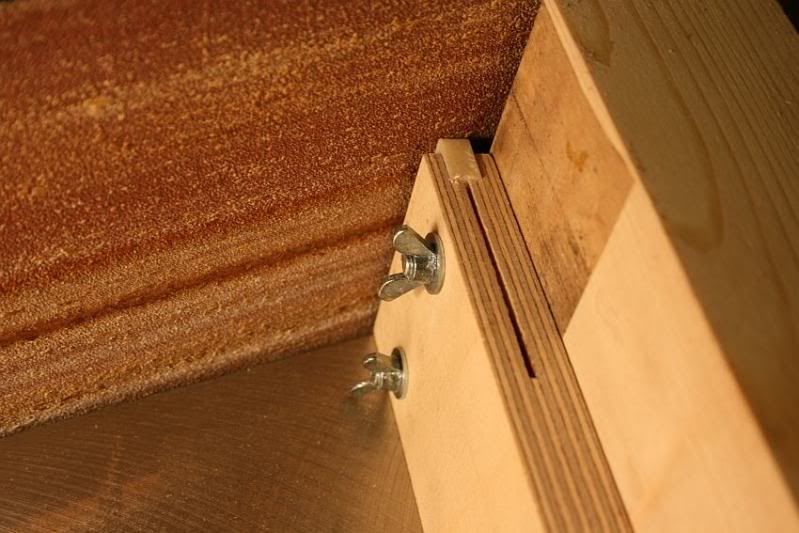
Here’s my neck holding fixture, which I clamp in my bench vise. ![]() The nut and headstock almost done
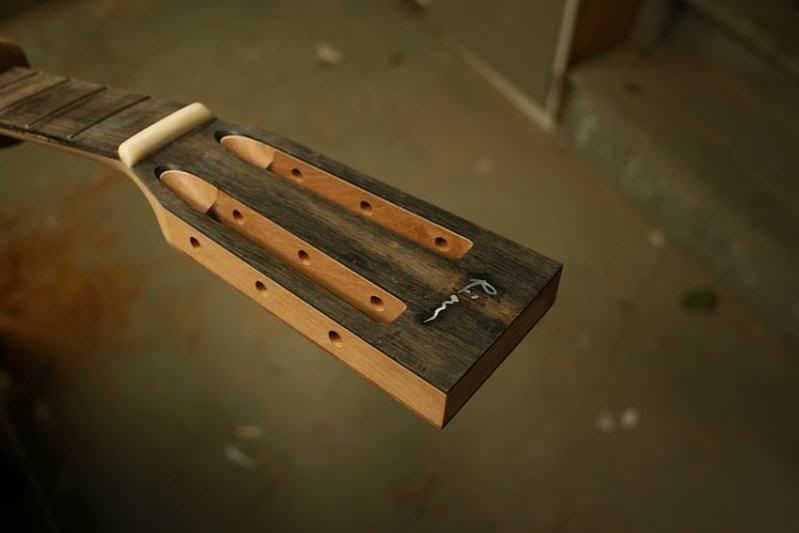
 ![]() The whole thing. ![]() Here’s a picture of a finished, but different headstock, done the same way. ![]() That was the hand stop (or whatever you want to call it) variety. Here’s some pictures of how I recently did a more ordinary backstrap. The pictures are cut and pasted from a mandola build I’m documenting over on MIMF in their “$100 Acoustic Challenge”. 
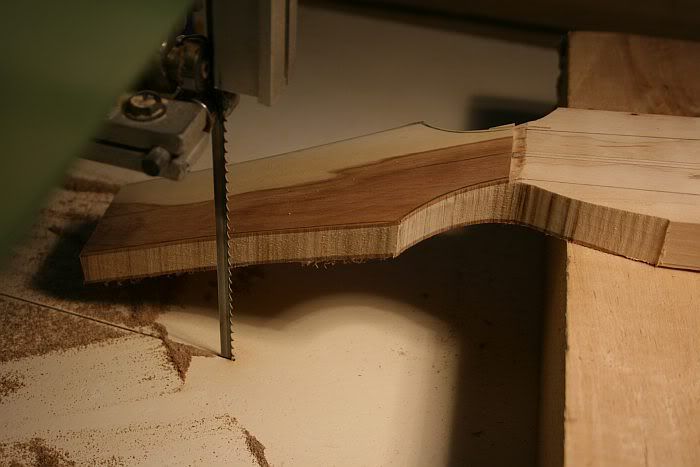
After bandsawing out the neck from a larger blank, the headstock front and fingerboard faces are trued up on the edge sander. ![]() I’ve sliced up some pear wood for headstock back and front veneers, and I thickness them on the edge sander. ![]() 
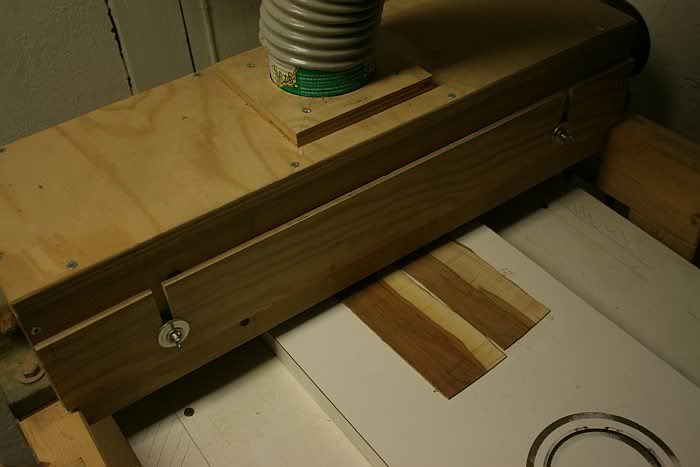
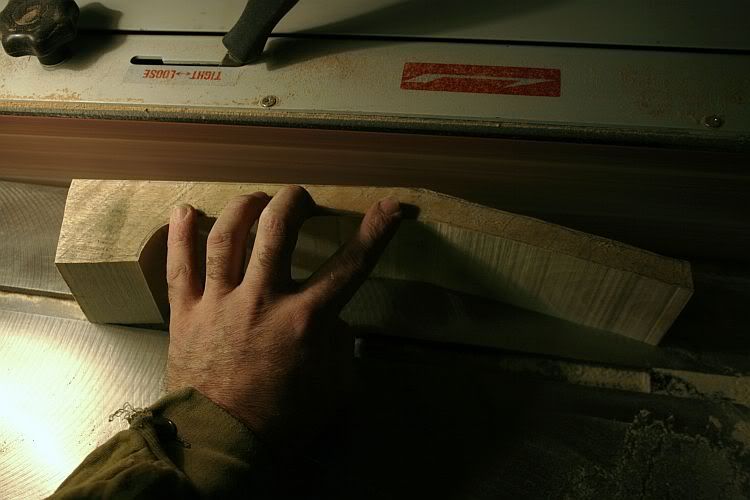
Most of the wood from the back of the headstock is removed with a Safe-T planer. ![]() 
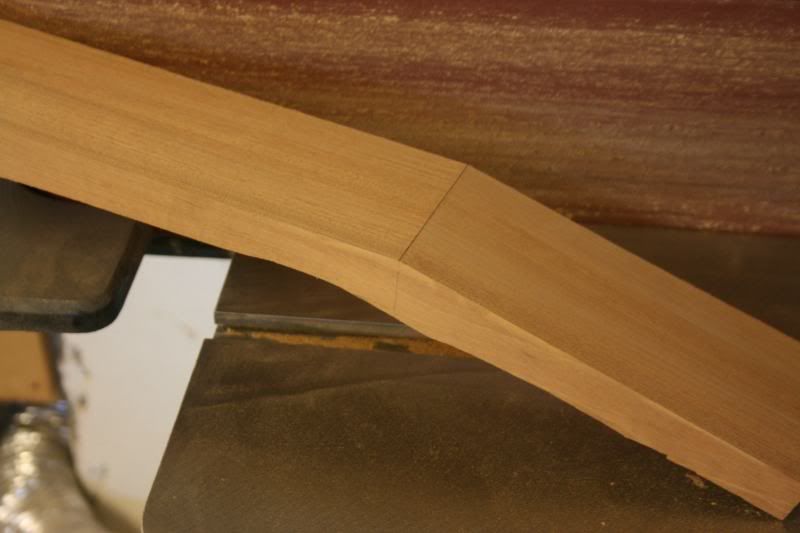
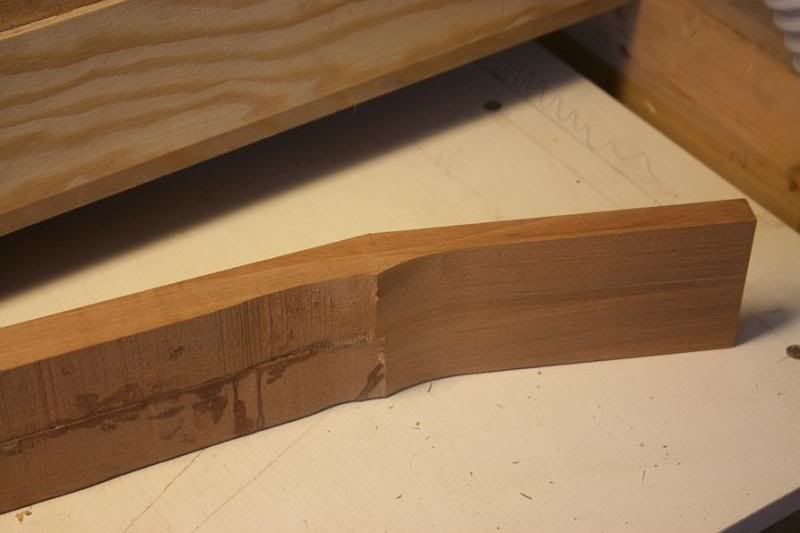
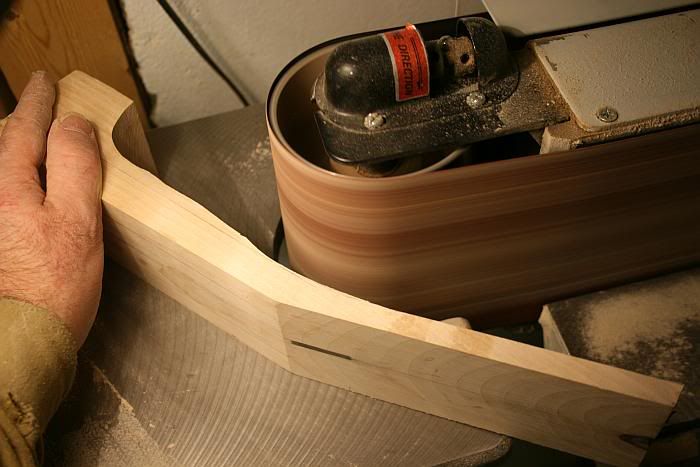
The headstock / neck transition is shaped on the idle drum end of my long belt sander. ![]() Lastly things are smoothed out with a scraper. ![]() 
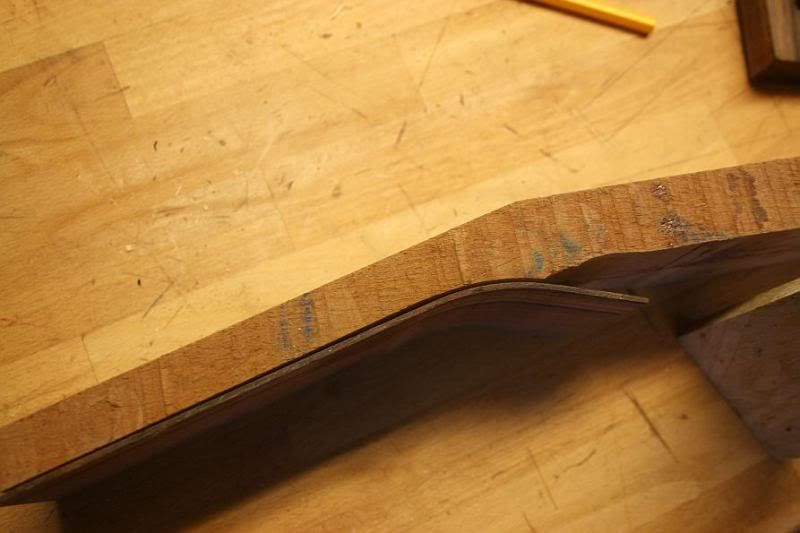
The back veneer is bent on the hot pipe to conform to the headstock / neck transition curve. Finally both veneers are glued to the headstock, with registering pins and appropriately shaped cauls. ![]() Fitting a nut before the final shaping of the neck is always a good idea. It saves the fragile edges of the neck around the nut from tear outs, plus you get a perfectly fitting nut. ![]() Shaping the neck with a large rasp ![]() 
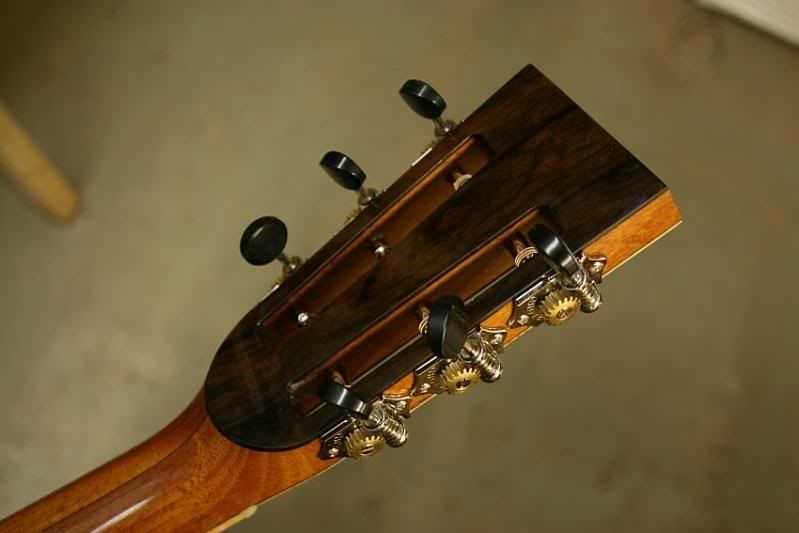
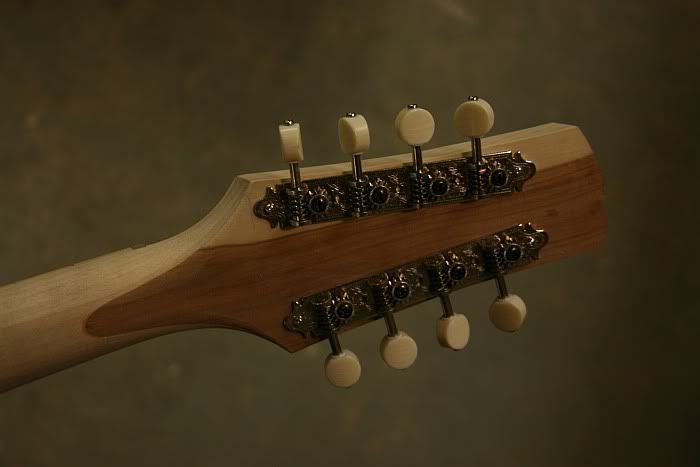
Back of the headstock, almost done, strung up "in the white". ![]() |
Author: | Heath Blair [ Wed Feb 03, 2010 5:27 pm ] |
Post subject: | Re: Backstrapping / hand stop / volute tutorial |
arnt, thats just beautiful and well executed work. thank you for putting it together. |
Author: | meddlingfool [ Wed Feb 03, 2010 5:31 pm ] |
Post subject: | Re: Backstrapping / hand stop / volute tutorial |
Thanks! I've had random levels of success with this. However, I found the mando one a little unclear. How do you get the backstrap to extend so far past the nut? BTW, love the matching FB/Veneers. Tres classy! |
Author: | Flori F. [ Wed Feb 03, 2010 5:40 pm ] |
Post subject: | Re: Backstrapping / hand stop / volute tutorial |
Many Thanks, Arnt! |
Author: | Arnt Rian [ Wed Feb 03, 2010 5:59 pm ] |
Post subject: | Re: Backstrapping / hand stop / volute tutorial |
meddlingfool wrote: However, I found the mando one a little unclear. How do you get the backstrap to extend so far past the nut? Yeah, I guess that could have been explained clearer... Here are some more pictures. After gluing on the veneers, I thickness the neck by running it under the Safe-T planer. This also levels the back veneer with the neck shaft. ![]() Here I am cutting the headstock outline on the band saw. You can barely see how the backstrap extends down the back of the neck. Wish I had a better picture, but I think you get the idea. ![]() This picture shows the neck being glued to the body, but you can also see how the backstrapping looks at this stage, when this part of the neck still has the rough marks from the band saw, and has yet to be shaped with a rasp. ![]() |
Author: | Hesh [ Wed Feb 03, 2010 6:16 pm ] |
Post subject: | Re: Backstrapping / hand stop / volute tutorial |
This is a great post Arnt my friend and your workmanship is absolutely superb!!! Great pics too and it was very easy for me to follow. I wanted to ask you since you are making/shaping your nut as you make the neck if you finish your guitars with the nut installed? It's a great look that can be found on some electrics and even though the finish has to be scored to remove the nut that's not difficult to do. I'm thinking of doing this too and I am wondering if you do it? Thanks Arnt! ![]() |
Author: | Arnt Rian [ Wed Feb 03, 2010 7:01 pm ] |
Post subject: | Re: Backstrapping / hand stop / volute tutorial |
Glad you like it, Hesh! I take the nut out before finishing, though. I like the look and feel of a polished bone nut just fine. |
Author: | meddlingfool [ Wed Feb 03, 2010 8:08 pm ] |
Post subject: | Re: Backstrapping / hand stop / volute tutorial |
Thanks for the extra pics. I think I get it now. It's great look, I'd like to try it. Cheers |
Author: | JohnAbercrombie [ Wed Feb 03, 2010 8:47 pm ] |
Post subject: | Re: Backstrapping / hand stop / volute tutorial |
Thanks, Arnt- I've done 'volutes' just the way you describe. Works great. (You can use leather on the clamping caul, as an alternative to cork.) I think I'll try the 'backstrap' look on a future build. Cheers John |
Author: | Dennis Leahy [ Thu Feb 04, 2010 12:38 am ] |
Post subject: | Re: Backstrapping / hand stop / volute tutorial |
I could look at your work all day, Arnt! One thing I didn't catch before (or forgot as fast as I tried to remember), is how you stop the saw blade from cutting into the neck wood, when you're trimming the upper headstock veneer (for the nut slot) after-the-fact. I think you told me you get close and finish with a chisel, is that correct? Thanks! Dennis |
Author: | Colin North [ Thu Feb 04, 2010 5:02 am ] |
Post subject: | Re: Backstrapping / hand stop / volute tutorial |
Hi Arnt, thanks for that, great tutorial, and arrived at a great time for me - I have two necks ot there ready to go. BTW, I have the same edge sander (BL80 or a very close clone) - got a nasty bite, eh! I like the nut holder for angle at bottom of the nut, and will be using that idea to keep my finger tips (don't ask) I did something similar for my last neck, but as my thickness sander needs bits taken out to do like you have shown, I used the idler wheel on my belt sander to shape the "volute" using a wooden block on the end table, Today I'm going to make (another..) jig to thickness the head to make the process more controllable. Thanks for sharing |
Author: | Rene [ Thu Feb 04, 2010 7:53 am ] |
Post subject: | Re: Backstrapping / hand stop / volute tutorial |
Hi Arnt, Very nice tutorial, thanks. I have a newbie type question. On the backstrap mandolin, did you glue down the veneer on a full thickness neck or did you reduce the neck directly under the veneer to accomodate it? I'm thinking that a veneer on a full thickness neck woud cause problems like sand thru's. On the other hand, inlaying the veneer sounds tricky also. René |
Author: | Hibdon Hardwood [ Thu Feb 04, 2010 8:50 am ] |
Post subject: | Re: Backstrapping / hand stop / volute tutorial |
Nicely done Arnt; very clean and beautiful work! Thanks for taking the time to share with all of us. |
Author: | Terence Kennedy [ Thu Feb 04, 2010 8:57 am ] |
Post subject: | Re: Backstrapping / hand stop / volute tutorial |
Very nice Arnt! Terry |
Author: | letseatpaste [ Thu Feb 04, 2010 9:41 am ] |
Post subject: | Re: Backstrapping / hand stop / volute tutorial |
My head always pops up like a gopher when I see Arnt Rian's name starting a new thread because I know there will be tasteful design work and awesome photography. |
Author: | WaddyThomson [ Thu Feb 04, 2010 10:02 am ] |
Post subject: | Re: Backstrapping / hand stop / volute tutorial |
Yes indeedy! Arnt's the man when it comes to show n tell! ![]() ![]() ![]() |
Author: | ksomerville [ Thu Feb 04, 2010 10:07 am ] |
Post subject: | Re: Backstrapping / hand stop / volute tutorial |
Thanks for taking the time to post this - I have been looking for a nice clear demonstration of this step. Your pictures are really well done - Kathy |
Author: | coke_zero [ Thu Feb 04, 2010 1:26 pm ] |
Post subject: | Re: Backstrapping / hand stop / volute tutorial |
Thank you for taking the time to do this, it is very helpful. Can someone explain the Safe-T Planer a bit more? |
Author: | Arnt Rian [ Thu Feb 04, 2010 3:22 pm ] |
Post subject: | Re: Backstrapping / hand stop / volute tutorial |
Thanks folks, I'm glad if you are finding this helpful. Dennis Leahy wrote: One thing I didn't catch before (or forgot as fast as I tried to remember), is how you stop the saw blade from cutting into the neck wood, when you're trimming the upper headstock veneer (for the nut slot) after-the-fact. I think you told me you get close and finish with a chisel, is that correct? Dennis, I may have said that...but actually you can saw pretty much straight down until you just kiss the neck wood with the saw, and there won't be much chisel work involved. Rene wrote: I have a newbie type question. On the backstrap mandolin, did you glue down the veneer on a full thickness neck or did you reduce the neck directly under the veneer to accomodate it? I'm thinking that a veneer on a full thickness neck woud cause problems like sand thru's. On the other hand, inlaying the veneer sounds tricky also. Hi Rene, I'm not quite sure what your question is, but I do take the thickness of the veneer into account when I thickness the neck in this area. The "tongue" end of the veneer is pretty much feathered out down the neck shaft. The neck profile and how you 'blend' the veneer into the neck shaft will affect its final shape. coke_zero wrote: Can someone explain the Safe-T Planer a bit more? http://www.stewmac.com/shop/Tools/Planes/Wagner_Safe-T-Planer.html |
Author: | Chris Oliver [ Thu Feb 04, 2010 5:47 pm ] |
Post subject: | Re: Backstrapping / hand stop / volute tutorial |
Arnt, Great info and pics... I love the nut holder and have a side project for this evening I've been meaning to get to since erased two fingerprints a few nights ago. Its the little things. ![]() |
Author: | Rene [ Thu Feb 04, 2010 6:18 pm ] |
Post subject: | Re: Backstrapping / hand stop / volute tutorial |
Arnt, Thanks for the info and I also went back and looked at the photo's again so now I get it. Rene |
Author: | James W B [ Thu Feb 04, 2010 6:20 pm ] |
Post subject: | Re: Backstrapping / hand stop / volute tutorial |
One of the best TUTES yet.Real precise and understandable. Thanks I`m gonna try one . JAMES |
Author: | DannyV [ Thu Feb 04, 2010 9:54 pm ] |
Post subject: | Re: Backstrapping / hand stop / volute tutorial |
Great work as usual Arnt! It looks like the entire heel of the mando is the male part of the dovetail? I'd really like to know a little more about it. I have an "A" sitting in finish right now. I had a hard time wraping my head around the neck joint so I built it like a guitar with a bolt on.I think it will work but I really need to learn the dovetail. I would like to try an "F" sometime. Thanks for taking the time, Danny |
Author: | gozierdt [ Fri Feb 05, 2010 11:14 am ] |
Post subject: | Re: Backstrapping / hand stop / volute tutorial |
Extra nice detail, Arnt. I really like your work, along with lots of others. I expecially like the mando backstrap. I like the way it transitions seamlessly into the neck profile. I'm working on two necks now, I'm going to try this on both. ![]() |
Author: | Tim L [ Fri Feb 05, 2010 11:46 am ] |
Post subject: | Re: Backstrapping / hand stop / volute tutorial |
I really got a lot out of what you have put up Arnt. Last guitar I made wound up with a backstrap on the neck out of necessity as the head got too thin. Your method is much more thought out than mine was. Thanks for posting this, hope someone stickys it to the tutorial section. Tim |
Page 1 of 2 | All times are UTC - 5 hours |
Powered by phpBB® Forum Software © phpBB Group http://www.phpbb.com/ |