Official Luthiers Forum!
http://www.luthiersforum.com/forum/

My third build; pics.
http://www.luthiersforum.com/forum/viewtopic.php?f=10101&t=25261
Page 1 of 3

Author:  Phillip Patton [ Fri Jan 01, 2010 8:55 am ]
Post subject:  My third build; pics.

I just started my third guitar project, and thought I'd share some pics. I'm sure most of you have seen this sort of thing before, so if you're tired of looking at pictures of guitars being built, say so and I'll go away. (Just being facetious; if we were tired of guitars, we wouldn't be hanging out on THIS forum, right? :mrgreen: )

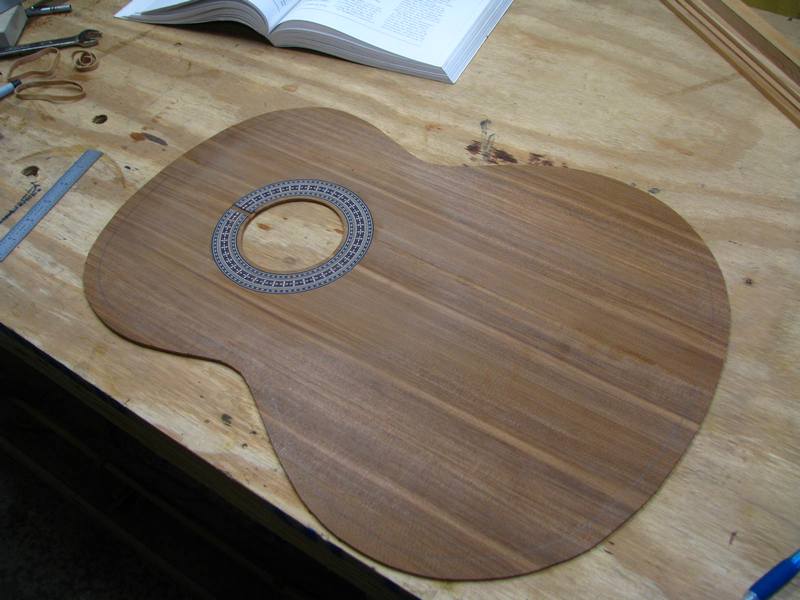
Anyway, I didn't think of taking pictures until I had the rosette finished, so I'll have to start off with the top trimmed to shape (1/2" oversized, of course) and I'll describe the way I made the top, since it was a little unconventional.

BTW, I'm building a classical guitar here, in case that's not obvious...

Since this is a hobby, and not a business (yet) I try to keep costs down by using locally available materials, and preferably stuff that grew on my own property.

For the soundboard, I opted to use western red cedar, which I bought at Menards in the form of 4x4 posts (used for decking and stuff). You might have to dig through the pile, but they do have stuff that's clear, straight, and quartersawn. [:Y:]

So, I cut off a section of 4x4 22 inches long (wasting the end, which can have staples in it [headinwall] ), then run it through the 6" jointer to make sure it is straight, then cut off slices about 3/16" thick.

Then I joint the edges again, and glue the pieces together. I had to use 5 pieces to get the width I needed, so I made 2 sections, one with 3 pieces, one with 2 pieces. Then I run the 2 sections through the planer. My planer is supposed to only go down to 1/8" thick, but it actually went a little thinner. [:Y:]

Once the 2 sections were planed to thickness, I glued them together. So the top has 4 seams, but they're virtually invisible.
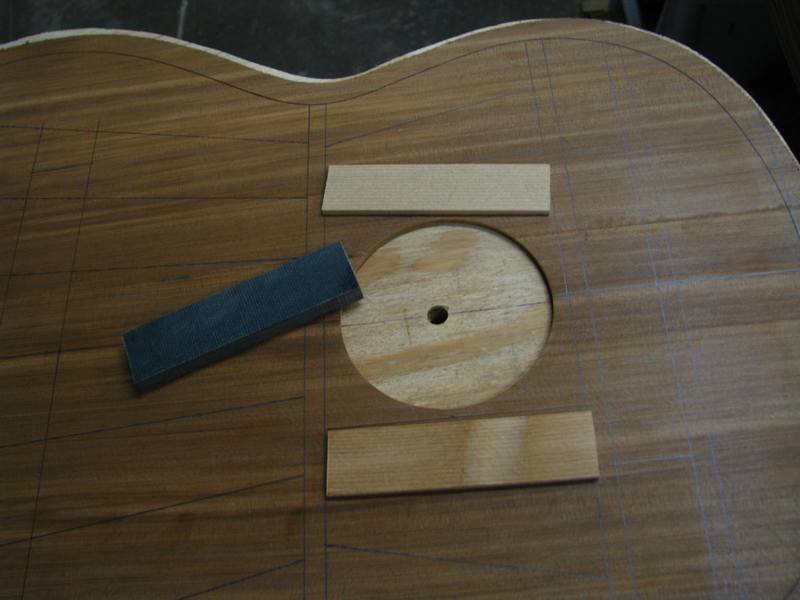
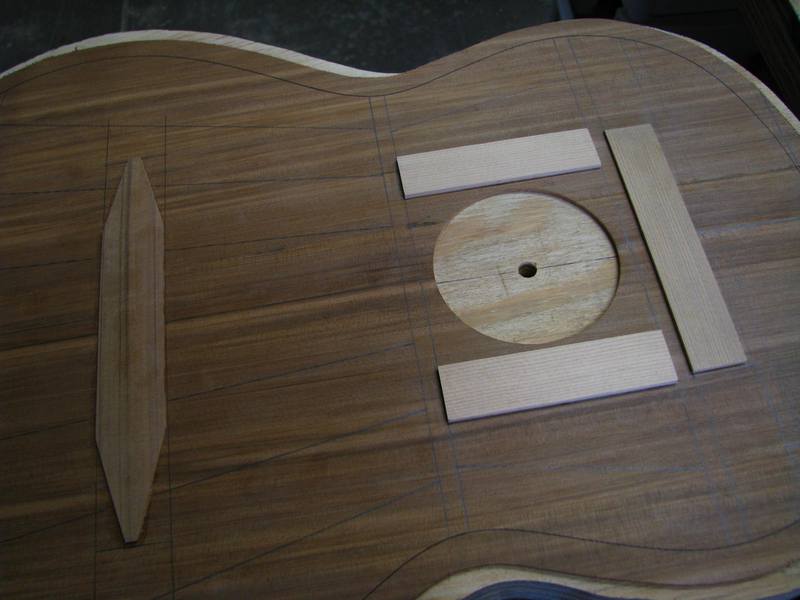
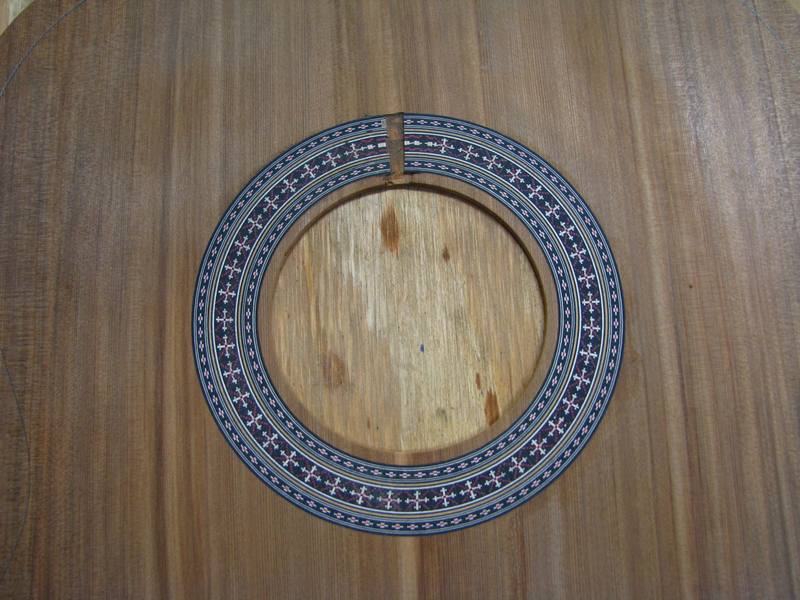

The rosette:

Image

Image


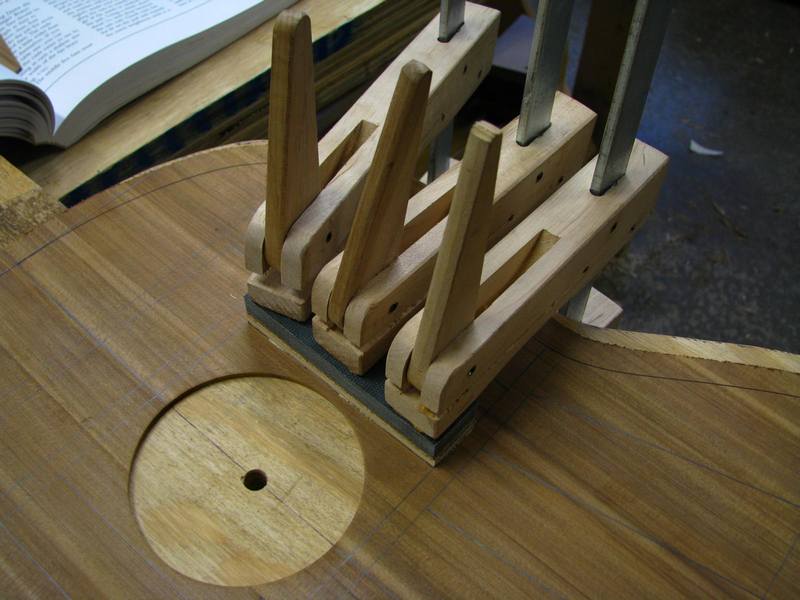
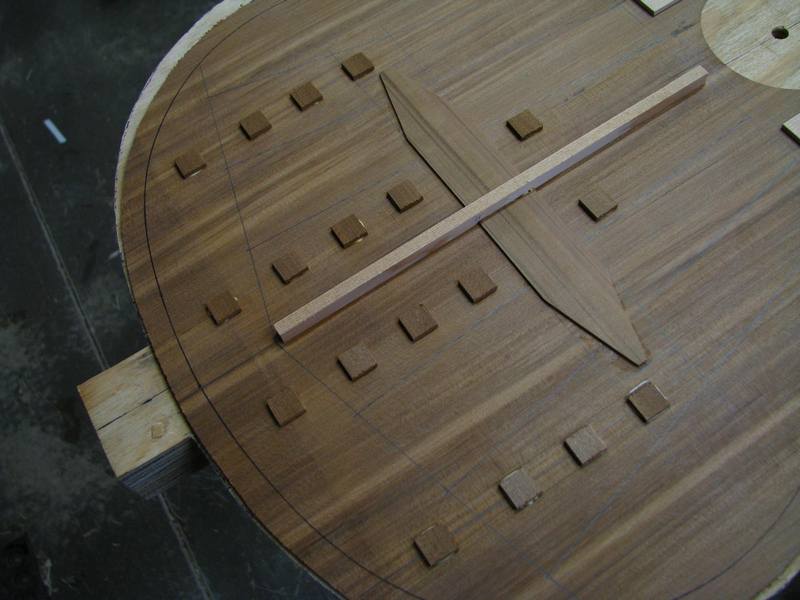
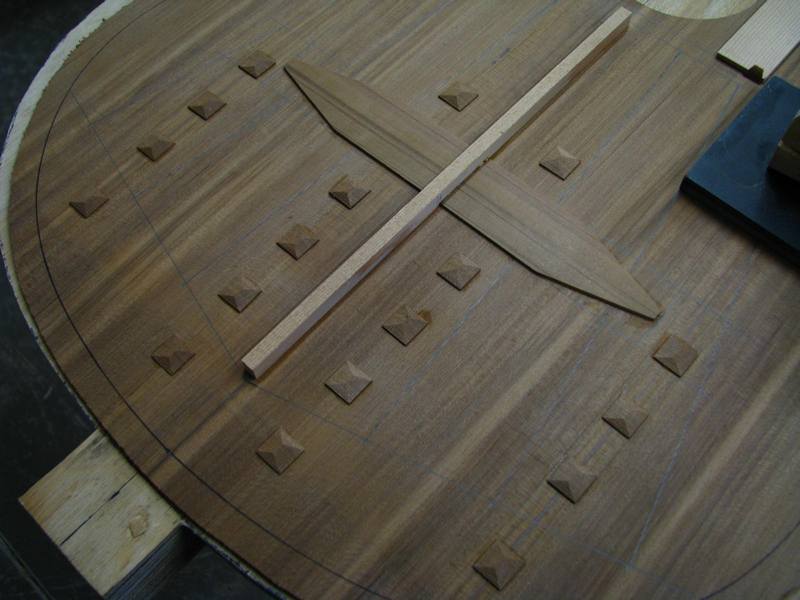
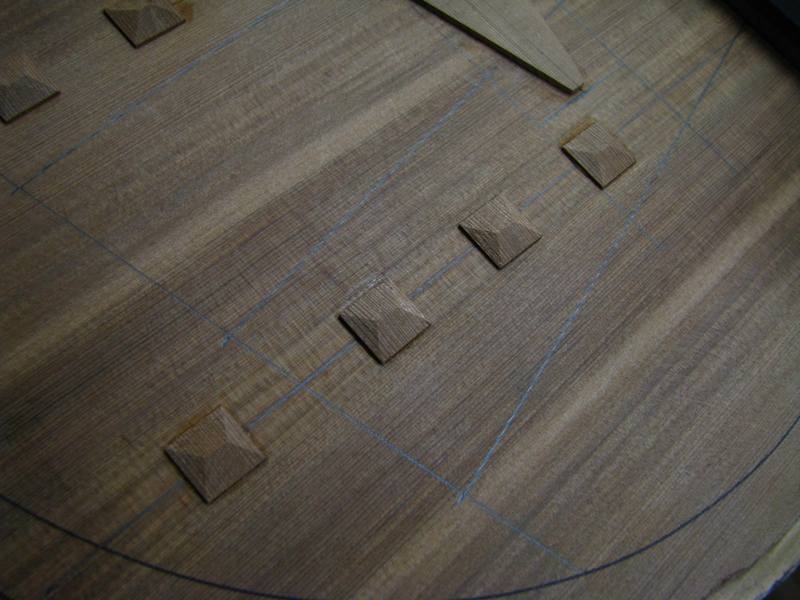
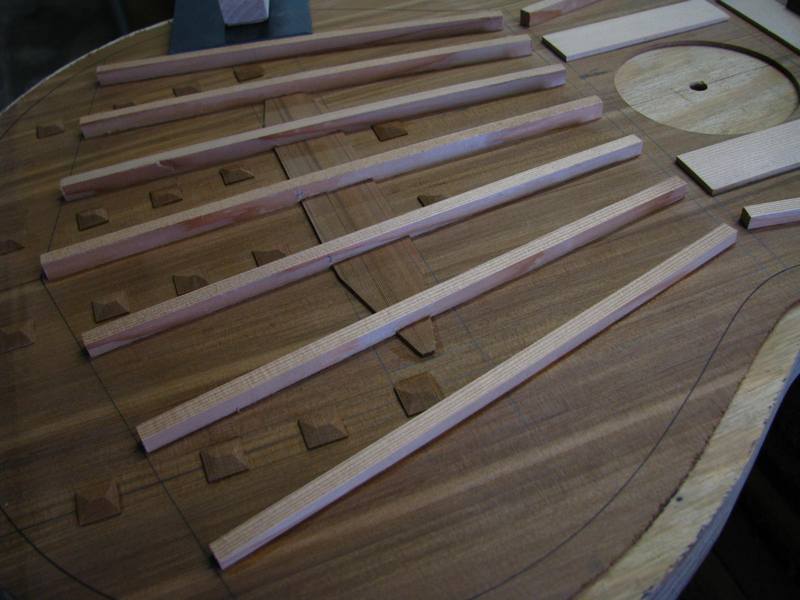
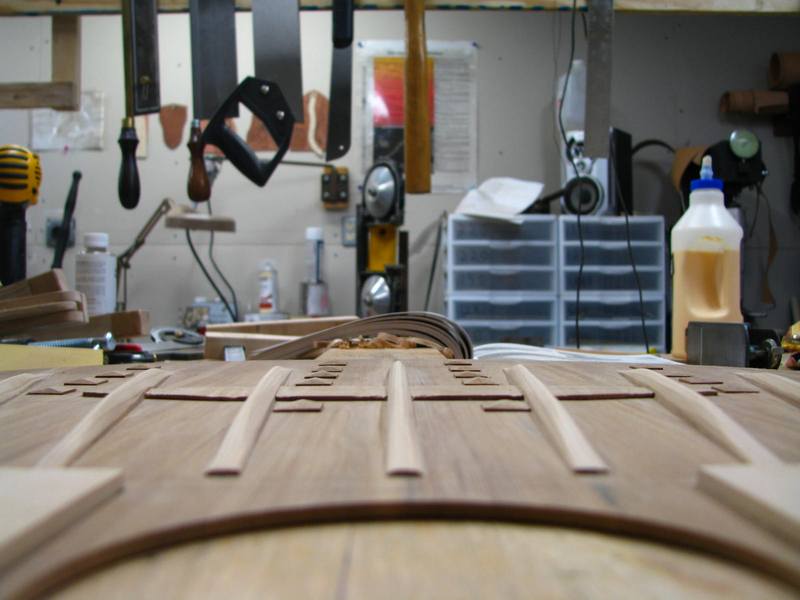
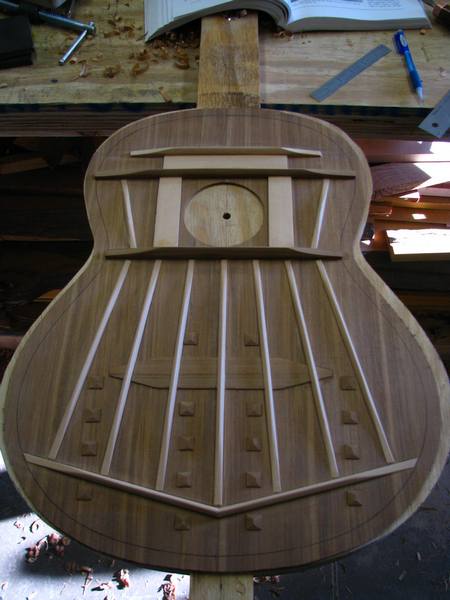
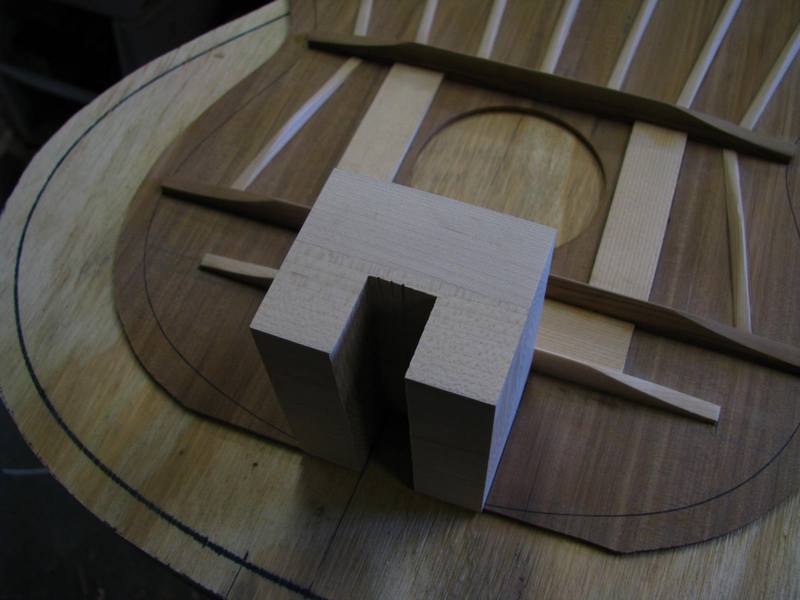
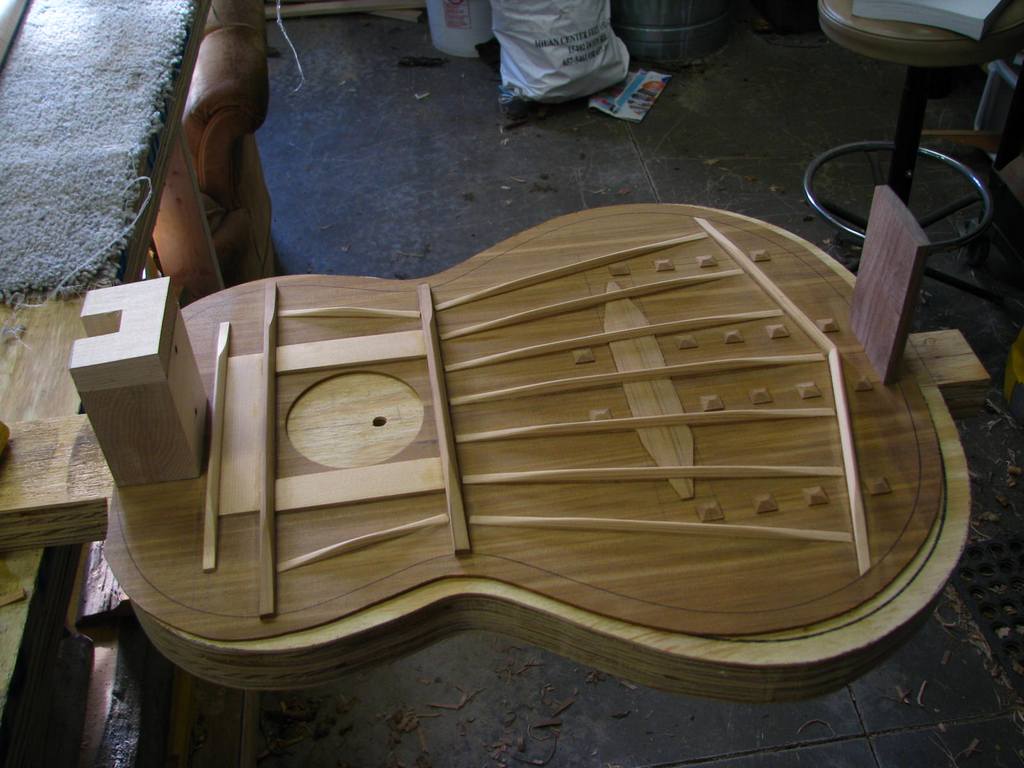
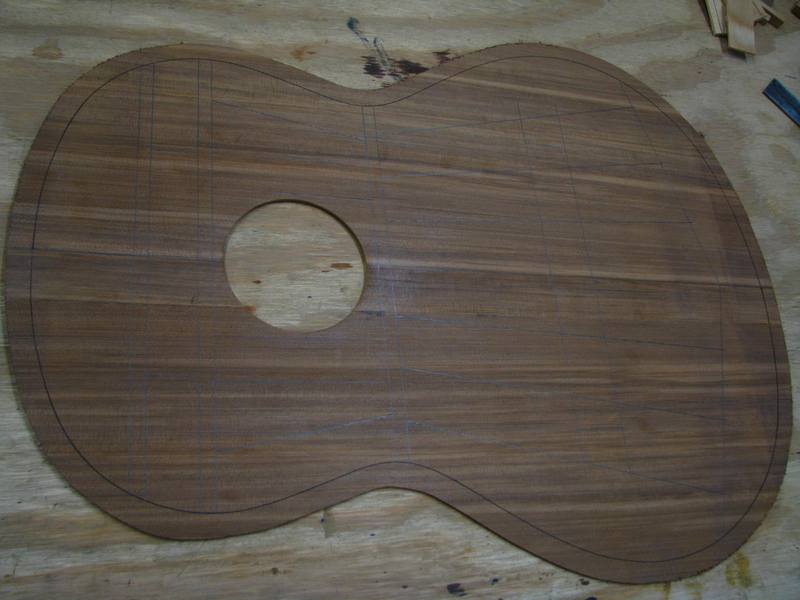
The brace pattern layed out:

Image


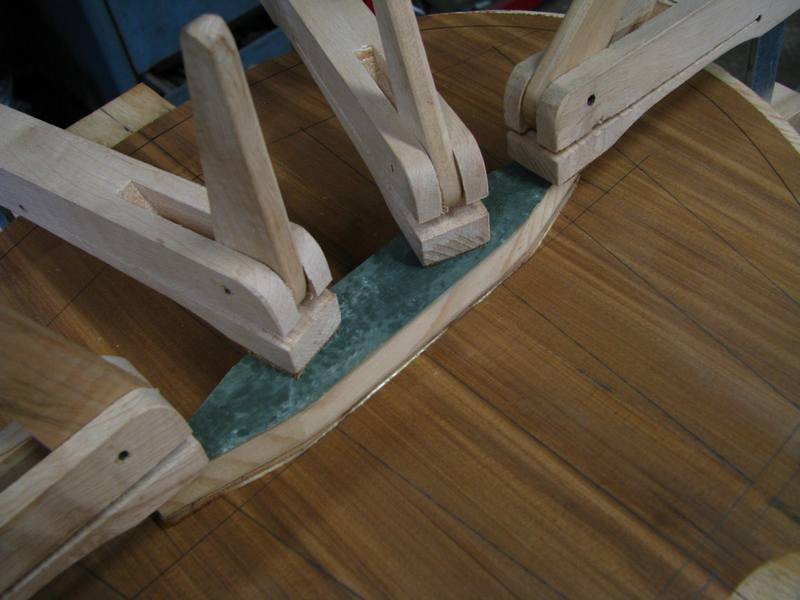
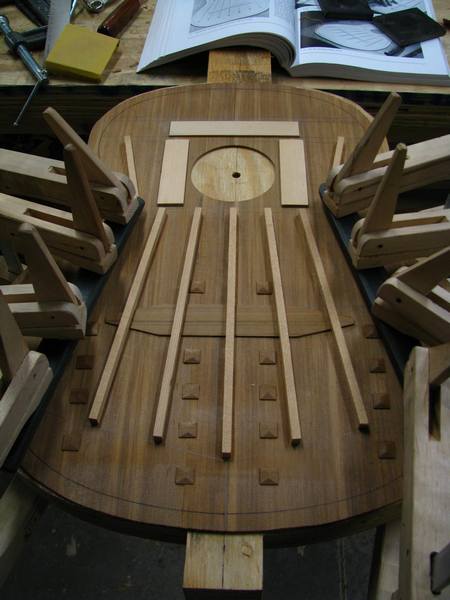
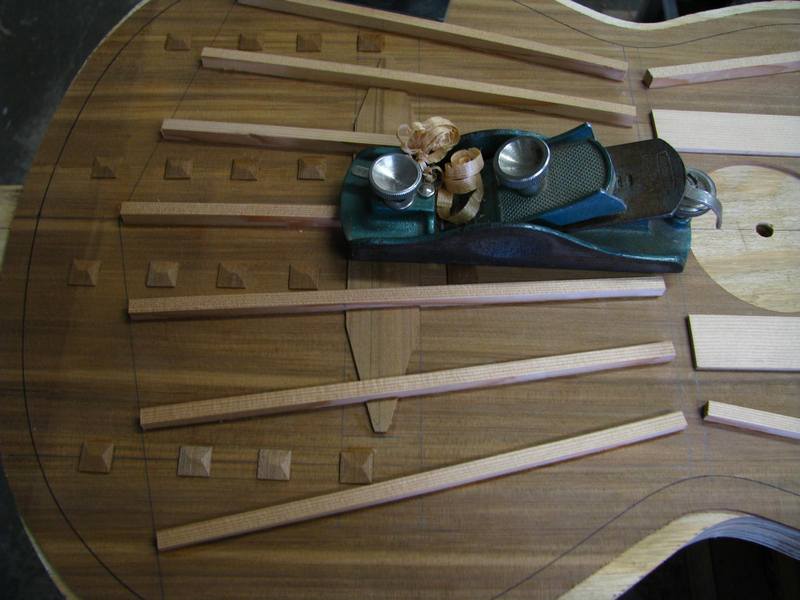
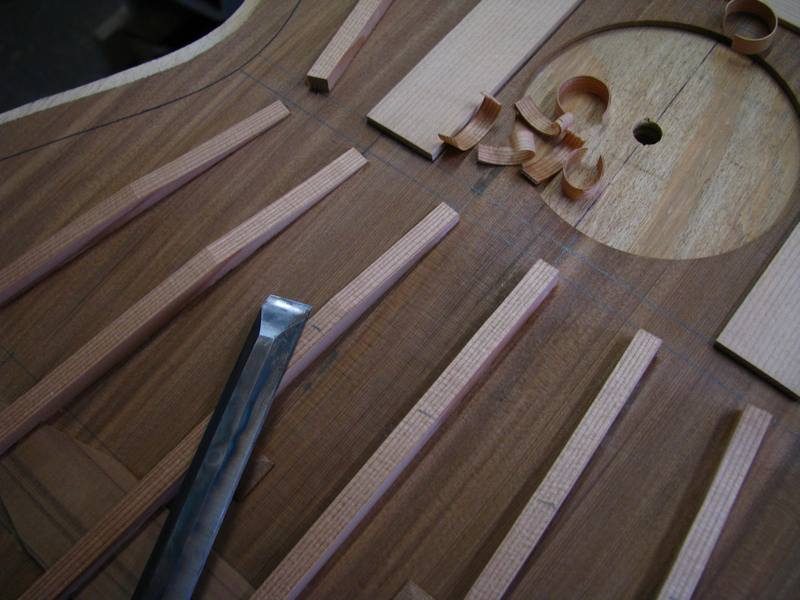
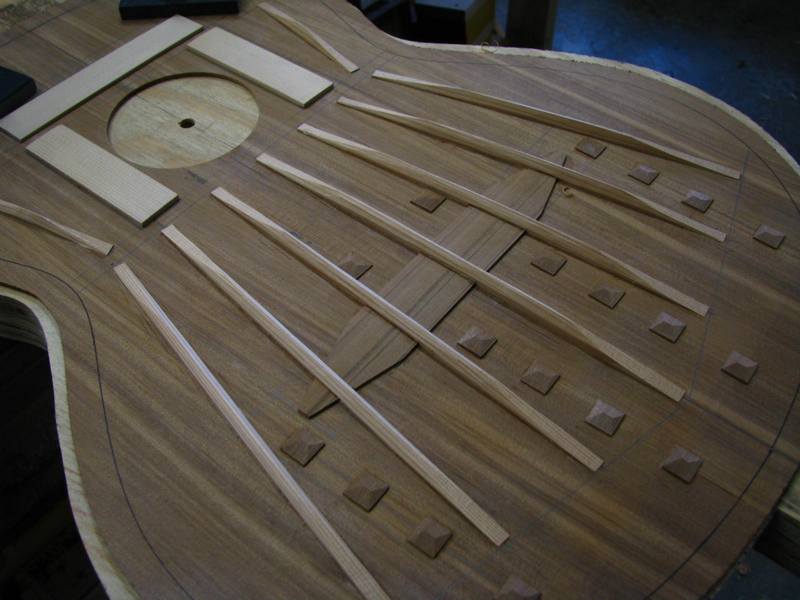
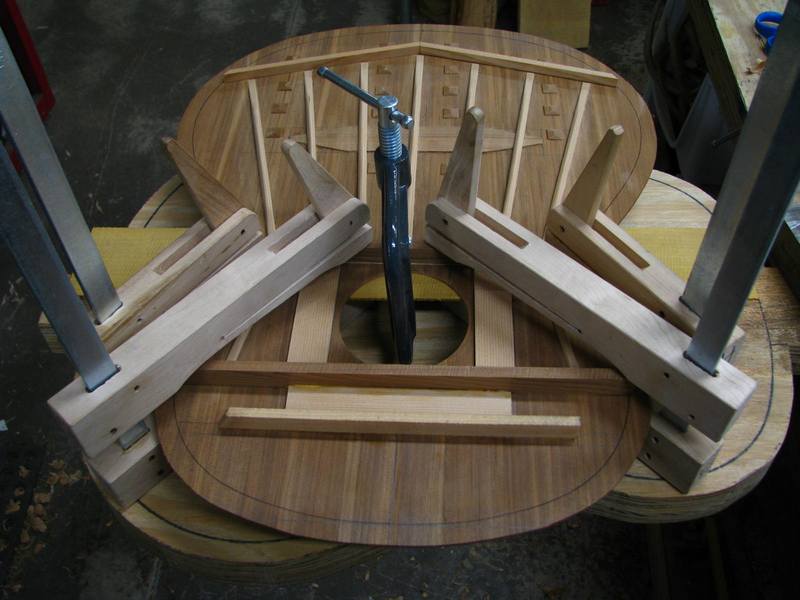
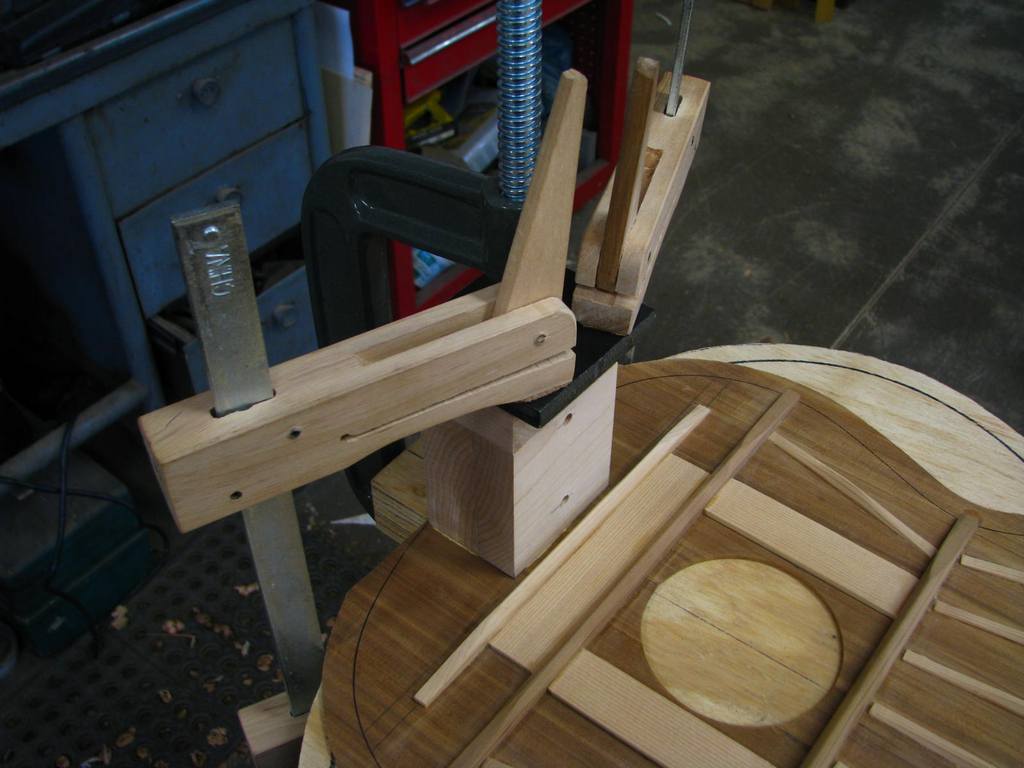
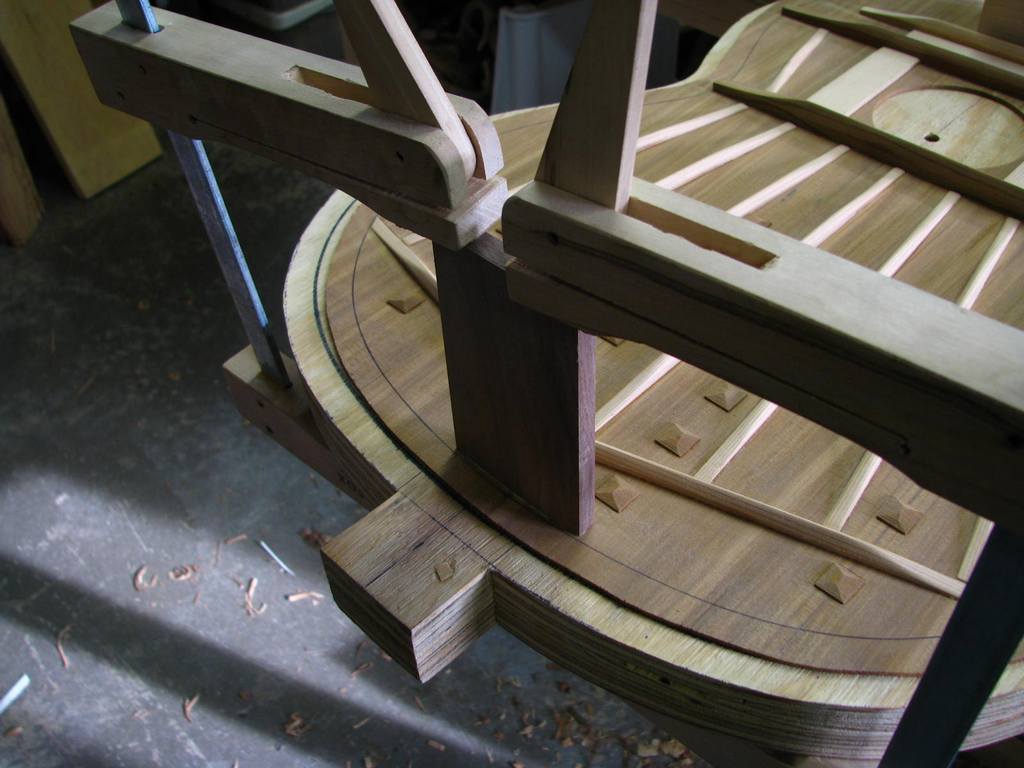
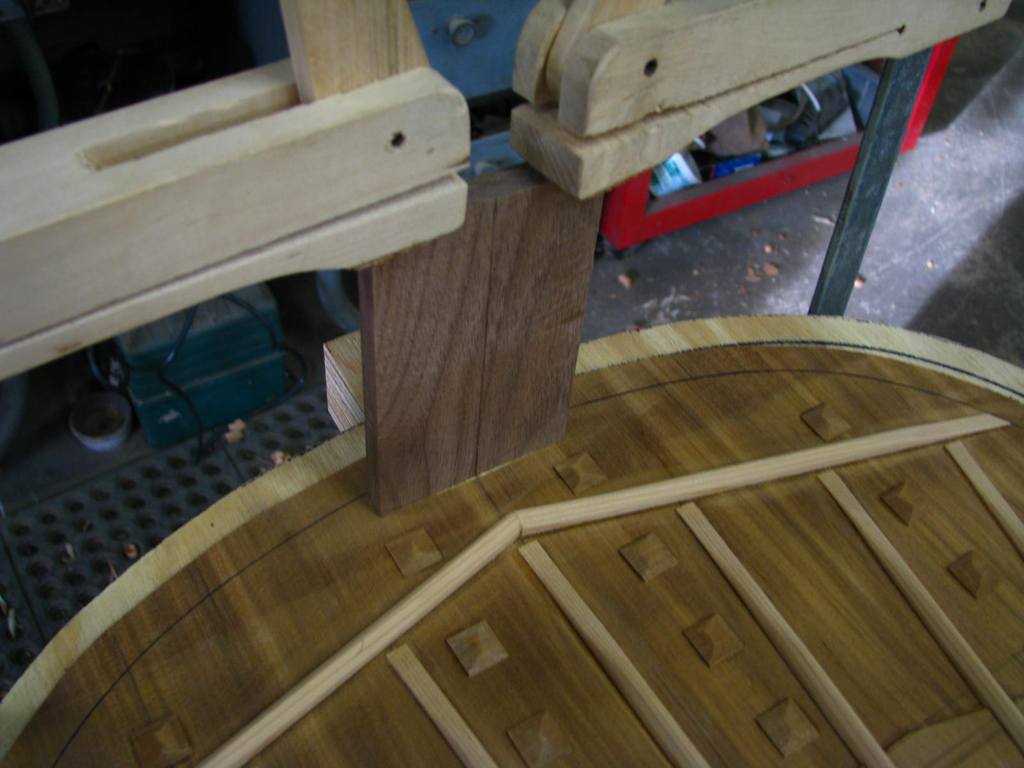
Gluing on the braces:

Image

Image

Image

Image

Author:  Phillip Patton [ Fri Jan 01, 2010 8:58 am ]
Post subject:  Re: My third build; pics.

Usually, with a 2 piece top, the middle fan brace is glued right on top of the centerseam. In this case, that didn't work, so I made little crossgrain squares to strengthen the seams:

Image

I carved them into pyramid shapes:

Image

Image


Then finished gluing on the fan braces:

Image

Author:  Hesh [ Fri Jan 01, 2010 9:31 am ]
Post subject:  Re: My third build; pics.

Looking great Phillip!!

Author:  WudWerkr [ Fri Jan 01, 2010 9:38 am ]
Post subject:  Re: My third build; pics.

I like the cross grain squares on the joints . was that your idea , or has that been done before ? Also great job at using local lumber . Very Impressive so far

Author:  Phillip Patton [ Fri Jan 01, 2010 10:32 am ]
Post subject:  Re: My third build; pics.

WudWerkr wrote:
I like the cross grain squares on the joints . was that your idea , or has that been done before ? Also great job at using local lumber . Very Impressive so far


I got the idea from Cumpiano's book. I think he used them on the centerseam for the steel string soundboard.

Author:  mnemotorsports [ Fri Jan 01, 2010 3:44 pm ]
Post subject:  Re: My third build; pics.

Nice so far. Did you buy the rosette or make your own? I like it alot.

Good luck on the rest.
matt

Author:  Phillip Patton [ Sat Jan 02, 2010 9:57 am ]
Post subject:  Re: My third build; pics.

mnemotorsports wrote:
Nice so far. Did you buy the rosette or make your own? I like it alot.

Good luck on the rest.
matt


Thanks!
I bought the rosette from Stew-Mac. I'm sure I'll try making them myself at some point, but not now.

Author:  SteveCourtright [ Sat Jan 02, 2010 12:10 pm ]
Post subject:  Re: My third build; pics.

Nice work, Phillip. I hope you can bring that to one of our Midwest gatherings so we can hear it!

Author:  Phillip Patton [ Sat Jan 02, 2010 9:03 pm ]
Post subject:  Re: My third build; pics.

More pics of the bracing:

Image

Image

Image

Image

Image

Image

Image

Author:  Phillip Patton [ Sat Jan 02, 2010 9:05 pm ]
Post subject:  Re: My third build; pics.

SteveCourtright wrote:
Nice work, Phillip. I hope you can bring that to one of our Midwest gatherings so we can hear it!


Well, I'll at least post an audio clip when it's done. :)

Author:  Phillip Patton [ Sun Jan 03, 2010 2:09 pm ]
Post subject:  Re: My third build; pics.

Image

Image

Image

Image

Author:  woodsworth [ Sun Jan 03, 2010 2:33 pm ]
Post subject:  Re: My third build; pics.

Sick of builds? Are you insane? I have a great appreciation for what you are doing here and how you are going about it. I will definitely be keeping an eye out as this progresses. I've spent so much time getting set up to do a build and you are building using what you can find. Do you have some pictures of the two previous guitars? I'd love to see them. This build is looking great. The quality of the work looks wonderful.

When i first looked at the top you were using i thought you were using sinker wood. Then i started reading your post. They should call you the frugal luthier. Keep up the good work. You've inspired me to look a little closer to what i can use instead of what i can sacrifice to get going.

Author:  Phillip Patton [ Mon Jan 04, 2010 11:51 am ]
Post subject:  Re: My third build; pics.

woodsworth wrote:
Sick of builds? Are you insane? I have a great appreciation for what you are doing here and how you are going about it. I will definitely be keeping an eye out as this progresses. I've spent so much time getting set up to do a build and you are building using what you can find. Do you have some pictures of the two previous guitars? I'd love to see them. This build is looking great. The quality of the work looks wonderful.

When i first looked at the top you were using i thought you were using sinker wood. Then i started reading your post. They should call you the frugal luthier. Keep up the good work. You've inspired me to look a little closer to what i can use instead of what i can sacrifice to get going.


Frugal Luthier! I love it. :mrgreen: Maybe I should change my screen name to that. LOL

You can find some pics of my first finished guitar here:

viewtopic.php?f=10101&t=25199

And here you can follow along with the other one I'm building, which will probably get finished this week.
You may have to register to see the thread, but I don't think so.

http://www.bladeforums.com/forums/showt ... p?t=666029

Thanks for your interest, and I'm looking forward to your first build. :)

Author:  Phillip Patton [ Mon Jan 04, 2010 11:53 am ]
Post subject:  Re: My third build; pics.

Image

Image

Image

Image

Image

With the head block and tail block glued on, the top is now ready for the sides, which I haven't started yet.

Does anyone have any suggestions as to what I should use for the back and sides? I was planning on using some curly hard maple that grew around here, but it seems like I should use something darker to go with the soundboard. Is staining the maple a viable option? I like stained maple, but in the past I've had issues with stain running when lacquered, and that's a pain... There's some other local woods I could use, like walnut, and oak.

Author:  woodsworth [ Mon Jan 04, 2010 12:05 pm ]
Post subject:  Re: My third build; pics.

Quote:
Thanks for your interest, and I'm looking forward to your first build.


Me too! Right now we are in a bit of freeze, the worst weather the uk has seen in a hundred years apparently. I went into the shop today but it is 0 degrees and my little heater wouldn't even get it to 1 degree after an hour of trying so i've retreated indoors and battened down the hatches.

So i've been internet bound...

You should change your name it is very fitting and you should have it before someone else steals it now it's out there. Seems to be the story of my life i'll think of something and then soon after someone else does it!!! arg.

So thanks for the builds they are helping me get through the cold weather.

Author:  Phillip Patton [ Mon Jan 04, 2010 1:34 pm ]
Post subject:  Re: My third build; pics.

woodsworth wrote:
Quote:
Thanks for your interest, and I'm looking forward to your first build.


Me too! Right now we are in a bit of freeze, the worst weather the uk has seen in a hundred years apparently. I went into the shop today but it is 0 degrees and my little heater wouldn't even get it to 1 degree after an hour of trying so i've retreated indoors and battened down the hatches.

So i've been internet bound...

You should change your name it is very fitting and you should have it before someone else steals it now it's out there. Seems to be the story of my life i'll think of something and then soon after someone else does it!!! arg.

So thanks for the builds they are helping me get through the cold weather.


Gee, this global warming is really getting old, isn't it? duh

I'm ready for spring, myself. :mrgreen:

Author:  Phillip Patton [ Thu Feb 04, 2010 4:23 pm ]
Post subject:  Re: My third build; pics.

I haven't been working on this lately, having been distracted by stupid stuff, like making money so I can keep the electricity from being turned off. ;)

But, I just had some of my locally grown curly hard maple resawn and thickness sanded, so I'm going to get working on it again.

I picked one of the lesser quality sides to practice bending. If it goes well, I'll do the real thing tomorrow.

Image

Image

Author:  James A. [ Thu Feb 04, 2010 10:36 pm ]
Post subject:  Re: My third build; pics.

Very good looking guitar. At least from that far away, it looks like you have paid attention to the small stuff. Nice work.

Author:  Alexandru Marian [ Fri Feb 05, 2010 4:50 am ]
Post subject:  Re: My third build; pics.

Why no tapering at the intersection of the cutoff braces?

Author:  WaddyThomson [ Fri Feb 05, 2010 10:59 am ]
Post subject:  Re: My third build; pics.

I was wondering that too! Also, I'd love to know the thickness of the top and the height of the braces. They look pretty sturdy, but I could be way wrong, as I'm used to narrower, taller, braces on my builds, using Spruce.

Author:  Phillip Patton [ Fri Feb 05, 2010 11:19 am ]
Post subject:  Re: My third build; pics.

Alexandru Marian wrote:
Why no tapering at the intersection of the cutoff braces?


Are you referring to the two braces that form a "v" at the ends of the fan braces? If so, I'm not sure. Since I don't have much experience of my own yet, I'm following the instructions in Cumpiano's book. He says to use a butt joint between the braces there.


WaddyThomson wrote:
I was wondering that too! Also, I'd love to know the thickness of the top and the height of the braces. They look pretty sturdy, but I could be way wrong, as I'm used to narrower, taller, braces on my builds, using Spruce.


I'm not sure what the thickness of the top is. I'll measure it next time I'm in the shop.

It is thinner than the spruce tops on my first two guitars, which is why I'm leaving the braces a little heftier. So far, tap tone sounds good, but then I'm not sure what it's supposed to sound like. :? :)

My purpose in posting my progress (besides having fun) is so you all can tell me what I'm doing wrong, so any input is appreciated.

Author:  Alexandru Marian [ Fri Feb 05, 2010 12:21 pm ]
Post subject:  Re: My third build; pics.

Yes, that's it. I don't have Cumpiano, but on all "famous plans" they are tapered exactly the same as they are tapered at their other end, down to nothing or app. 1mm. Best is no to butt then right on the joint (not your case here, but when doing a regular 2 piece) but to cross one of them over it.

Author:  Phillip Patton [ Fri Feb 05, 2010 1:51 pm ]
Post subject:  Re: My third build; pics.

Alexandru Marian wrote:
Yes, that's it. I don't have Cumpiano, but on all "famous plans" they are tapered exactly the same as they are tapered at their other end, down to nothing or app. 1mm. Best is no to butt then right on the joint (not your case here, but when doing a regular 2 piece) but to cross one of them over it.


Well, if it's important, it's not too late to feather them. What's difference would it make? I suppose the top would be a little "looser" without the butt joint?

Author:  Alexandru Marian [ Fri Feb 05, 2010 3:34 pm ]
Post subject:  Re: My third build; pics.

Yes, it would become a wee little looser. I would imagine the change would be small and would not alter the character of the guitar, but it would at least "look right". Now, if your top+bracing are already loose to the lowest acceptable level, then further work on those brace can affect the sound in a negative way. You should be the judge of that. I am definitely not going to consider myself responsible if the guitar turn out a dud oops_sign
Or maybe if you leave it as is and it sounds fantastic, you can call it the Patton bracing :D

The fan braces look plenty stiff to me (mine are just half in volume for example with a spruce top) but you said the cedar plate is thin....

Author:  WaddyThomson [ Fri Feb 05, 2010 7:06 pm ]
Post subject:  Re: My third build; pics.

I, like Alex, don't want to talk you into making a dud, but just for comparison purposes, here is the top that I just took out of the solera. Remember, it is Spruce, and pretty stiff, but it is 2.4 mm in the area around the bridge and into the upper bout, but tapers to 1.7 - 1.8 at the perimeter of the lower bout starting just above the waist. The fan braces are 3 mm wide, and vary from about 6.5 mm in the center to 4 mm on the outside. The closing braces, such as they are, are about 3.5 x 3.5 or so. Not saying this is right, but this top will be plenty stiff for a classical top, and is probably a little stiffer than my last one. I would assume that your top should be at least 10 to 20% thicker, depending on the stiffness of the Cedar. My body may also be a little smaller than yours. I'm only about 14" wide at the wide spot of the lower bout. I would think tapering those closing braces might open up the bass a little on your guitar. Much of the bass response comes from that area between the bridge and the tail-block. However, if you are building to a plan, you should probably stick to the plan. This is just food for thought!
Attachment:
P1030037 (Large).JPG
Attachment:
P1030039 (Large).JPG

Page 1 of 3 All times are UTC - 5 hours
Powered by phpBB® Forum Software © phpBB Group
http://www.phpbb.com/