Official Luthiers Forum!
http://www.luthiersforum.com/forum/

My Binding Machine
http://www.luthiersforum.com/forum/viewtopic.php?f=10101&t=19236
Page 1 of 1

Author:  Pat Hawley [ Sat Oct 18, 2008 1:20 pm ]
Post subject:  My Binding Machine

I just finished making a binding machine so I thought I'd post a few photos in case I had any ideas that might be useful to others.

First off, it's a machine that I think was originated by Dan Fobert. I learned about it right here when Wes McMillian posted photos of his machine in this thread: viewtopic.php?f=10101&t=18515&hilit=+binding+machine+

Wes was kind enough to answer a few questions I had along the way building this thing. Thanks Wes!

OK, here is the first photo just to remind you of what it looks like:

Image

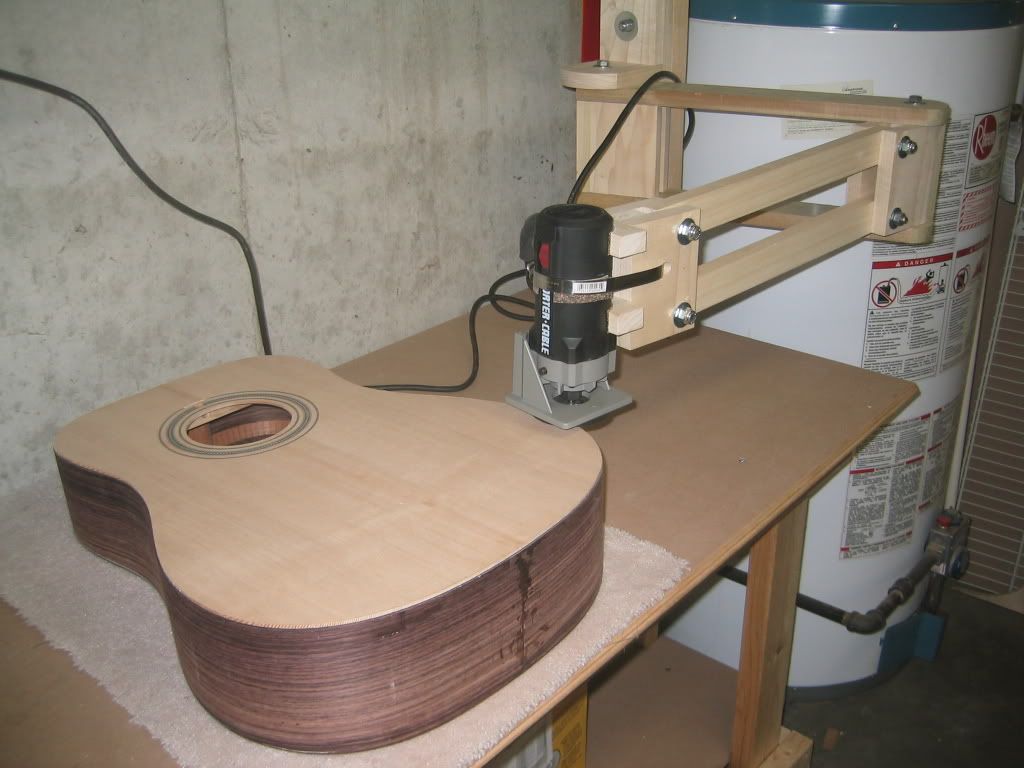
Where the original plans called for 3/8" rod thread at each end, I just used a 3/8" wood screw into wood. Seems to work OK.

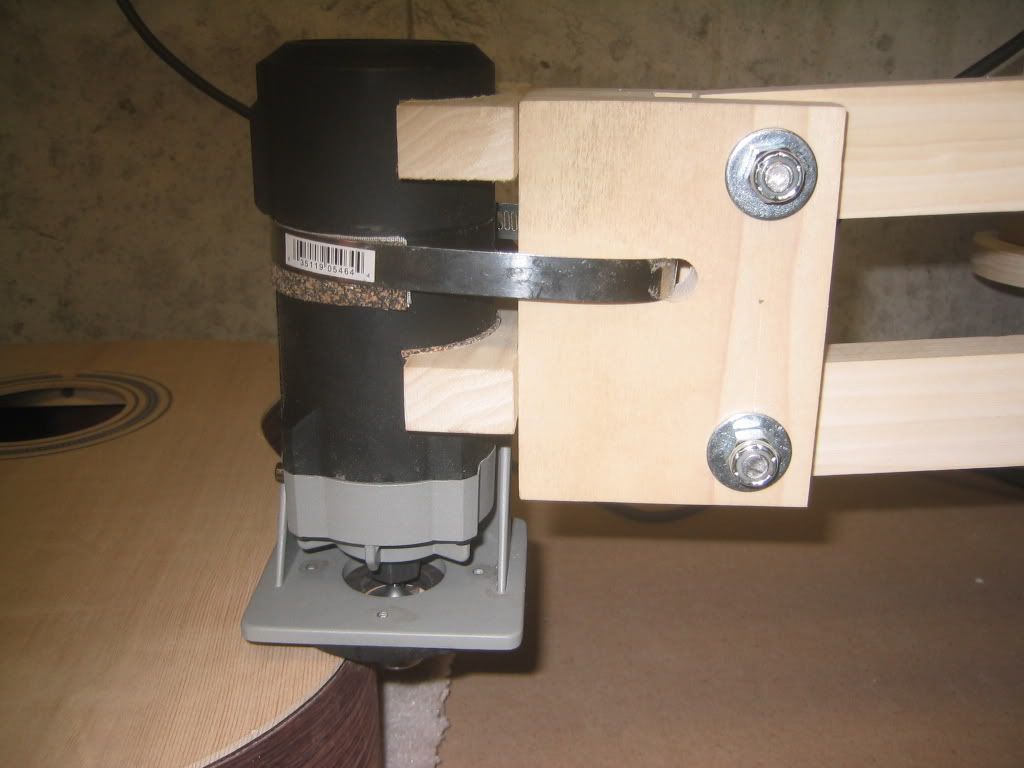
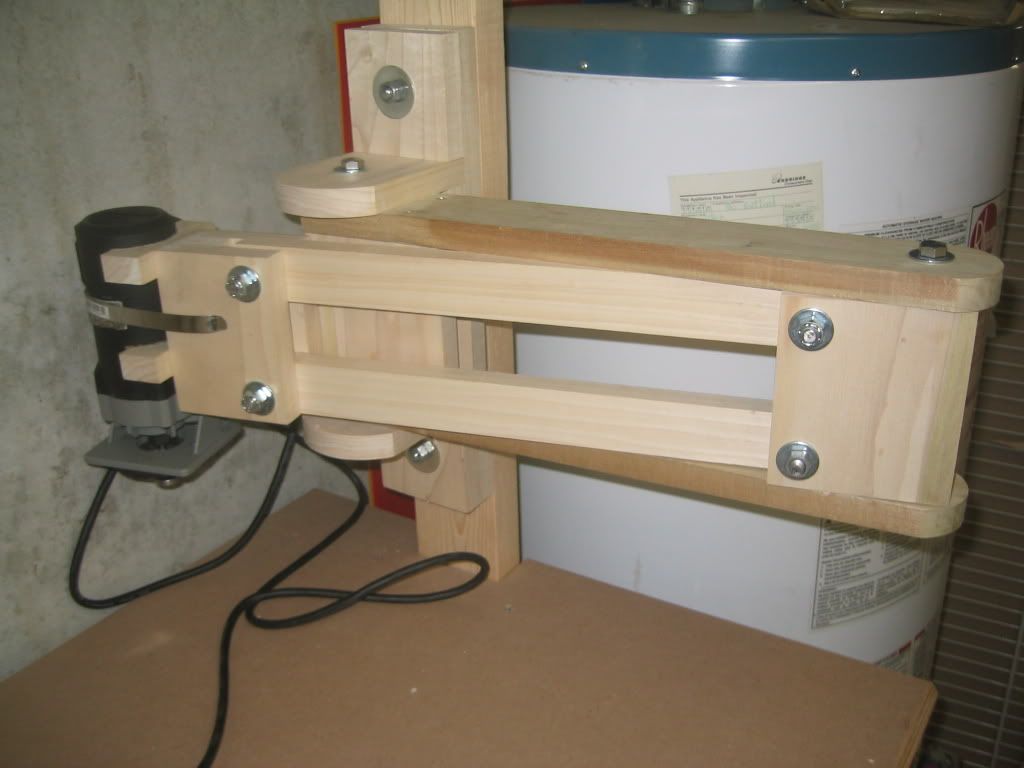
This second photo is primarily to show you how I attached the router to the arm. I made a couple of cradles from poplar, lined them with cork and clamped the router in place with a hose clamp. There are a couple of reasons I chose this method: I wanted to be able to get the router on and off easily (I'm not sure why) and secondly, I liked the idea of having the router drop lower than the arms to provide more clearance.

Image

The third photo shows the business end of things while on the guitar. I have the router bit and bearing set from LMI.

Image

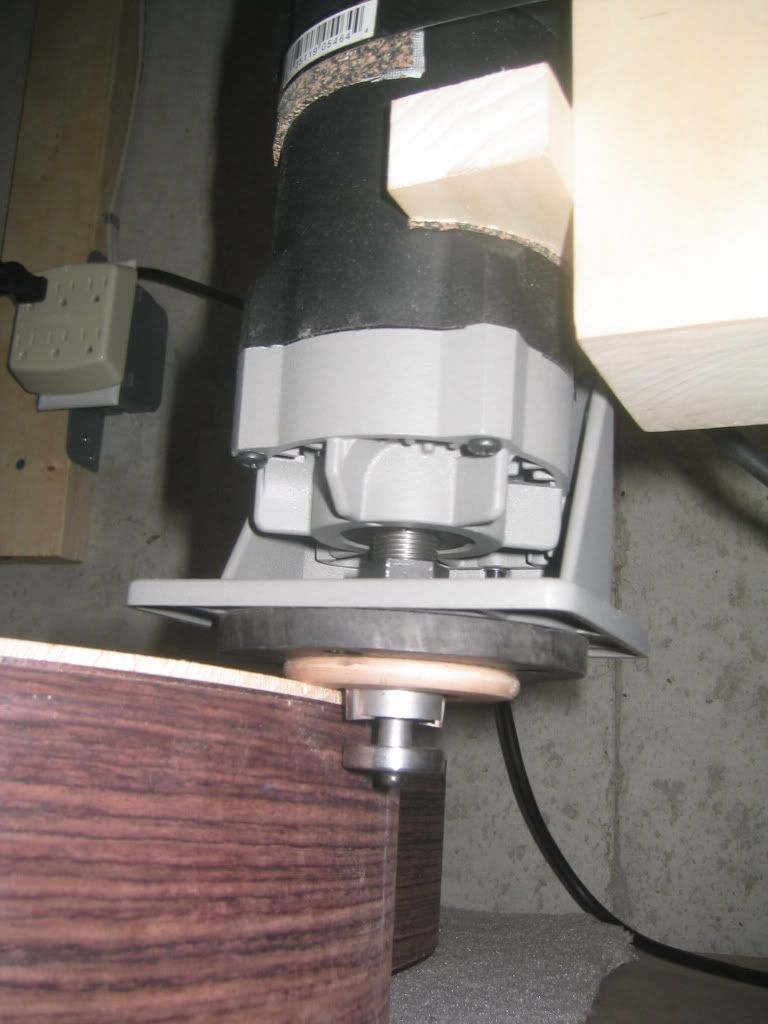
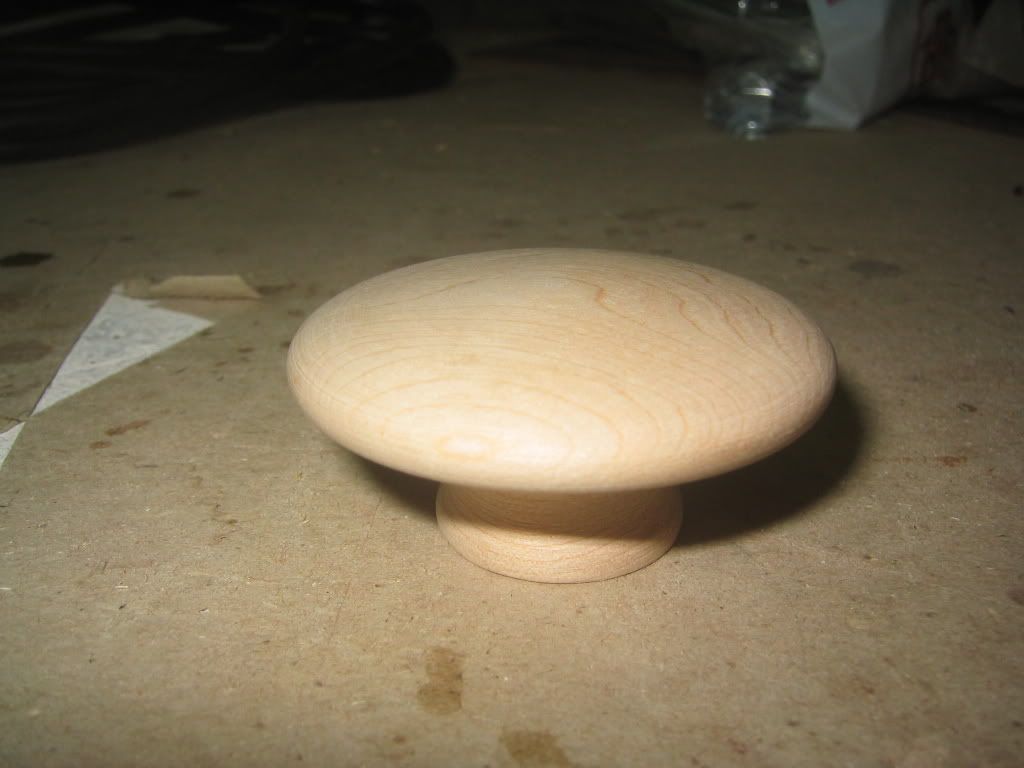
The fourth photo is again about the business end. The home made black router plate is a piece of ebony left over from a fret board. The doughnut is a hardwood that has about a quarter inch of flat before curving up.

Image

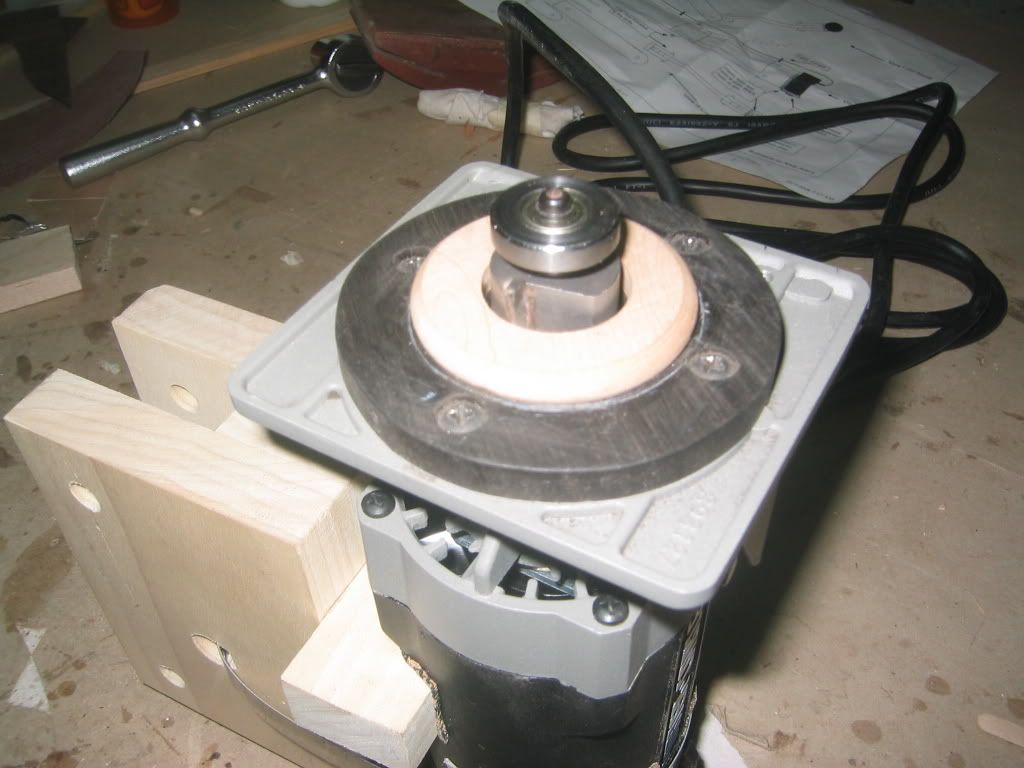
Fifth photo shows that the doughnut started life as a 2" diameter cupboard knob that I got from Home Depot. I put a flat on the top and trimmed off the bottom to save what I wanted for the doughnut. I glued it to the ebony then drilled a one inch hole through them both.

Image

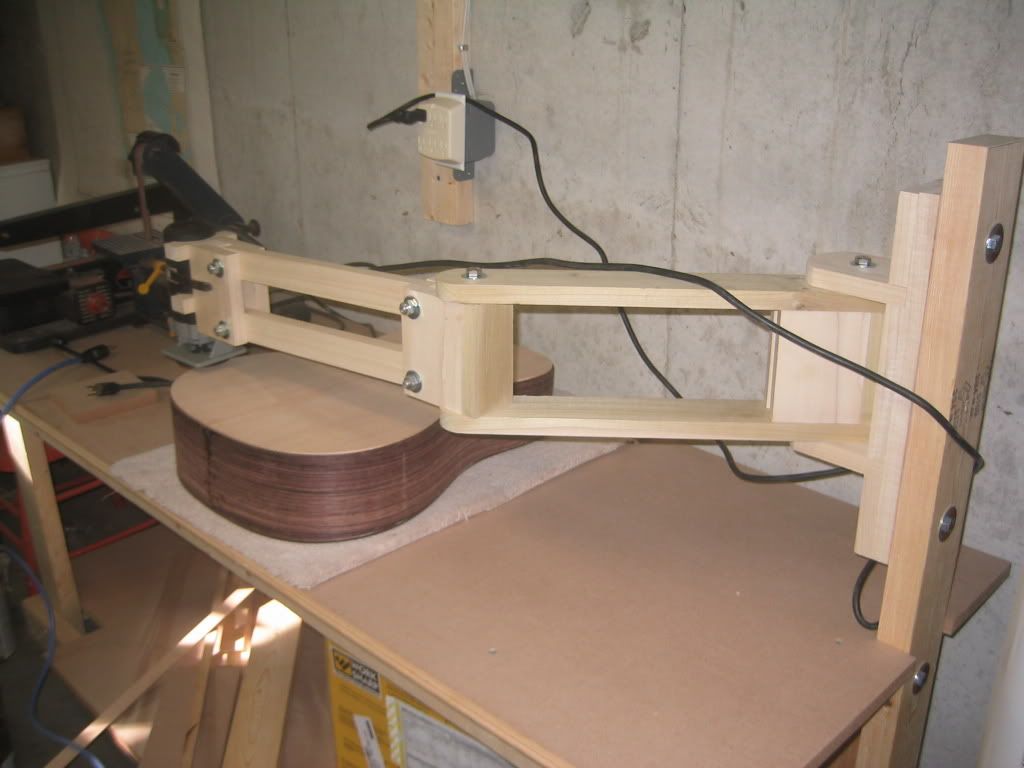
The sixth picture is to show the arm stretch out to reach the far side of the guitar. For reference, the boards for the arm above its elbow are 18" long and the boards for the arm below the elbow are 16" long. You need about 40" worth of table for the set up.

Image

The seventh and last photo shows one of the features I really like about this machine is the way it folds up and kind of tucks away when not in use.

Image

Total cost for the machine was around $60.00. It's amazing the way all the little bits and pieces add up. I haven't used it in earnest yet, I've just been doing non-power runs around the guitar to see how it feels. I see no reason why it shouldn't work fine. I don't intend to build a cradle - my plans are to remount the guitar in my external form to get it all square and clamp that to the table.

Hope this was of use to some people who might be thinking about building a binding machine.

Pat

Author:  DYeager [ Sat Oct 18, 2008 1:52 pm ]
Post subject:  Re: My Binding Machine

Pat, very nice - the cupboard-knob-into-a-clearance-donut ALONE was worth the price of admission. I expect to incorporate that into my (other kinda) binding machine before the next job.

Many thanks!

Author:  Ricardo [ Sat Oct 18, 2008 2:01 pm ]
Post subject:  Re: My Binding Machine

Pat, a very elegant improvement over the standard version! I wished I had seen yours before building mine. [clap]

Author:  Chris Paulick [ Sat Oct 18, 2008 2:06 pm ]
Post subject:  Re: My Binding Machine

Thanks Pat, I'm still deciding on the way to go for my binding machine. I think I am very interested in this design for the same reasons you were since I saw that post. I like your idea of using the building mold in stead of a cradle. One less thing to make. Does this seem smooth in it's movement and is there any issues with the router being out of plumb when the arms are extended? That's one reason I might be leaning towards the LMI design. I see it as not having that issue and it would take up even less space and I could just mount it to the wall above my router table. Plus I think I could link an arm to it an use it as a small duplicator of sorts but I'm getting off subject.:)

Author:  Dan Roach [ Sat Oct 18, 2008 9:21 pm ]
Post subject:  Re: My Binding Machine

Pat,

Many thanks for posting this [:Y:] [:Y:] . I just built this jig as well, and you just helped me answer my last three questions....what to use for the donut, how to mount it to my workbench, and what to use for a cradle. Now I am back on track :D .

Thanks again,
Dan

Author:  Wes McMillian [ Sat Oct 18, 2008 9:44 pm ]
Post subject:  Re: My Binding Machine

Great job, Pat! [:Y:] Looks awesome!

I, too, used my mold for the first guitar after I built the router arm and it worked fine. You do need a way to level and stabilize the mold, though. My dread mold was made in a such a way that I could just thread some levelling feet through it. Since then, though, I have made the cradle, which was a worthwhile project IMO.

Chris, as long as the upright is stable (mine is attached firmly to the wall, and levelled in both directions) and the arms are EXACTLY the same length, you will find no sag in the router - it will always remain referenced to the upright. Again, it has to be levelled in both directions and assured that the main upright does not move.

Author:  Don Williams [ Sat Oct 18, 2008 10:52 pm ]
Post subject:  Re: My Binding Machine

Very nice looking jig!

One question..... Did you make the spacer between the cutter and the bearing, or did that come with the LMI set? My big complaint with all these bit sets is that there isn't enough space there for being able to route the binding first and then the top/back purfling without dropping into the binding slot. This looks like it solves the problem.

Author:  Hesh [ Sun Oct 19, 2008 6:38 am ]
Post subject:  Re: My Binding Machine

Very nice jig Pat even if it does remind me of my dentist's office...... :D

Author:  Brock Poling [ Sun Oct 19, 2008 7:16 am ]
Post subject:  Re: My Binding Machine

Don Williams wrote:
Very nice looking jig!

One question..... Did you make the spacer between the cutter and the bearing, or did that come with the LMI set? My big complaint with all these bit sets is that there isn't enough space there for being able to route the binding first and then the top/back purfling without dropping into the binding slot. This looks like it solves the problem.


With the LMI set you can route bindings first then purflings. I do it all the time.

Author:  Don Williams [ Sun Oct 19, 2008 8:39 am ]
Post subject:  Re: My Binding Machine

I also have an LMI set, but the space between the cutter and the bearing is much less than what the picture above shows. If I try to cut a shallow purfling ledge in the top, it is very easy to slip accidentally into the binding channel. I had to add a couple of extra small washers to keep that from happening.

Author:  Terence Kennedy [ Sun Oct 19, 2008 9:42 am ]
Post subject:  Re: My Binding Machine

Nice looking machine. I do note that the flat area on your doughnut that rides on the guitar looks a little wide. It'll be fine on the top but might ride up a little on the back as you transition into the upper bout giving a shallower channel or if you set your depth at the upper bout the channel might deepen as you go south. By trial and error I eventually wound up with about a 1/8" flat area with a rounded transition to the rest of the doughnut.
Terry

Author:  Pat Hawley [ Sun Oct 19, 2008 9:52 am ]
Post subject:  Re: My Binding Machine

I'm glad that some have found the photos useful. I wasn't sure if I should post or not seeing as the topic had already been covered. However, I'm impressed with this jig. It's not often that one of the best solutions to a problem is also one of the least expensive.

Chris, as Wes said, there are no issues with the router being out of plumb when the arm is stretched out as long as it is mounted square and arm components are built accurately. When making the arm component pairs, I started by sticking matching boards together with double sided tape prior to drilling holes - so I know distances are equal.

Don, the router bit and bearing set shown in the pictures is the way it came from LMI and I have no problems if I want to do the binding channels first. I got the set around a year ago. Is yours older? I wonder if they've made a change. At any rate, I wanted the option of doing things in either order - which is why I made a doughnut with a wider flat area than some that I've seen commercially available. However, I still have no idea if there is a best order - binding channel first? Why?

Pat

Author:  John Hale [ Sat Dec 27, 2008 6:53 pm ]
Post subject:  Re: My Binding Machine

well done innovative thinking I wish I had it!

Page 1 of 1 All times are UTC - 5 hours
Powered by phpBB® Forum Software © phpBB Group
http://www.phpbb.com/